-
Notifications
You must be signed in to change notification settings - Fork 0
Setup IAM permissions for users installing Snowplow
Setting up permissions in IAM for the user(s) installing Snowplow is an 3 step process:
- [Create an IAM group (incl. creating a user and setting permissions)] (#create-group)
- [Enable users to log into AWS] (#enable-login)
Disclaimer: Snowplow Analytics Ltd will not be liable for any problems caused by the full or partial implementation of these instructions on your Amazon Web Services account. If in doubt, please consult an independent AWS security expert.
Warning: these permissions are still more permissive than they need to be. We will be putting in time to narrow them down further over the coming weeks.
## 1. Setup the IAM groupFirst click on the IAM icon on the AWS dashboard:

Now click on the Create a New Group of Users button:

Enter a Group Name of snowplow-setup:
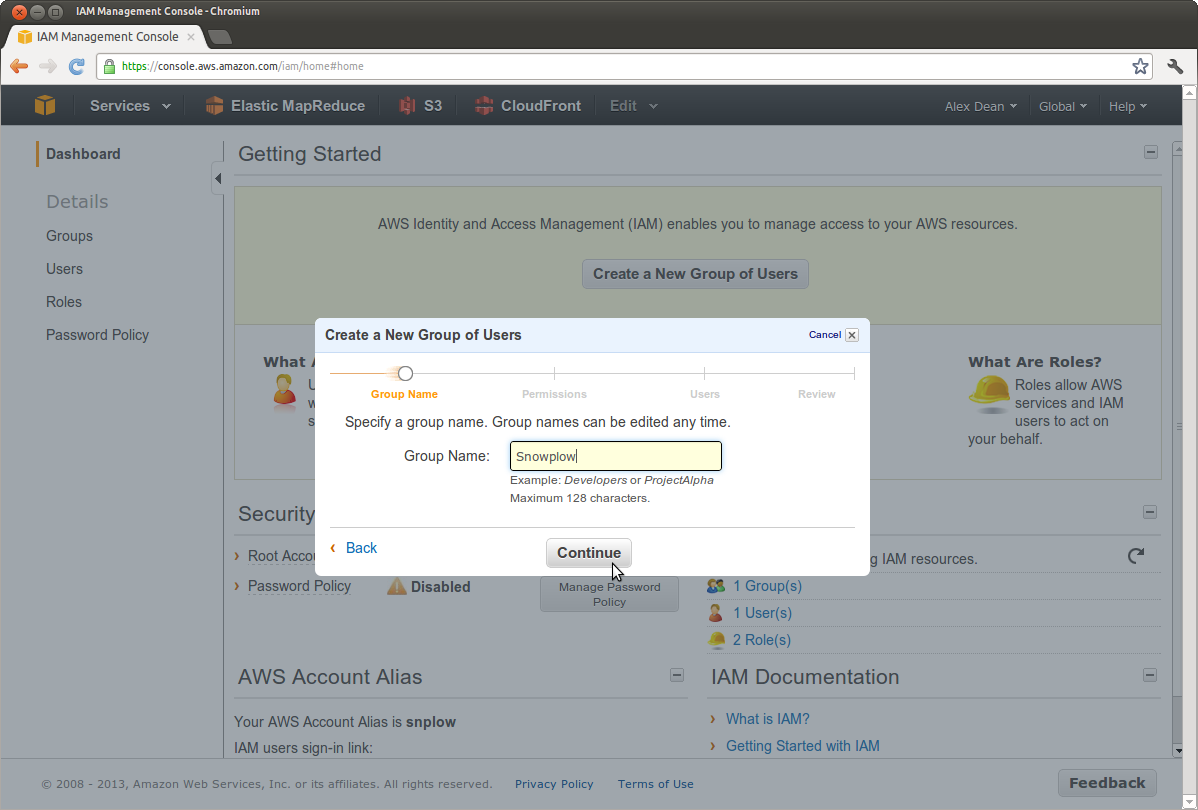
Now choose the Custom Policy option and click Select:

Let's give it a Policy Name of snowplow-policy-setup-infrastructure:
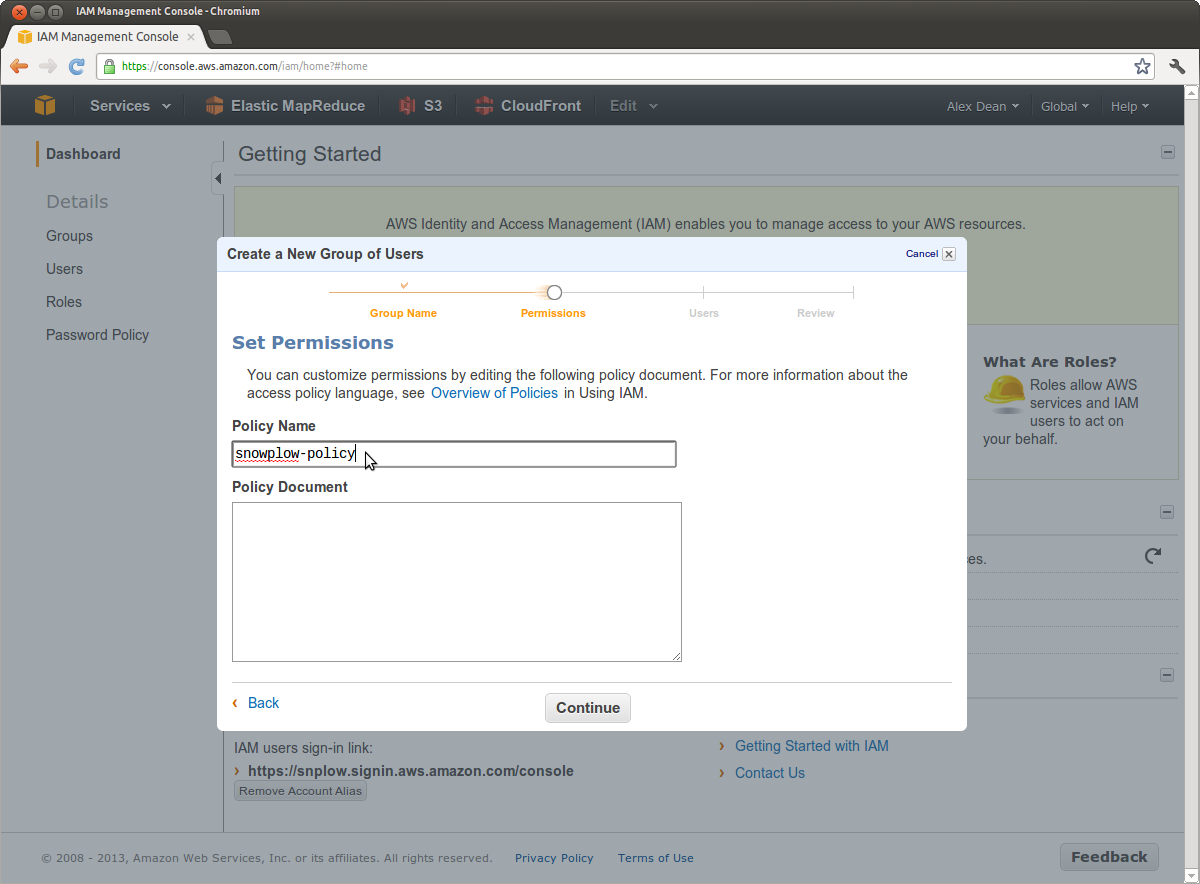
Now we need to give permissions on:
- Amazon S3: All Actions (*)
- Amazon EMR: All Actions (*)
- Amazon CloudFront: CreateDistribution
- Amazon Elastic Beanstalk: All Actions (*)
- Amazon Redshift: All Actions (*)
These permissions are set out in the following policy document. If you are not using the Clojure Collector, you can remove the Elastic Beanstalk section.
Now paste the following JSON into the Policy Document text area:
{
  "Version": "2012-10-17",
  "Statement": [
    {
      "Action": [
        "s3:*"
      ],
      "Resource": [
        "*"
      ],
      "Effect": "Allow"
    },
    {
      "Action": [
        "elasticmapreduce:*"
      ],
      "Resource": [
        "*"
      ],
      "Effect": "Allow"
    },
    {
      "Action": [
        "cloudfront:CreateDistribution"
      ],
      "Resource": [
        "*"
      ],
      "Effect": "Allow"
    },
    {
      "Action": [
        "elasticbeanstalk:*"
      ],
      "Resource": [
        "*"
      ],
      "Effect": "Allow"
    },
    {
      "Action": [
        "redshift:*"
      ],
      "Resource": [
        "*"
      ],
      "Effect": "Allow"
    }
  ]
}
Now click Continue:

From the Add Existing Users tab, switch to the Create New Users tab:
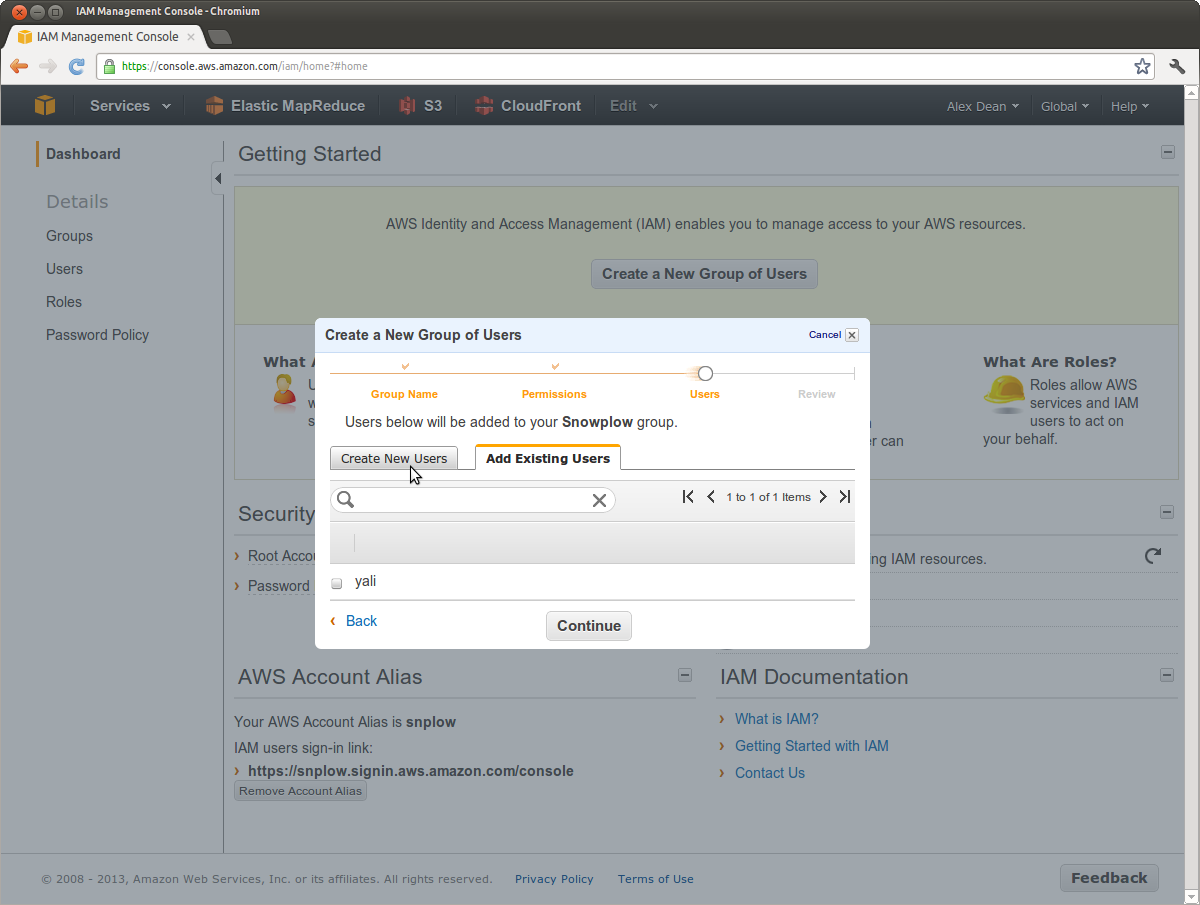
Now enter a first User Name - we use snowplow-setup:

Keep the option Generate an access key for each User checked, and then click Continue.
Check that the configuration for your new IAM group looks something like this:
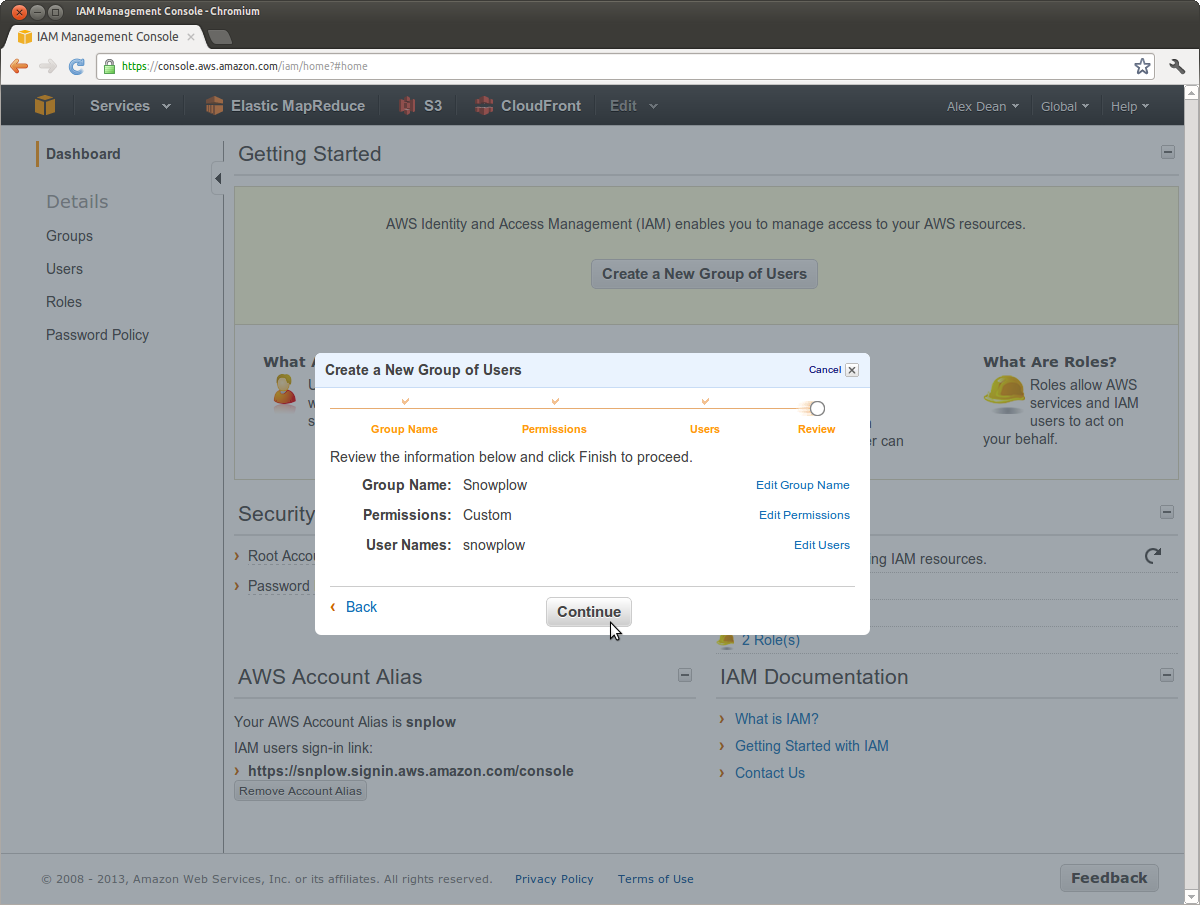
Click Continue and you should see the following:

Click Download Credentials to save these credentials locally. Then click Close Window.
Provide these credentials in a secure way - not via email - to whoever is setting up Snowplow for you, so that they can add them into the configuration of your EmrEtlRunner and StorageLoader applications.
Back to top.
## 2. Allow the IAM user to loginFor much of the Snowplow setup process, the IAM user you have setup above will need access to the Amazon Web Services control panel.
From within the Users tab inside the IAM dashboard, click on your snowplow user:

Now switch to the Security Credentials tab in the bottom pane, and click Manage Password on the right:

Now choose Assign an auto-generated password:
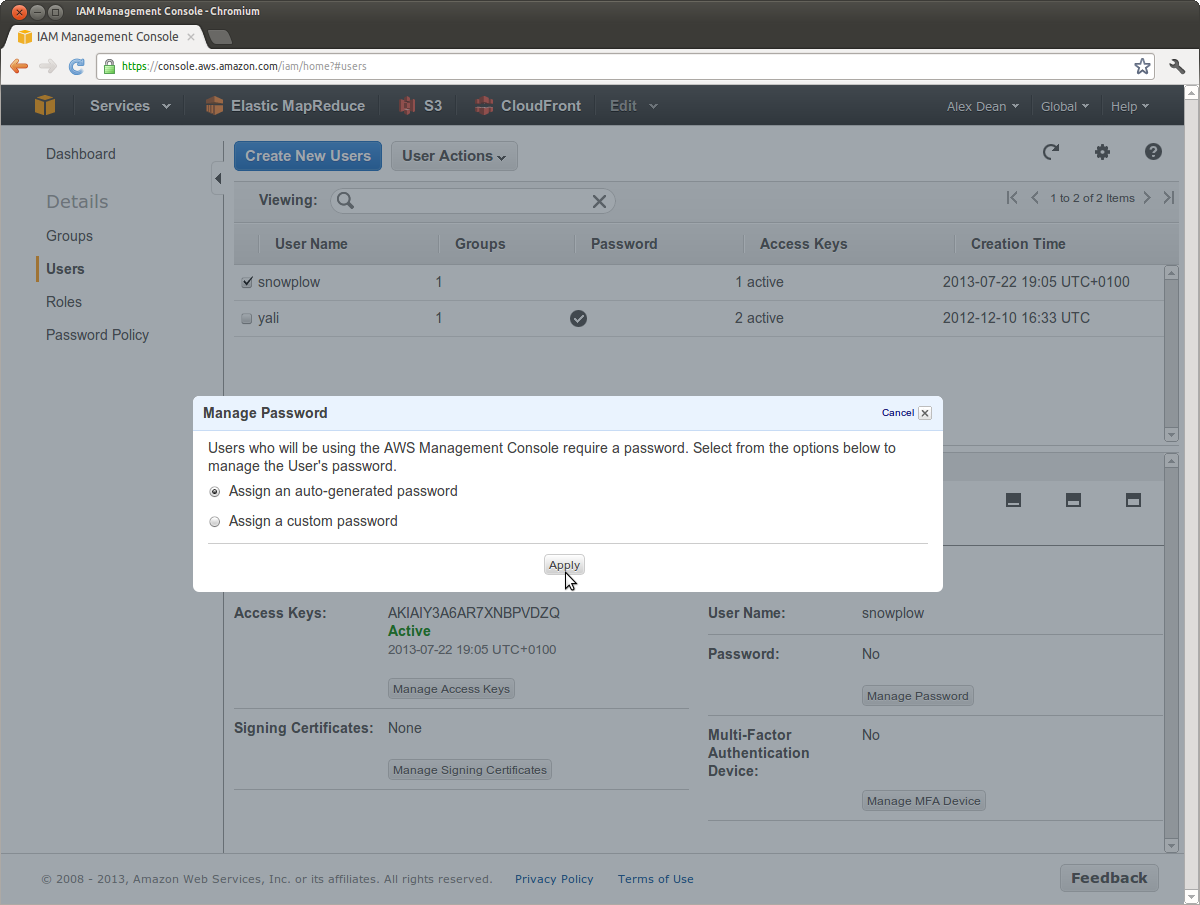
Click Apply and you should see the following:
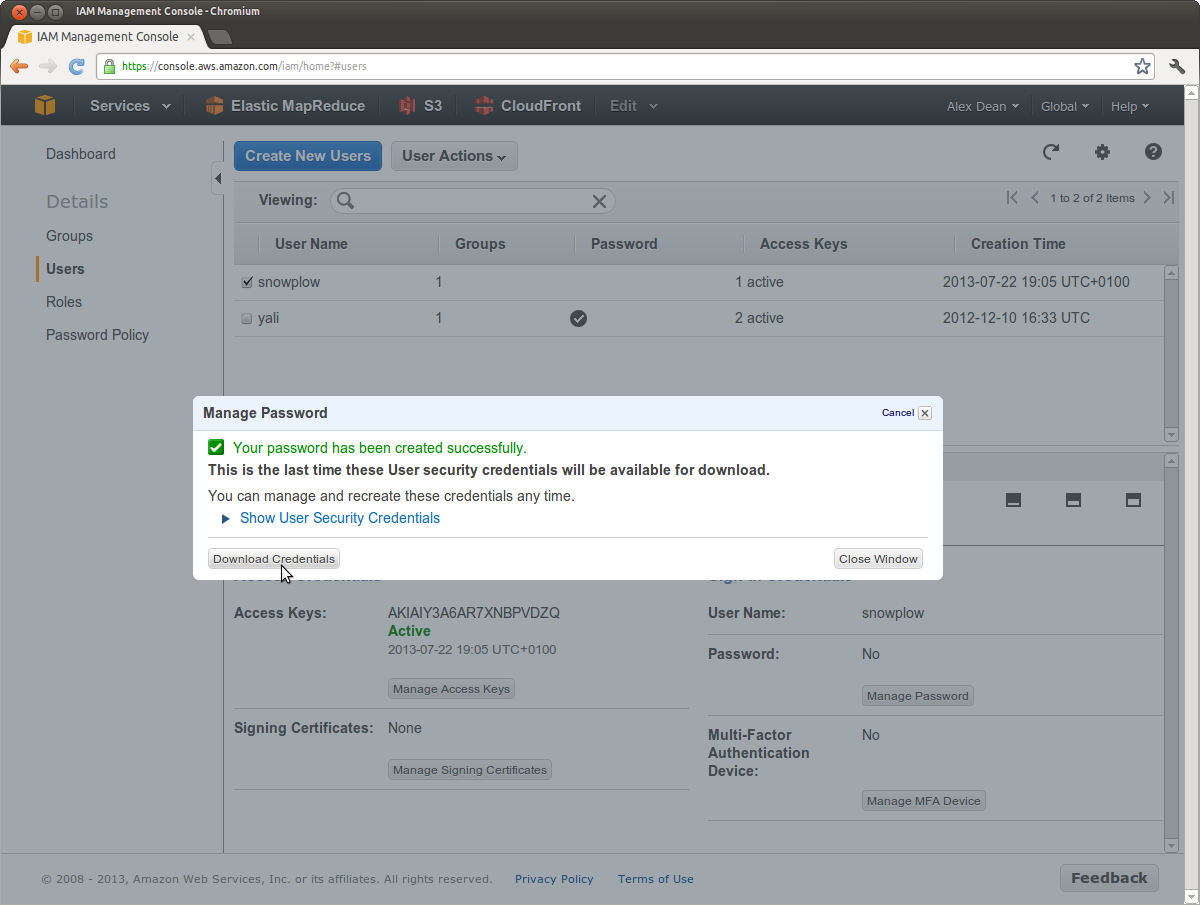
Click Download Credentials to save these credentials locally. Then click Close Window.
Now, provide the following details in a secure way - not via email - to whoever is setting up Snowplow for you:
- Login URL: https://snplow.signin.aws.amazon.com/console
- Username:
snowplow - Password: as downloaded
Back to top.
Home | About | Project | Setup Guide | Technical Docs | Copyright © 2012-2013 Snowplow Analytics Ltd
HOME > [SNOWPLOW SETUP GUIDE](Snowplow setup guide) > Common
1. Trackers
Tracker setup: choosing a tracker
Javascript tracker setup
iOS tracker setup
2. Collectors
Collectors setup: choosing a collector
Cloudfront collector setup
Clojure collector setup
SnowCannon (node.js) setup
3. ETL
ETL setup: choosing an ETL module
EmrEtlRunner setup
Hive ETL
Scalding / Cascading ETL
4. Storage
Storage setup: choosing a storage option
StorageLoader setup
S3 / Hive storage setup
Infobright setup
5. Analytics
Analytics setup
[Analysis using Hive](hive analytics setup)
Infobright based analytics
ChartIO analytics setup
COMMON
Troubleshooting
IAM Setup Guide
- IAM - Setup
- Setup a user to install Snowplow
- Setup a user to operate Snowplow
- Setup a user to analyse Snowplow data with EMR
Ruby and RVM setup
[Hosted assets](Hosted assets)