-
Notifications
You must be signed in to change notification settings - Fork 0
Setting up EMR command line tools
HOME > SNOWPLOW SETUP GUIDE > Step 5: Get started analysing Snowplow data > Getting started with EMR and Hive > Setting up EMR command line tools
- Before you get started...
- A note on OSes
- Installing Ruby
- Installing the Amazon Elastic MapReduce Ruby Client
- Next steps
This is a guide to setting up [Amazon Elastic MapReduce Ruby Client (command line tools)] (http://aws.amazon.com/developertools/Elastic-MapReduce/2264), with a view to using the tool to develop Hive queries. (Covered in the [next guide](querying the data using hive).) Amazon offers a number of other tools to use Elastic MapReduce, however the Ruby Client is the only one we will cover in the documentation, and is the simplest one to get started with.
Amazon has published a very good getting started. This guide can be used as a standalone guide, or read in connection with Amazon's own guide.
## 2. A note on OSesWe have had reports from community members that setting up Ruby and Amazon's "EMR Ruby Client (command line tools)" is more straightforward in a Unix-based environment (such as Ubuntu or OS X) than it is in Windows.
You may want to bear this in mind if you have a choice of different environments you can use to set up EMR.
## 3. Installing RubyAmazon Elastic MapReduce Ruby Client is built in Ruby, so unless you have already have Ruby installed, you'll need to install it. Full instructions on downloading and setting up Ruby can be found here. There are many ways to install Ruby - if you don't have a strong preference for one of them, we recommend Mac OS X and Linux users use RVM, whilst Windows users use Ruby Installer. (A more thorough guide to installing Ruby using RVM can be found here.)
A guide to installing RVM and Ruby can be found [here](Ruby and RVM setup).
## 4. Installing the Amazon Elastic MapReduce Ruby Client-
On Linux or Mac, install the Elastic Map Reduce tools into your apps folder:
$ mkdir -p ~/Apps/elastic-mapreduce-cli $ cd ~/Apps/elastic-mapreduce-cli $ wget http://elasticmapreduce.s3.amazonaws.com/elastic-mapreduce-ruby.zip $ mv elastic-mapreduce-ruby.zip ~/downloads/
-
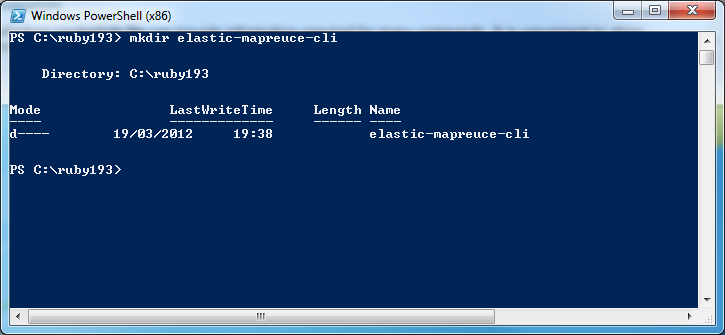
On Windows, navigate to your Ruby folder, and in it, create a new folder for the command line tools:
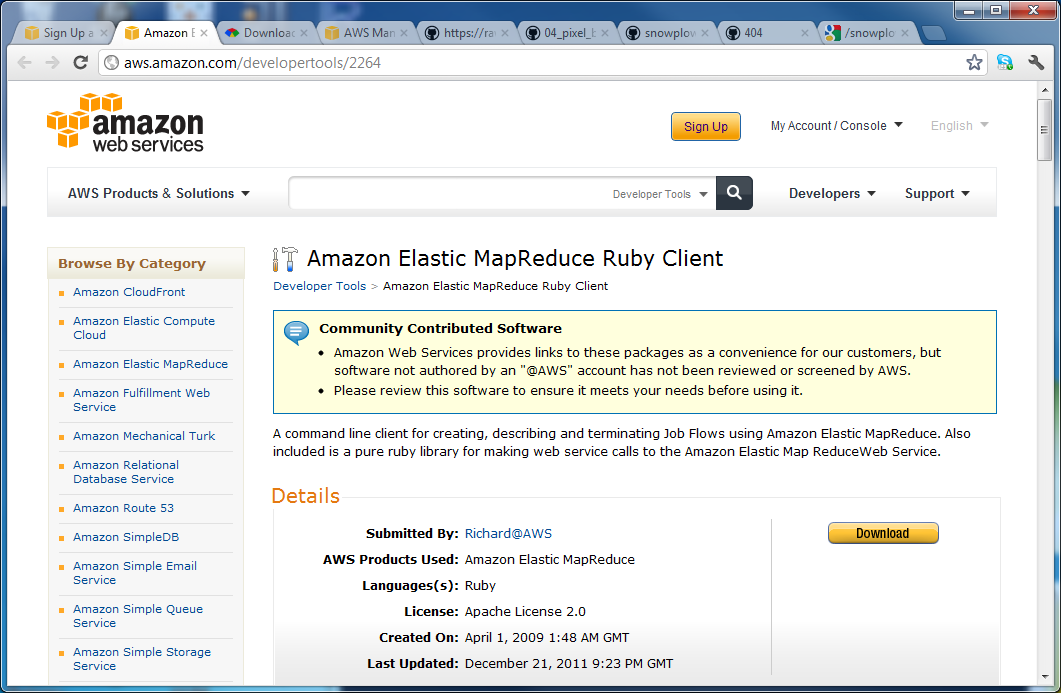
- Go to http://aws.amazon.com/developertools/2264. Login if prompted and click download.
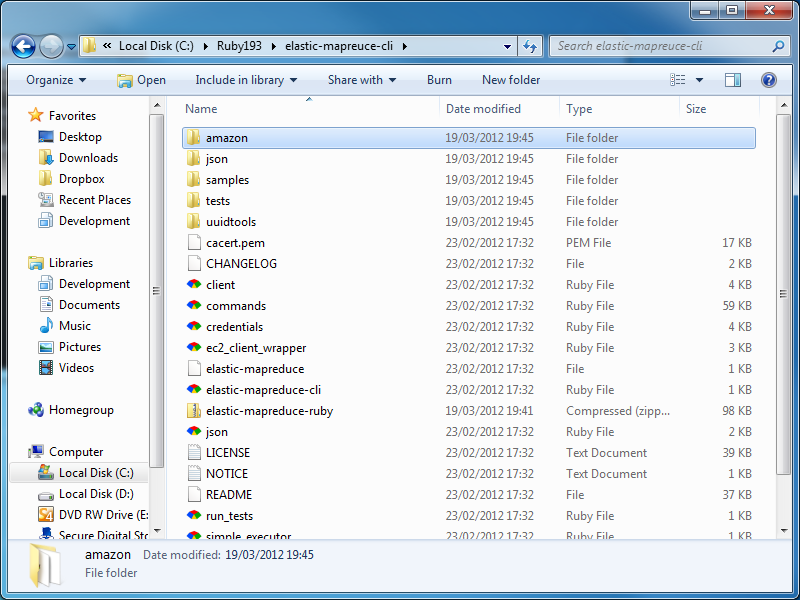
- Now go to the folder you just installed Ruby in, and in it, create a new folder where you'll save the Elastic Map Reduce tools. Give this folder an appropriate name e.g.
elastic-mapreduce-cli. Unzip the download into the new folder, by double clicking on the Zip file (to access the contents), selecting the contents, copying it and then pasting it into the new folder.
-
To use the client successfully, you will need the tools to talk directly to your Amazon account without any difficulty. That means ensuring that the correct security / login details are available to the command-line tools
-
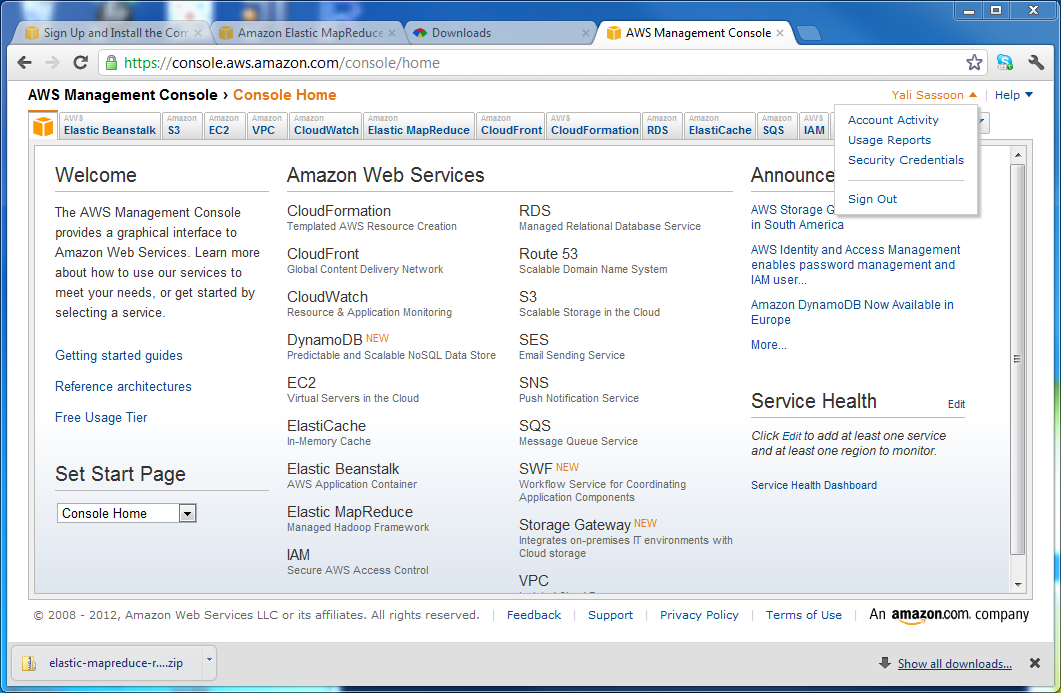
Start by fetching your AWS Access Key ID and AWS Secret Access Key. To get both of these, log in to http://aws.amazon.com
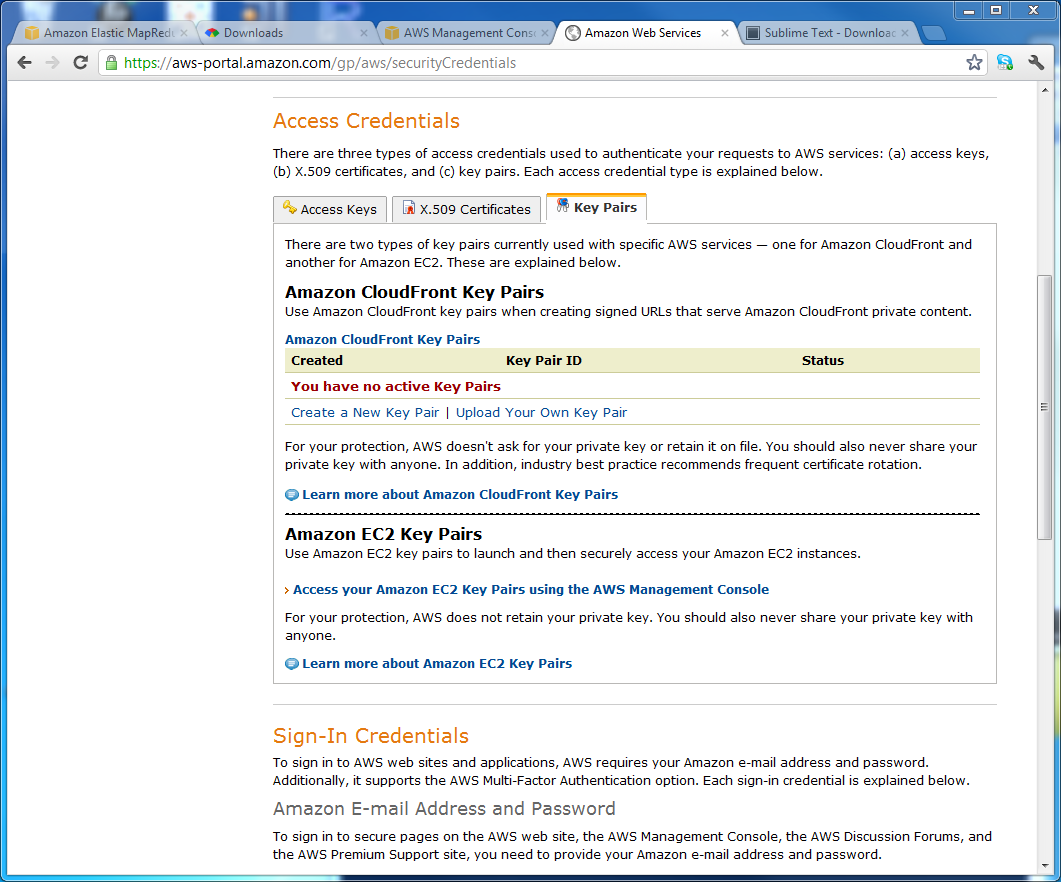
- Click on My Account (by clicking on your name on the top right of the screen) and select Security Credentials. Scroll down to Access Credentials: you will be able to take a copy of your Access Key ID. To reveal the associated Secret Access Key, click on the Show link. Copy and paste both of these to a text-editor: in a bit you will use these to create a config file.
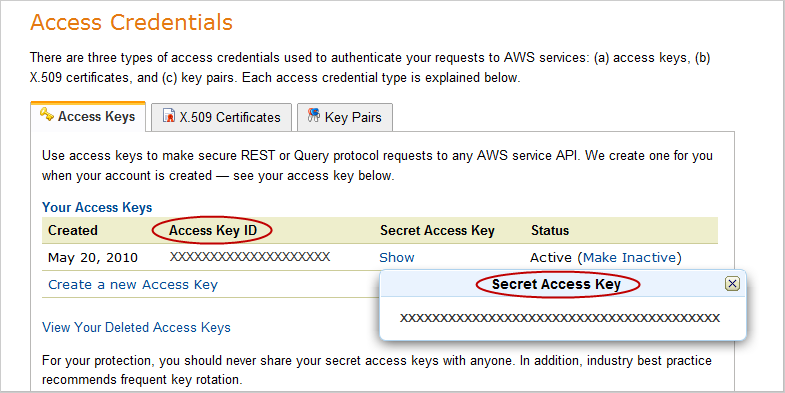
- Now you have your access key and secret access key, you need to create an Amazon EC2 Key Pair. Elastic MapReduce is built on top of EC2, and Key Pairs are a key part of Amazon's security apparatus. Click on the Key Pairs tab (2 along from Access Keys in the same screen) and click Access your Amazon EC2 Key Pairs using the AWS Management Console. (Don't be distracted by the CloudFront Key Pairs section above - that is not relevant here...)
-
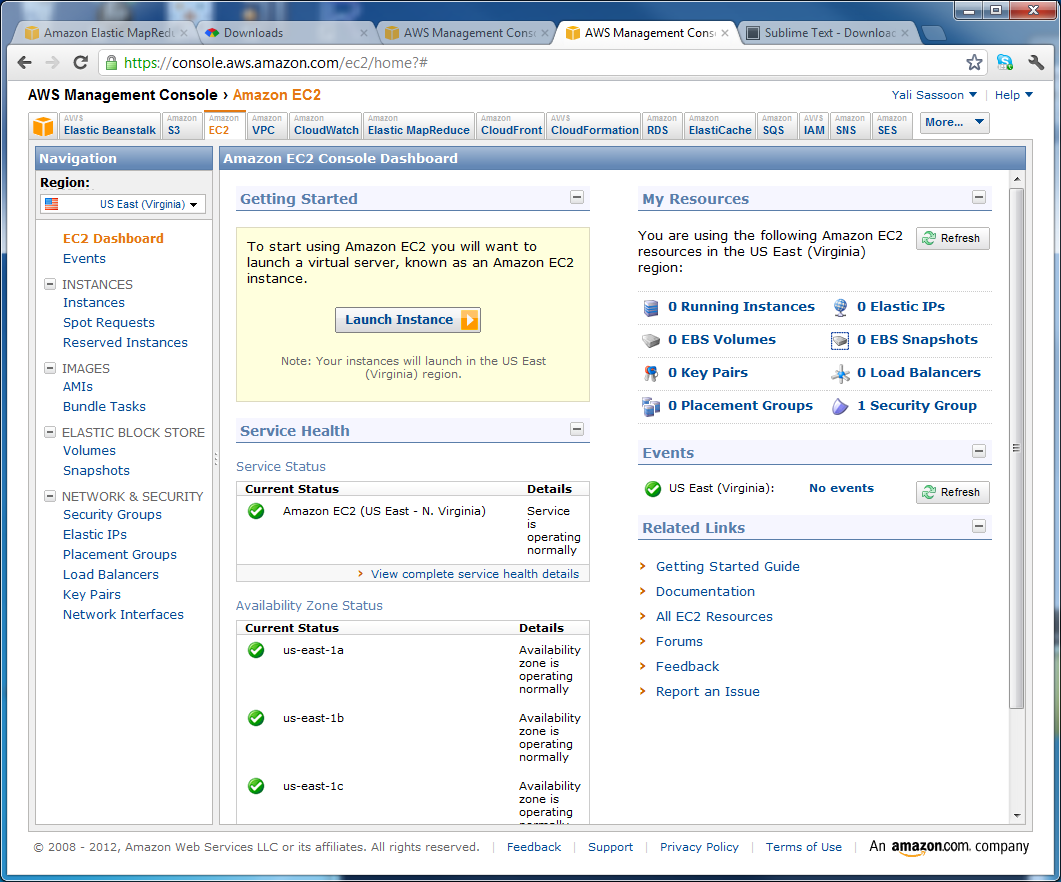
In the EC2 window, check what region has been set in the top left, and if necessary, change the region to the one in which you plan to do your analysis. (We use EU West (Ireland) for most of our analysis because we're based in the UK, but Amazon still often defaults to one of the US data center locations...)
-
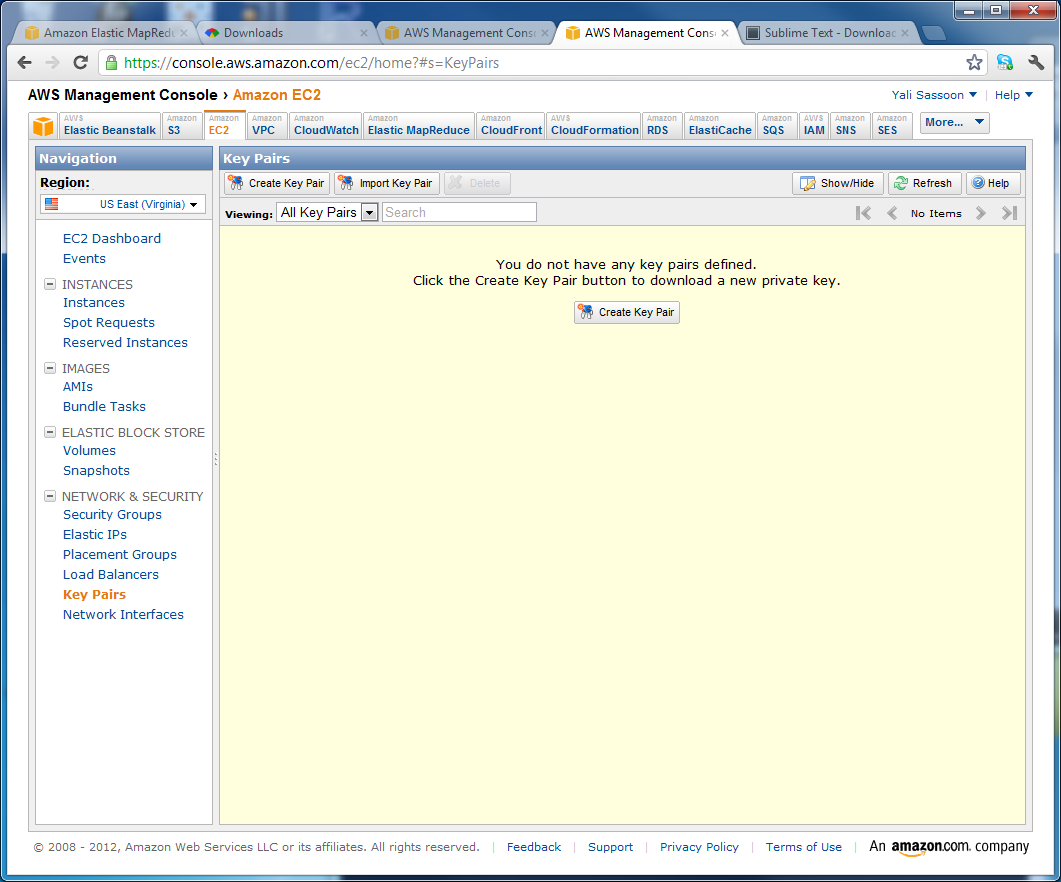
Click on Key Pairs on the left hand navigation. (In the Network & Security section.)
- Click on the Create Key Pair button
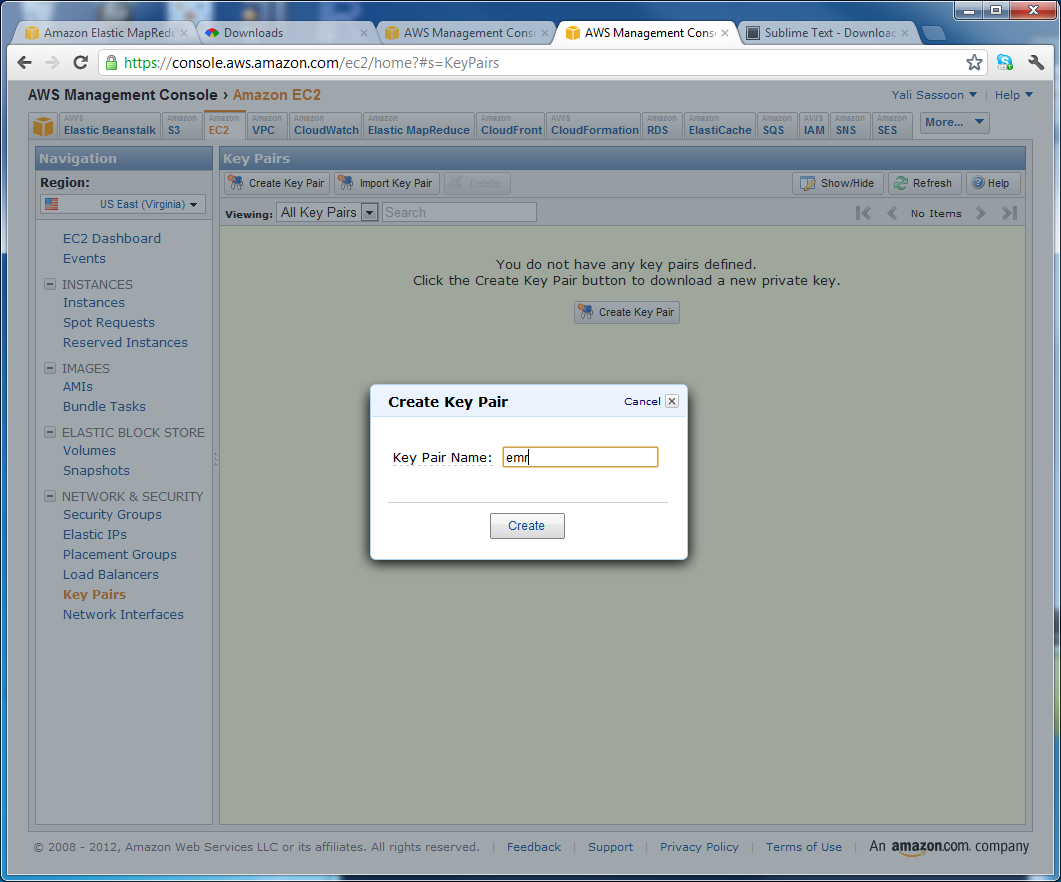
- When prompted, give the key pair an appropriate name of your choice. Note it down in your text-editor
-
The
.PEMfile should automatically download. Move it to a safe location (e.g. in a subdirectory ofelastic-mapreduce-cli) and note the location, again in your text editor, along with the name of the key pair. (This should be the same as the name of the.PEMfile) -
Now go to your text-editor. Create a file
credentials.jsonin theelastic-mapreduce-clifolder -
Add the following (JSON) code to it, substituting the relevant values, noted above, for
access_id,private_key,keypair,key-pair-file:{ "access_id": "[Your AWS Access Key ID. (See above)]", "private_key": "[Your AWS Secret Access Key. (See above)]", "keypair": "[Your key pair name. (See above)]", "key-pair-file": "[The path and name of your PEM file. (See above)]", "log_uri": "[A path to the bucket on S3 where your SnowPLow logs are kept. We will identify this in the next section.]", "region": "[The Region of yoru job flow, either us-east-1, us-west-2, us-east-1, eu-west-1", eu-west-1, ap-northeast-1, ap-southeast-1, or sa-east-1. We will identify this in the next section]" }
-
The
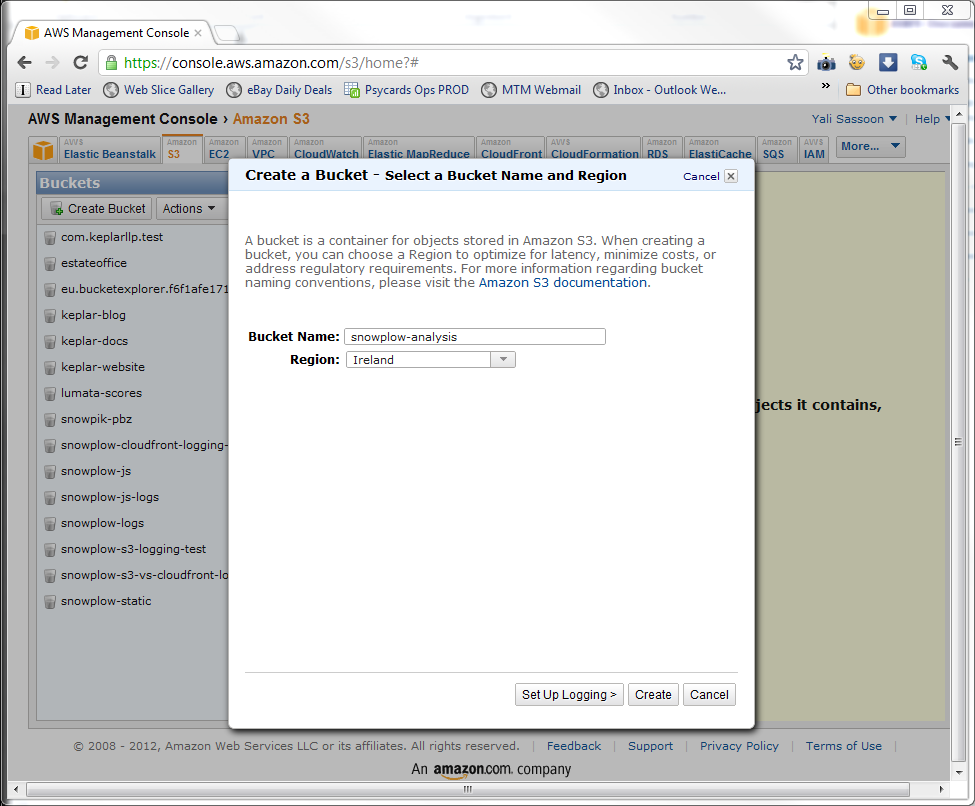
log-uriparameter in thecredentials.jsonfile needs to point at the Amazon S3 bucket that you will use to store the outputs of your analysis. (And any logging of Hadoop sessions, if you desire.) It makes sense to create a new bucket to store these results. To do so, click on theS3tab at the top of the AWS Management Console, and in the left hand menu under Buckets click the Create Bucket button:
-
Name the bucket. (You'll need top pick a name that is unique across Amazon S3, to
snowplow-analysiswill not be an option, unfortunately -
Select which Region you want the bucket located in. Because we're based in the UK, we've picked Ireland: pick the data center that makes the most sense for you. (Most likely the same location as the S3 buckets with the raw Snowplow data you intend to analyse.) Click the create button.
-
Now update
credentials.jsonwith thelog-uri. This will bes3n://+ the bucket name +/. For us, then"log_uri" = "s3n://snowplow-analysis/" -
You also need to set the
regionfield incredentials.json. Pick the appropriate region - this should match the Region you selected when you created the bucket. So for us that iseu-west-1. (we selected Ireland)
| Region name | Region code |
| US Standard | us-east-1 |
| Oregon | us-west-2 |
| Northern California | us-west-1 |
| Ireland | eu-west-1 |
| Japan | ap-northeast-1 |
| Singapore | ap-southeast-1 |
| Sao Paulo | sa-east-1 |
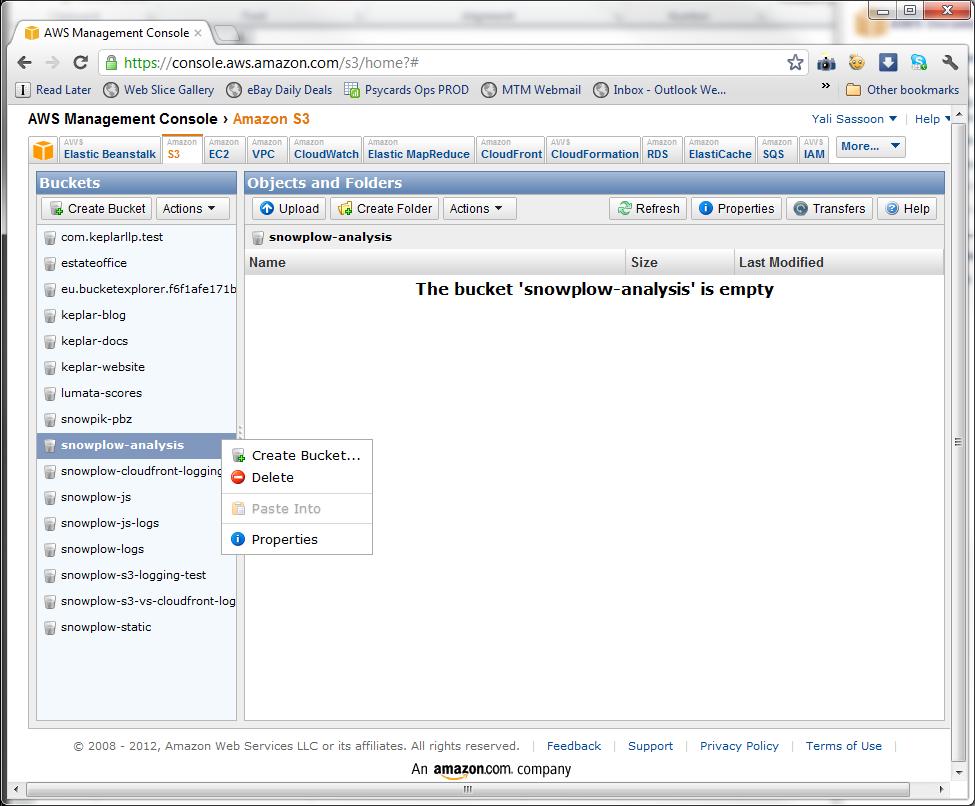
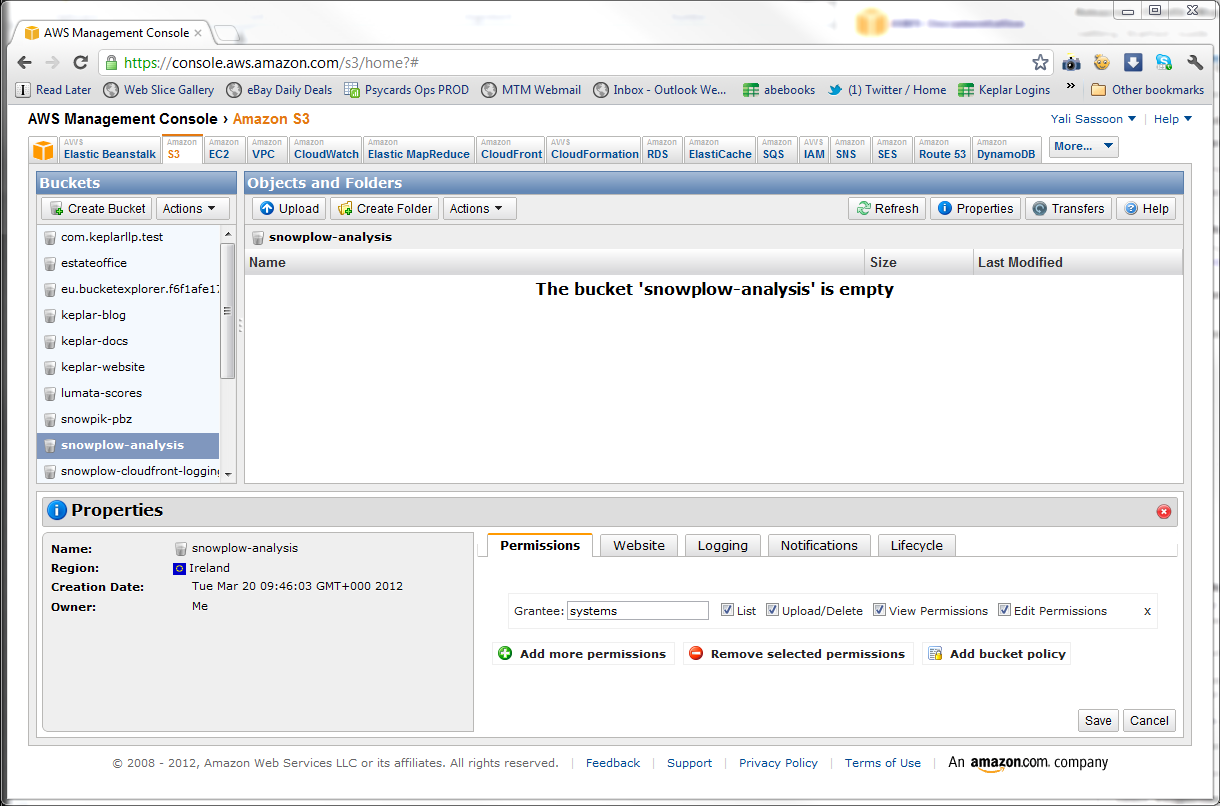
- You need to set permissions on the S3 bucket, so that the command line tools can write results output to it. To do so, go back to the S3 console, right click on the bucket you created and click on properties
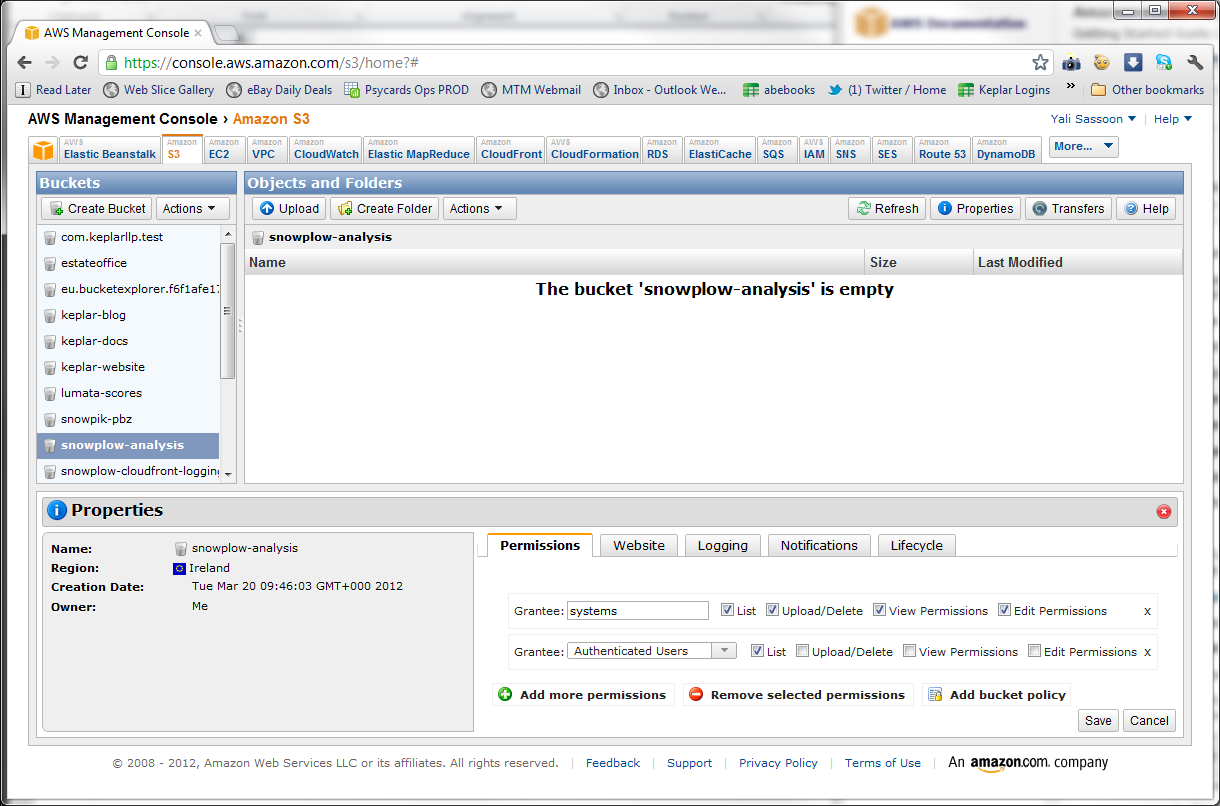
- A Properties pane will appear at the bottom of the screen. On the Permissions tabl, click Add more permissions
- Select Authenticated Users from the Grantee dropdown, then select List just next to it and click Save
Now that you have configured the Ruby client, the last thing to do before you can run a Hive interactive session is setup SSH. This process looks different, depending on whether you using a Mac / Linux or PC.
-
Navigate to your
.PEMfile in the command line tool and set the permissions on the file as below:$ chmod og-rwx mykeypair.pem
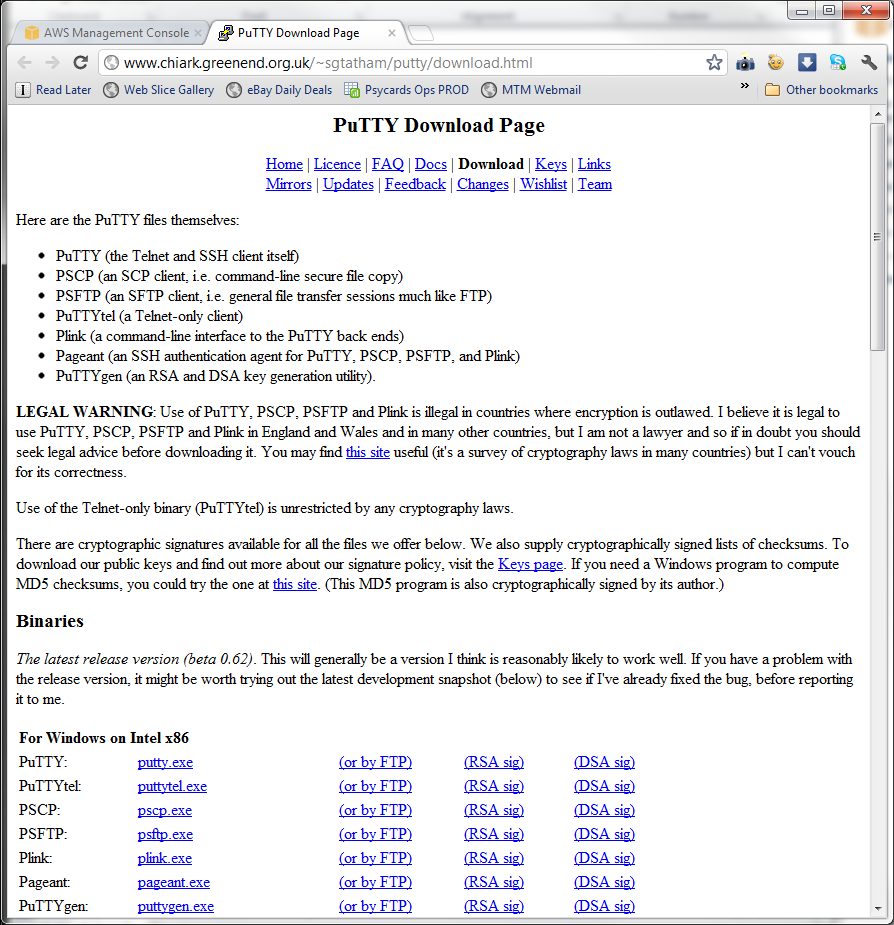
- Download PuTTYgen.exe from here
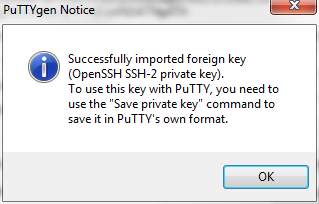
- Double click on the download to launch PuTTYgen. Click on the Load button and select the
.PEMfile you downloaded from Amazon earlier, when you created the EC2 key-pair
-
Enter a passphrase in the dialogue box, confirm the passphrase, and click the Save private key button. Save the file down as a
.ppkfile: this will be what you use to establish a secure SSL connection. -
Exit the PUTTYgen application
-
Now download PUTTY and Pageant from the same webpage you downloaded PUTTYgen. You will need these to establish the SSH connection and run Hive
Now you're ready to test! Check that the EMR command-line tool runs okay:
$ cd ~/Apps/elastic-mapreduce-cli
$ ./elastic-mapreduce --help
Usage: elastic-mapreduce [options]

  Creating Job Flows
  <snip>
Let's try something more adventurous:
$ ./elastic-mapreduce --list
j-11IY9G5EHZGP1     WAITING        ec2-54-247-19-229.eu-west-1.compute.amazonaws.com Development Job Flow (requires manual termination)
   COMPLETED      Setup Hive
   <snip>
And finally, let's try starting and ending a job:
$ ./elastic-mapreduce --create --alive
Created job flow j-284VOXKIH634U
$ ./elastic-mapreduce --terminate --jobflow j-284VOXKIH634U
Terminated job flow j-284VOXKIH634U
Obviously update the jobflow ID with yours. Excellent! Your EMR tool is now working. Next up, you can proceed to the guide to running Hive using the command line tools.
## 5. Next stepsAll done setting up the command-line tools? Then get started querying your Snowplow data with Hive.
Home | About | Project | Setup Guide | Technical Docs | Copyright © 2012-2013 Snowplow Analytics Ltd
HOME > SNOWPLOW SETUP GUIDE > Step 5: Getting started analysing Snowplow data
- [Step 1: Setup a Collector] (setting-up-a-collector)
- [Step 2: Setup a Tracker] (setting-up-a-tracker)
- [Step 3: Setup EmrEtlRunner] (setting-up-EmrEtlRunner)
- [Step 4: Setup the StorageLoader] (setting-up-storageloader)
- [Step 5: Analyze your data!] (Getting started analyzing Snowplow data)
- [5.1: setting up ChartIO to visualize your data] (Setting-up-ChartIO-to-visualize-your-data)
- [5.2: setting up Tableau to perform OLAP analysis on your data] (Setting-up-Tableau-to-analyse-data-in-Redshift)
- [5.3: setting up R to perform more sophisticated data analysis] (Setting-up-R-to-perform-more-sophisticated-analysis-on-your-data)
- [5.4: get started analysing your data in EMR and Hive] (getting-started-with-EMR)
Useful resources
