-
Notifications
You must be signed in to change notification settings - Fork 1
Tram Your Print Bed
Tramming is the act of setting something parallel to something else. If your printer does not have a bed level sensor such as the BLTouch, you must adjust the level of the bed to match the motion of the print head. This motion may or may not be square to the printer frame. If you have a bed level sensor, however, the sensor will attempt to align the print head with the level of your print bed. If your print bed is not parallel to the frame, the whole machine may end up skewed. This could result in inaccurate prints or other mechanical problems. To avoid this, we can tram the bed to the printer frame to give the sensor a level reference to calibrate to.
There are several ways to do this. The procedure described below is relatively simple and quick and works on Tenlog printers because their base has a large flat top surface. If your base is dented or uneven, you may have to adjust the procedure to measure to the top of the Y-axis rails or use a level.
This procedure assumes you have a set of digital calipers with a locking screw. If you don't have this, maybe now is the time to buy some.
If you remove the bed surface during this procedure, it may improve your results, especially if you change bed surfaces frequently.
-
Start by adjusting your bed by eye to a position that appears level, and which compresses the springs enough so the springs do not move under moderate pressure. Inadequate spring compression can allow your bed assembly to shift during prints.
-
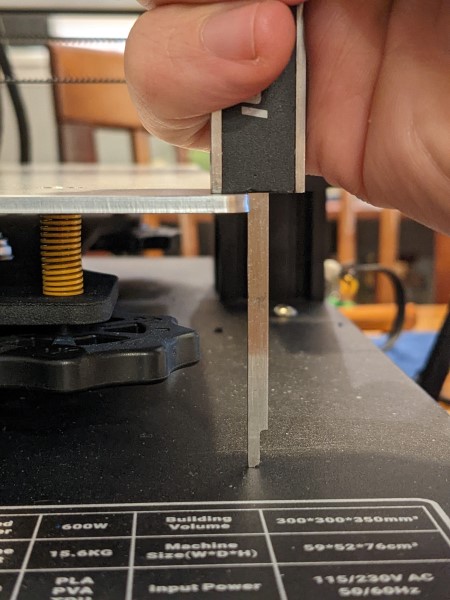
Chose a corner of the print bed, and use the depth gauge on your calipers to measure the distance from the top of the bed at that corner down to the printer base. Try to keep the gauge as vertical as possible while taking the measurement.

*Note the spring - compressed, but not completely* -
Use the knob on your calipers to lock them in this position. Next, we will try to match the other 3 corners to this measurement.
-
Proceed to an adjacent corner, and put the depth gauge on the corner. Note whether this corner is higher or lower than the previous corner, and use the adjuster wheel to move it to the correct height.
-
Repeat the previous step on the other two corners, progressing from one corner to the next in order.
-
Adjusting any corner affects the other corners so once finished with all 4 corners, repeat the procedure and readjust each corner as necessary. Repeat the procedure as many times as necessary until there are no more adjustments to make.
Once your bed is properly trammed, you should run a G34 to level the X-axis gantry. After that, you can generate a bed mesh and activate bed leveling.