-
Notifications
You must be signed in to change notification settings - Fork 49
Setting up Jamtaba
The following explanation refers to Jamtaba's Standalone Version configuration only:
First go to the Preferences Menu. It is located in the upper left corner below the Jamtaba Icon.

Now Jamtaba needs to know what Audio Device to use. You can use any external interface on the market or your computer’s built in soundcard. Select the Audio option to continue (or press F5 in standalone version).

Audio Device: This is your soundcard. Prefer ASIO drivers if possible. You can use ASIO4ALL if your souncard doesn’t have ASIO drivers.
NOTE: non-windows systems allow input/output selection independent from each other:

ASIO panel: Use this button to open your device's specific ASIO driver configuration window.
Inputs and outputs: This is where you select which inputs and outputs you will be using. Jamtaba supports multichannel soundcards, so it will use as many as you have if you select them.
Buffer size: Use the lowest value possible. If you hear dropouts and clicks, then try increasing one step at a time until the sound is clear. Smaller values use more CPU, but reduce the overall latency of the system. You can tweak this parameter along with the Sample Rate to achieve the best configuration possible for your system. Don’t be afraid to experiment!
Sample Rate: This depends on your hardware. Use at least 44100 HZ (CD quality). Your latency will be less with higher sample rates, but you will also need more CPU resources.
Encoder Quality: Here you can choose the Ogg Vorbis encoding quality for the local audio. Choose depending on what kind of internet upload speed you have. If you have a standard internet connection, choose NORMAL. If your upload speed is more than 256Kbps you're safe to choose HIGH. On the other hand if you get disconnected often from Jams or you experience other users audio cuts, then try LOW. Keep in mind that Low quality can compromise the sound others hear from you considerably in order to use less upstream bandwidth, so use only if there's no better alternative. This menu is available only for the standalone version at the moment, so it will not change the settings for the VST/AU Plugin (see the Appendix page for instructions on how to change the VST/AU Plugin settings).
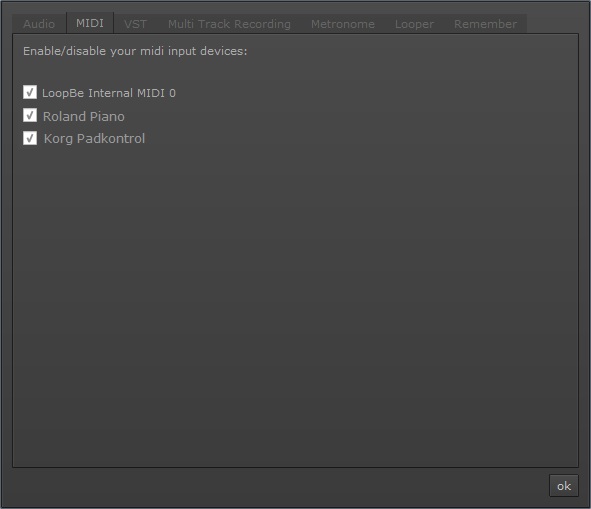
Now it’s time to configure your MIDI devices. Connect all your equipment and turn them on. Next step is to select the MIDI tab in the Preferences Menu (or press F6 in standalone version). Jamtaba will activate all the devices that appear in the list automatically, but you can uncheck any of them that you don’t want to use with Jamtaba.

If you need to connect MIDI devices after you launched Jamtaba, just press F6 (open the MIDI Preferences) anytime and the new ones will be detected auomatically. Press Ok and they wil become available in your local track.
This concludes the configuration of Jamtaba. Now it’s time to learn what’s in the control section.