-
Notifications
You must be signed in to change notification settings - Fork 18
Editor 05 Custom Nodes
Renato Pereira edited this page Oct 26, 2014
·
2 revisions

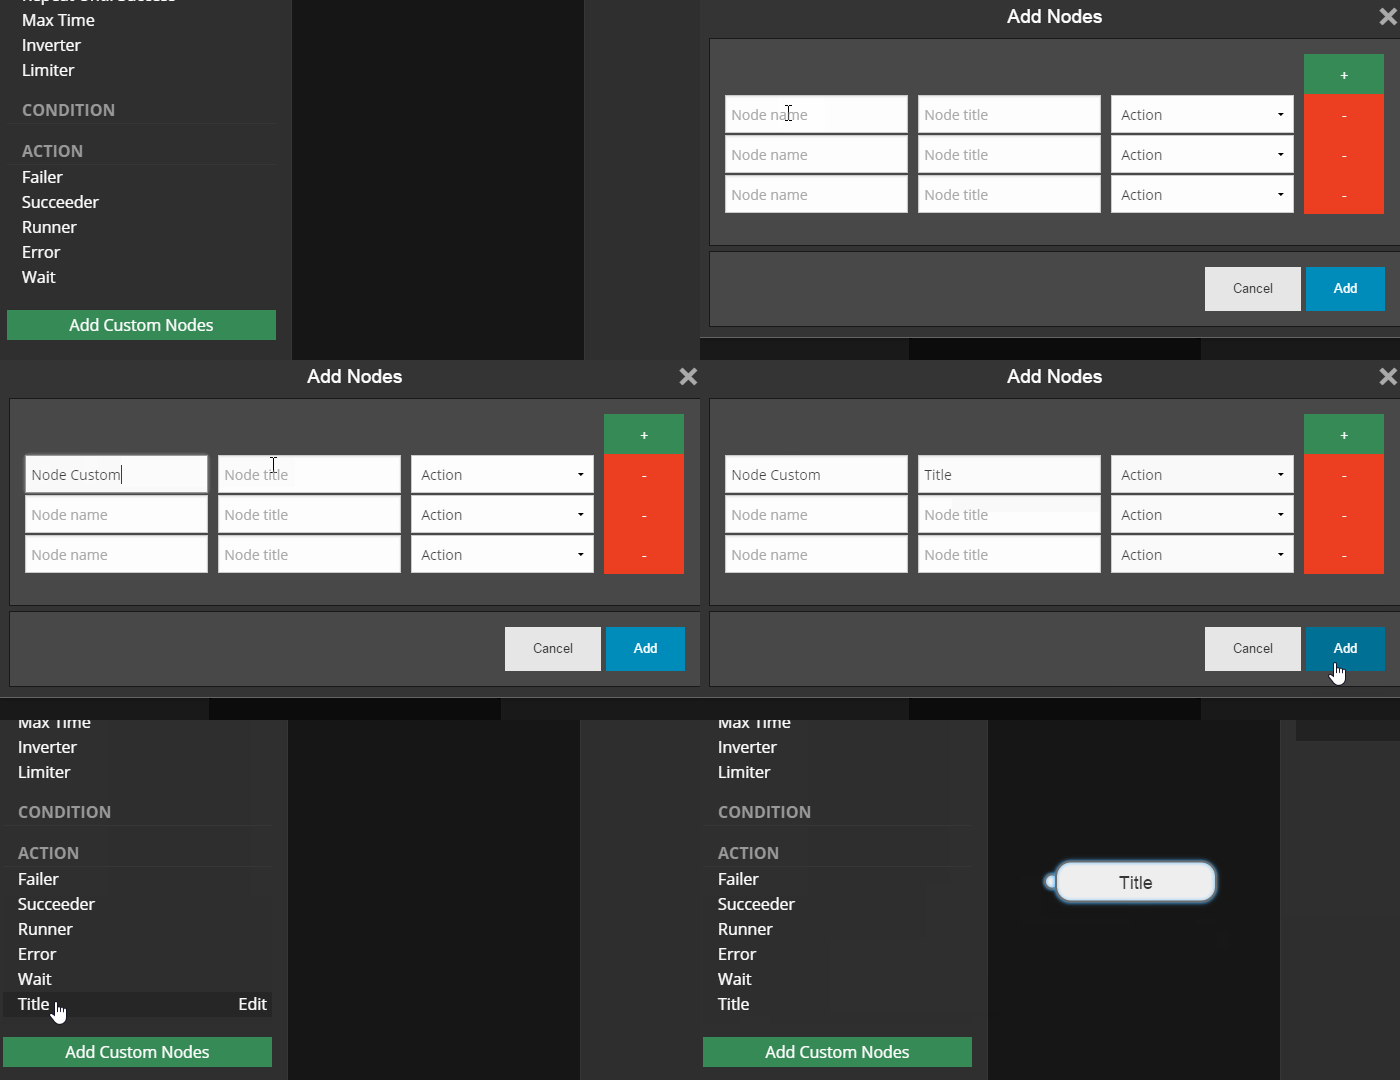
In order to add custom nodes in the editor:
-
Click in the button
Add Custom Nodesat the node panel; -
Type the name (obligatory), the title (optional), and select the node category.
- Note: you can add several nodes together, just press
+to open new rows.
- Note: you can add several nodes together, just press
-
Press
Addbutton.
Notice that:
- You don't need to create any code in order to add custom nodes in the editor, but...
- You need to specify the node class when loading it with Behavior3JS;
- Be aware that, the node name will be used to find the node when loading it from JSON.
- Consult [to know more](Core 05 Creating Trees From JSON).

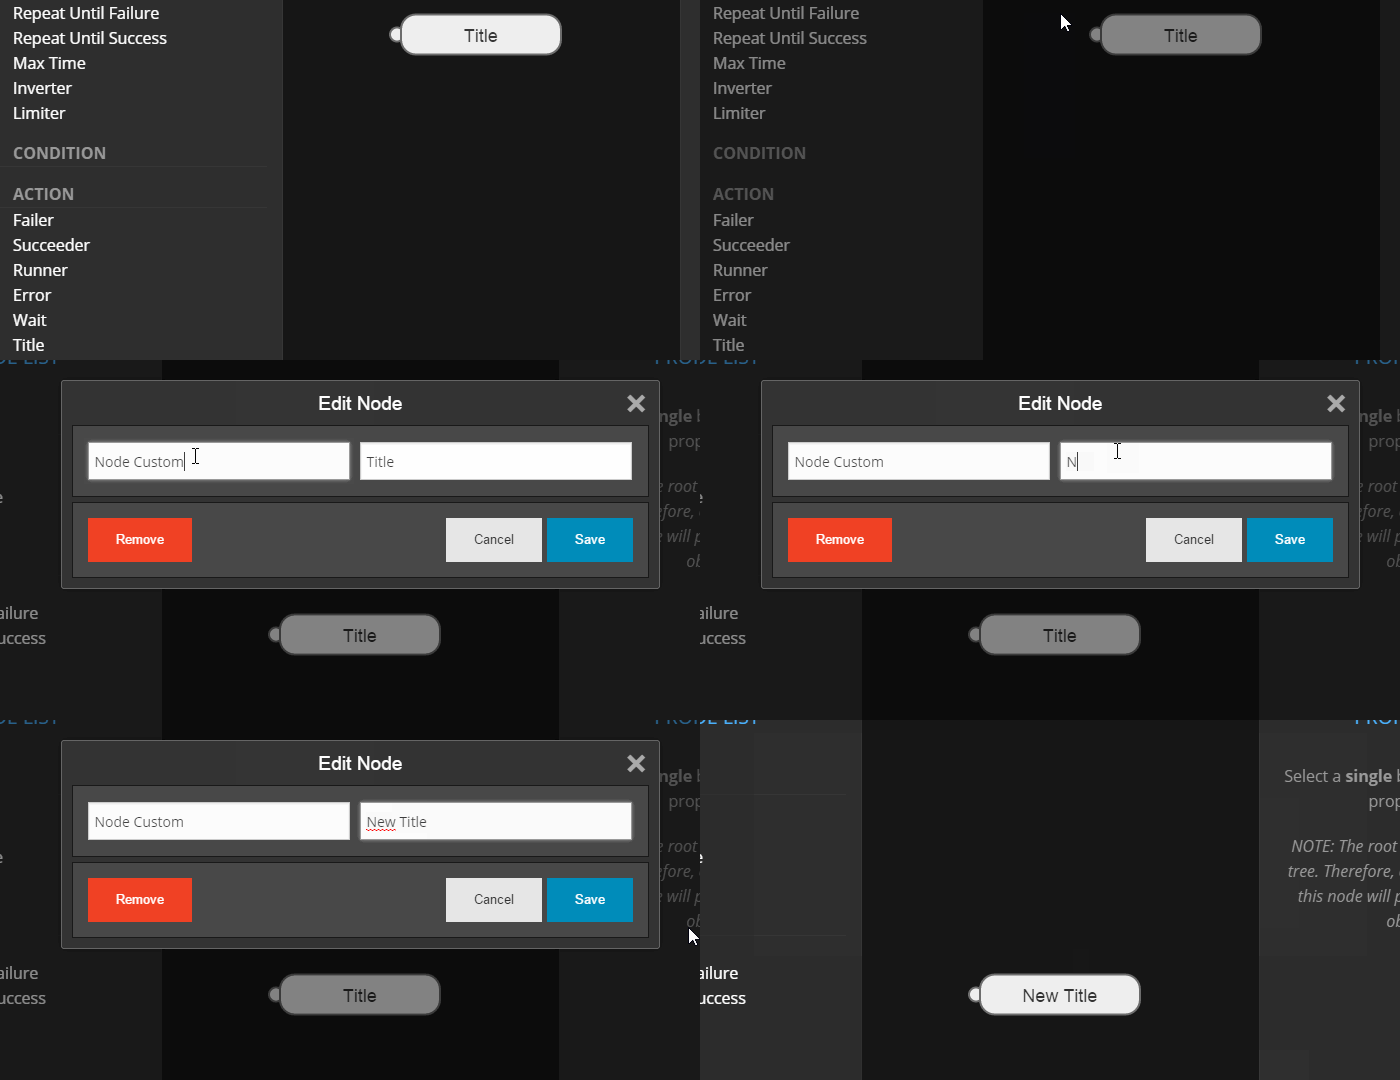
You can edit existing nodes by clicking the edit button (besides the node at the node panel).
Notice that, you cannot edit default nodes.

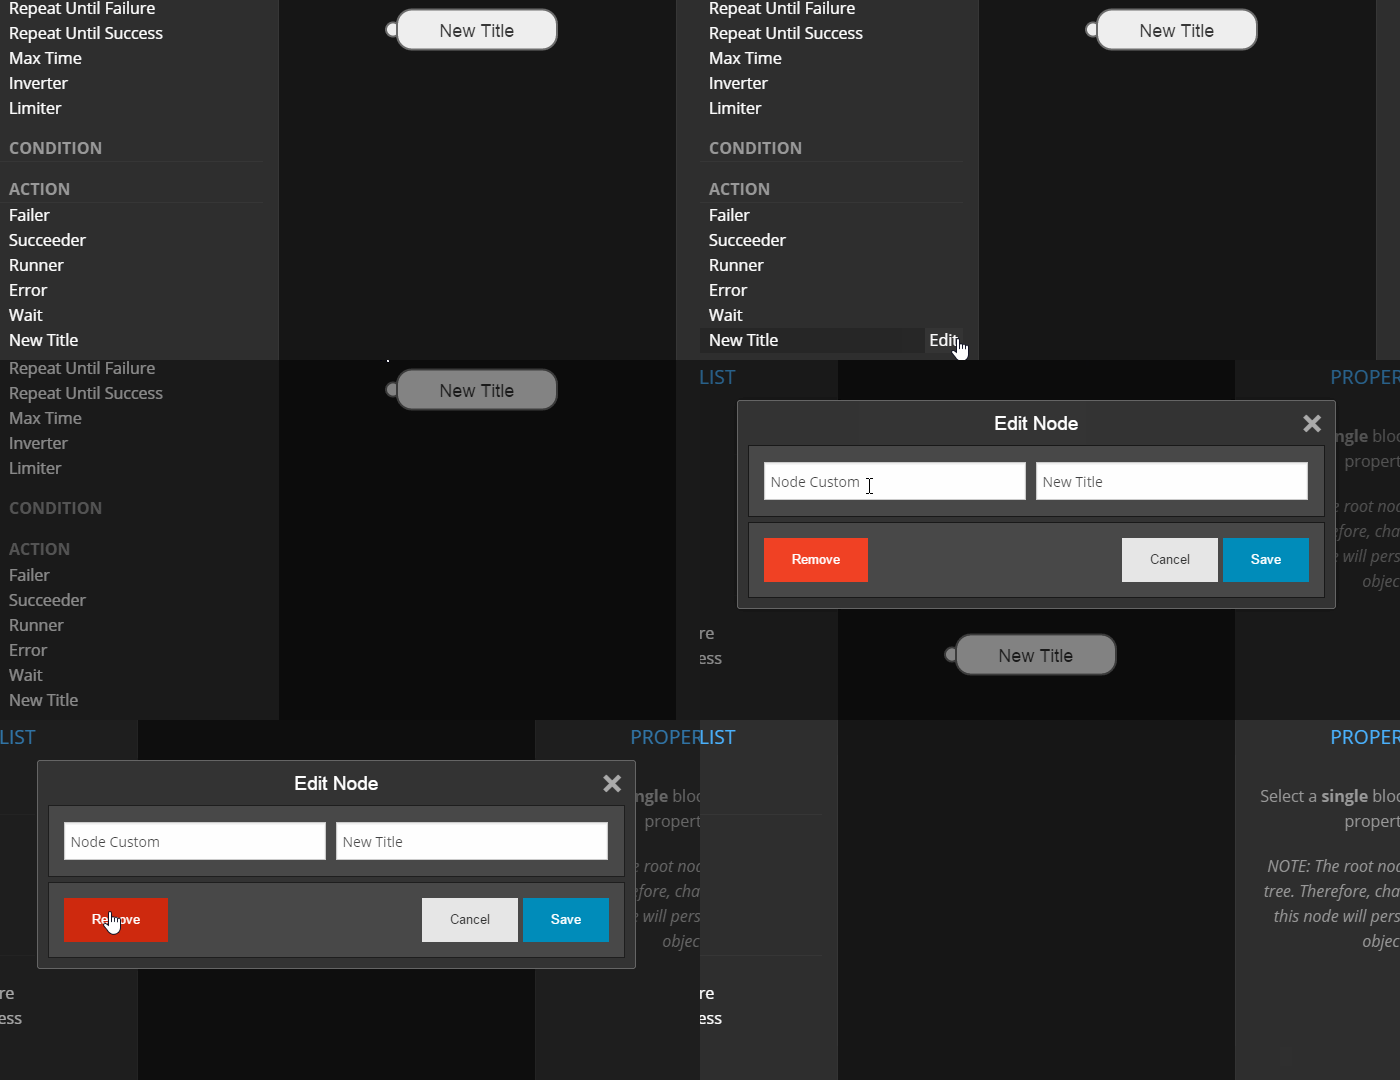
After clicking the edit button (besides the node at the node panel), you can remove the node by pressing the Remove button.
Notice that, you cannot remove default nodes.
Pages:
Core Guide:
- [01. Introduction](Core 01 Introduction)
- [02. Downloading and Setting Up](Core 02 Downloading and Setting Up)
- [03. General Guidelines](Core 03 General Guidelines)
- [04. Creating Custom Nodes](Core 04 Creating Custom Nodes)
- [05. Creating and Using Trees](Core 05 Creating and Using Trees)
Editor Guide:
- [01. Interface](Editor 01 Interface)
- [02. Adding and Connecting](Editor 02 Adding and Connecting)
- [03. Selecting and Moving](Editor 03 Selecting and Moving)
- [04. Node Properties](Editor 04 Node Properties)
- [05. Custom Nodes](Editor 05 Custom Nodes)
- [06. Importing and Exporting using JSON](Editor 06 Importing and Exporting using JSON)