-
Notifications
You must be signed in to change notification settings - Fork 7
Home
Developers should look here.
- Our GitHub CI run builds eclipse distros (Linux / Windows) containing the plugin. Download it here.
- In case you are using macOS, you might need to add our Update Site to run the plugin. It can be found here.
- Under Arch Linux the grading tool is available as artemis-grading-bin from the AUR.
- The package bundle is missing notarization thus it cannot be opened by simply double-clicking it (cf. #129).
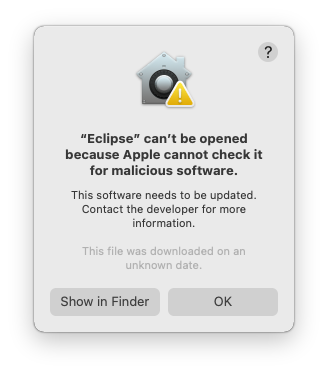
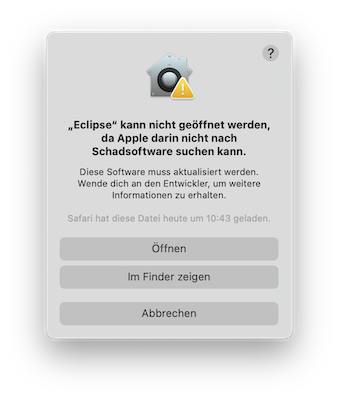
- To open the application, you have to open the context menu (right click) and select Open. This triggers the following dialog which allows you to circumvent Gatekeeper.
The GUI consists (mainly) of two parts:
- Artemis Grading View
- Assessment Annotations View
Both can be open directly by open the Artemis Perspective.
The Artemis Grading View is a tab folder with three tabs:
- Assessment
- Grading
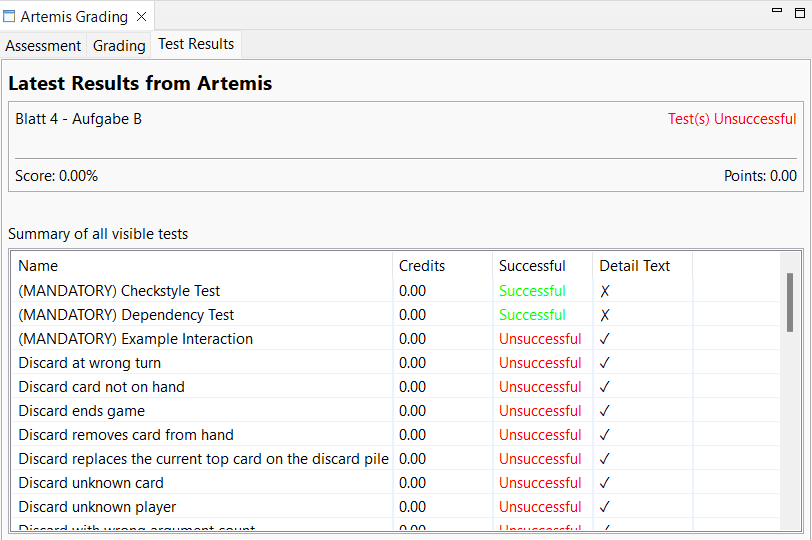
- Tests (show test results from Artemis)
The assessment tab has the following functions:
- Select course, exercise and exam
- Start assessment (correction round 1 or 2)
- Refresh Artemis state (if something changed)
After a new assessment is started, it is possible to reload, save, close or submit the started assessment (using the buttons).
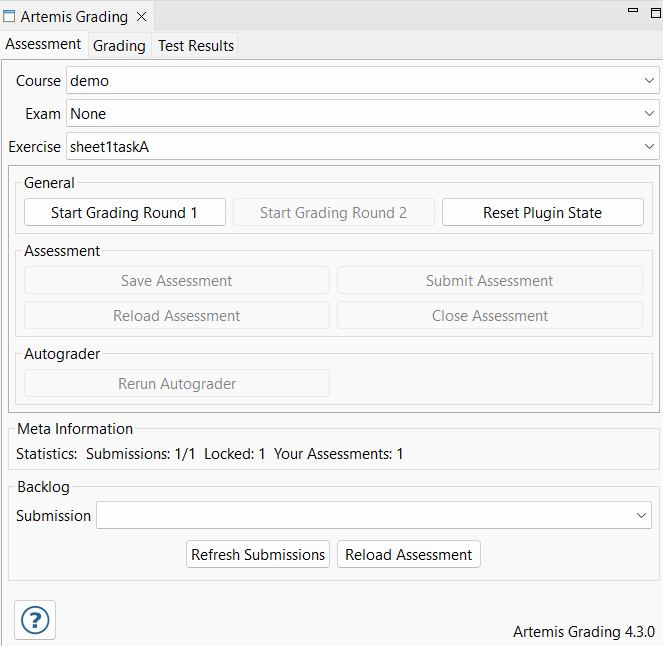
The tab can be used to reload submissions that are already started, saved or submitted. One can filter the submission by selecting a filter in the first combo. It is important to selected the specified course and exercise in the assessment tab, otherwise the submission cannot be loaded. After a submission is loaded again, it can be graded and submitted normally.
The grading tab can be used to create annotations for the downloaded submission. The tab is generated whenever a new submission is downloaded. For creating a new annotation do the following:
- Mark the lines, where the annotation should be
- Click on the mistake button in the certain rating group
- After that you should see the new annotation in the assessment annotation view.
- Note: If you Shift-Click or Middle-Click a button, you can provide additional information for the student.
- Note: You can also use a keyboard shortcut for adding annotations (see below).

The test view provides an overview on the test results of Artemis. If there is some detail output, you can simply click on the row to read it.
User data are persisted in the Artemis Grading Preferences. You can what you need to fill in down below. To update the preferences, the "Refresh Artemis State" button must be pressed in the Assessment tab. Otherwise, the changes will only take effect after a restart.

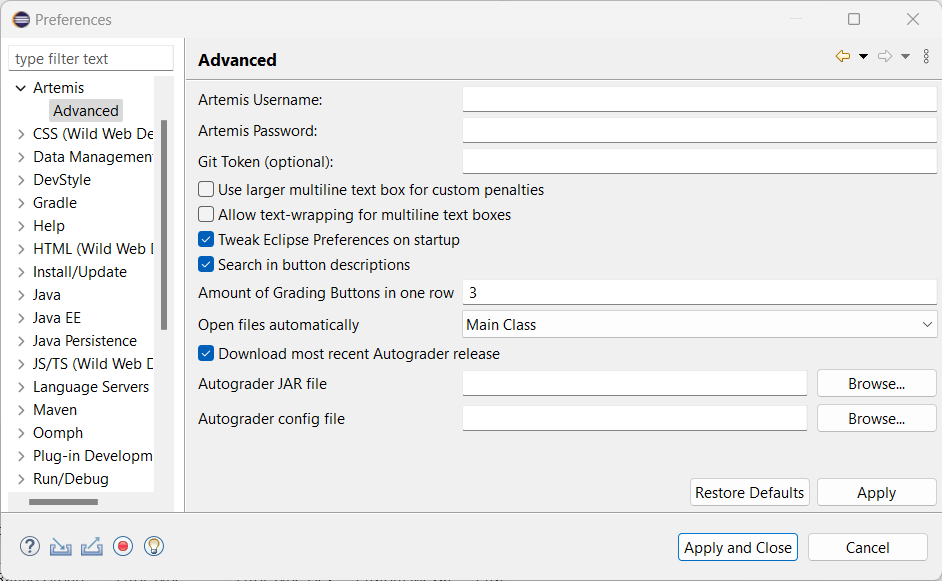
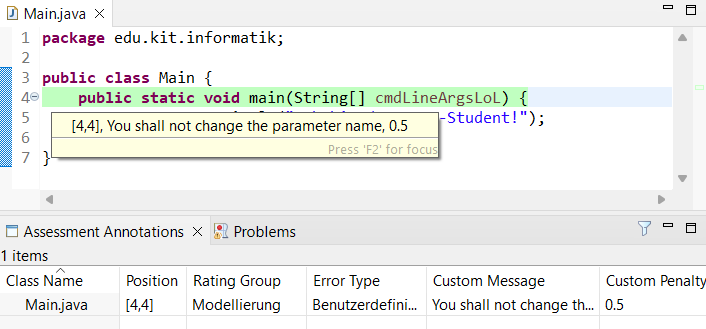
The assessment annotation view shows the annotations of the downloaded submission. The annotation can be deleted by deleting the marker.
-
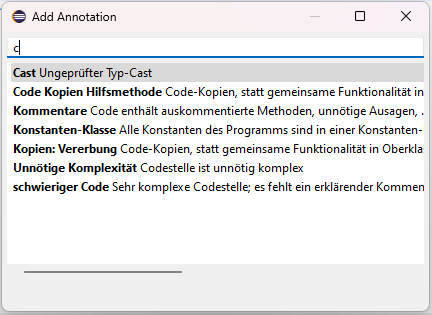
When an editor is active, press Alt+Enter to insert an assessment annotation at the current line. The shortcut opens a dialog where you can search for the desired mistake type. Press Enter to add the annotation or Shift+Enter to add a custom message to the annotation. You can also click or shift-click a mistake type in the list of annotations.
By default, the dialog will search in the names and descriptions of the mistake types as they are shown on the mistake buttons. You can change the behavior in the settings to include only the name of the mistake type. You can change the keyboard shortcut for adding an assessment annotation in the Eclipse preferences under General > Keys > Add annotation commmand.
-
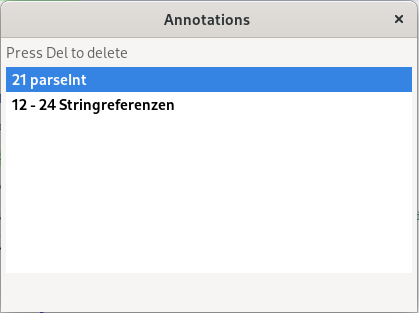
When an editor is active, press Ctrl+Alt+Enter to view or delete annotation at the current line. The shortcut opens a dialog where you can look through the annotations that include the current line, sorted by how many lines the annotations span. The dialog display the lines the annotation spans, the name of the respective mistake type (i.e. the button name), and the custom message if it is present. Use the arrow keys to navigate the annotations. Press Del to delete a selected annotation.
This section deals with the configuration of the backend.
To Configure mistake types, rating groups and whatnot, we use a config file. See docs/examples/config.json for an example configuration.
There are rating groups, mistake types, penalty rules, and allowed
exercises. The main config features are explained in the following. Be
aware of "positiveFeedbackAllowed": true which enables
or disables the positive custom feedback ability.
A rating group consists of multiple mistake types and an optional penaltyLimit. That limit is used for penalty calculation. The rating group has an optional property additionalDisplayNames that can be used to provide display names per language.
"ratingGroups": [
    {
        "shortName": "functionality",
        "displayName": "Funktionalität",
        "negativeLimit": -20,
        "positiveLimit": null,
        "additionalDisplayNames": {
             "en": "Functionality"
        },
    }
]A mistake type belongs to a rating group and has a penalty rule that
defines the penalty calculation logic.
The mistake type has optional properties additionalButtonTexts and additionalMessages that can be used to provide additional languages for the view (only in eclipse).
You can use the optional properties enabledForExercises and enabledPenaltyForExercises to provide a regex for the exercise short names. If set and not matched the properties will disable the whole button or the penalty for the button.
Config File:
"mistakeTypes" : [
    {
        "shortName": "custom",
        "button": "Custom Penalty",
        "message": "",
        "penaltyRule": {
            "shortName": "customPenalty"
        },
        "appliesTo": "functionality"
    },
    {
        "shortName": "jdEmpty",
        "button": "JavaDoc Leer",
        "message": "JavaDoc ist leer oder nicht vorhanden",
        "additionalButtonTexts": {
            "en": "JavaDoc Empty"
        },
		 "additionalMessages": {
            "en": "JavaDoc is Empty and should not be present."
        },
        "penaltyRule": {
            "shortName": "thresholdPenalty",
            "threshold": 1,
            "penalty": 5
        },
        "appliesTo": "functionality",
        "enabledForExercises": "sheet1.*",
		"enabledPenaltyForExercises": "sheet2.*"
    },
    {
        "shortName": "stackingXY",
        "button": "Stacking (XY)",
        "message": "Hier wird mehrmals abgezogen",
        "penaltyRule": {
          "shortName": "stackingPenalty",
          "penalty": 0.5,
          "maxUses": 4
        },
        "appliesTo": "functionality"
    }
]
See the Development chapter for more info about creating a new PenaltyRule.
There is an option to specify which exercises a configuration should be used for. If someone tries to start an assessment for an exercise with an id not specified in the configuration, a warning is shown.
"allowedExercises": [
    42
]
where 42 is the id of the exercise. This can be found in the header of
the page of the exercise:
https://artemis.example.com/course-management/14/programming-exercises/42.
Also, the last number of this URL is the exercise id.
There can be any number of exercise ids in a configuration, if none is specified, no validation of the id will be done.
Currently, there are two penalty rule types you may use in your config:
-
ThresholdPenalty: Iff the number of annotations with the given mistakeType >= $threshold, then penalty is added -
CustomPenalty: The tutor defines the message and the penalty.
Penalty Calculation is done rating-group-wise. For each rating group:
- all mistake types are evaluated: The corresponding annotations are used to calculate the mistake type's contribution.
- All mistake types' contributions are summed and optionally compared against the rating group's penalty limit which acts as a cap.
- Each annotation generates a MANUAL feedback, visible in the editor. No penalty points given, here!
- Each Rating group generates a
MANUAL_UNREFERENCEDfeedback, visible below the editor (in the browser Artemis client). Here, penalty points are given. - Also, one (or more) MANUAL_UNREFERENCED feedback (invisible for students) is generated, which is used as a database for this client (containing serialized client-specific annotation data, including model identifiers, GUI markers, startLine, endLine, ...)