-
Notifications
You must be signed in to change notification settings - Fork 363
Hardware Integration
This contains hardware integration notes on how to connect physical robots to CHAMP controller.
Here are a few open source quadrupedal robot projects you can use to configure CHAMP with:
First, generate a configuration package using champ_setup_assistant. Follow the instructions in the README file to configure your own robot. The generated package contains:
- URDF path to your robot.
- Joints and Links map to help the controller know the semantics of the robot.
- Gait parameters.
- Hardware Drivers.
- Navigation parameters (move_base, amcl and gmapping).
In order to convert CHAMP's output (12 DOF actuator joint angles) to physical movements, you'll need to create a hardware interface for your actuators that is able to do the following:
-
Subscribe to trajectory_msgs/JointTrajectory . This ROS message contains the joint angles (12DOF) that the actuators can use to move the robot.
-
Publish all the actuators' current angle using sensor_msgs/JointState to 'joint_states' topic.
-
Control the actuators and read its angle (optional) programmatically.
One way to do this is to use ros_control infrastructure where you can write the necessary hardware API calls to rotate and read the current angle of the actuators. For open-loop systems like digital servo based robots, you can just store the required angles and use those as pseudo actuator feedback.
A simpler approach, is to write a ROS node that contains a publisher and subscriber to the the topics mentioned above and directly call the hardware API to rotate and read the actuator angles.
Once you have a hardware interface, you can now include its launch file in your configuration package's bringup.launch:
cd <your configuration package folder>/launch
nano bringup.launch
Insert your hardware interface's launch file between the group tags. You can click here as an example.
You can change CHAMP's joint control topic name to match your hardware interface's trajectory_msgs/JointTrajectory msg by editing bringup.launch and changing 'joint_controller_topic' arg to the correct topic.
Now you can launch CHAMP and your hardware driver by running:
<my_robot_config> bringup.launch rviz:=true hardware_connected:=true
You can permanently enable 'hardware_connected' arg by setting it to 'true' inside the bringup.launch file.
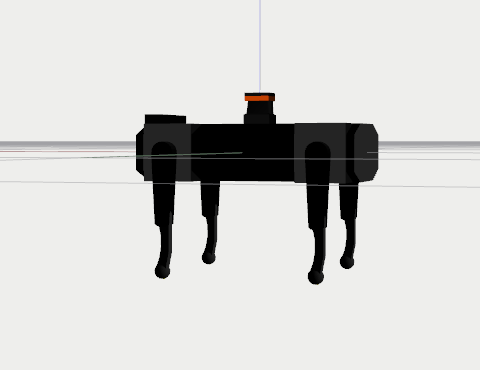
All actuators when in zero position should stretch the robot's legs towards the ground. From the frontal and sagittal view, all legs should be perpendicular to the ground.

If you want to run the robot autonomously, you need to have an IMU installed for odometry data. You can use any IMU as long as the data is wrapped in sensor_msgs/Imu and published in 'imu/data' topic.
You can use the following pre-configured LIDARs in your application:
- XV11 Lidar
- RPLidar
- YDLIDAR X4
- Hokuyo (SCIP 2.2 Compliant)
Enable any of these supported LIDARs by using the 'laser' arg in your configuration package's bringup.launch file:
cd <your configuration package folder>/launch
nano bringup.launch
change sim to any of the following:
- hokuyo
- rplidar
- xv11
- ydlidar
In the same bringup.launch file, you can define the sensor's transform using static_transform_publisher node.
Foot sensors are not required for CHAMP's stock quadruped controller to work. If you're adding foot sensors for your application, the data must be wrapped in champ_msgs/ContactsStamped and published in 'foot_contacts' topic.
The 'publish_foot_contacts' arg must also be set to false to disable the open-loop implementation in the controller:
cd <your configuration package folder>/launch
nano bringup.launch
set 'publish_foot_contacts' arg value to 'false'.
You can use the joints GUI if you want to control your actuators directly. This will be useful in calibrating and debugging your actuators.
Run bringup.launch:
roslaunch <my_robot_config> bringup.launch rviz:=true hardware_connected:=true publish_joint_control:=false
If your hardware interface uses a different topic, add an additional argument 'joint_controller_topic' and pass your hardware interface's joint control topic.
roslaunch <my_robot_config> bringup.launch rviz:=true hardware_connected:=true publish_joint_control:=false joint_controller_topic:=new_control_topic
Run the GUI:
roslaunch champ_bringup joints_gui.launch