-
Notifications
You must be signed in to change notification settings - Fork 42
Creating Backgrounds with Blender, Riistudio, and BrawlCrate
- About This Guide
- Getting Set Up: Required Programs
- Some things to be aware of:
- Blender
- RiiStudio
- BrawlCrate
- Editing your .scene file in a text editor
- Testing your board on-the-fly with Dolphin Emulator!
- Conclusion
- Uploading to the Custom Street repository
- Next Steps
Welcome to the first part of a multi-part guide on making custom backgrounds in Fortune Street!
This guide will cover the basics of importing custom background models into Fortune Street. This guide will just cover importing a model and its textures into the game. Future guides will cover lighting, animation, and other aesthetical touches.
The majority of the work is done through Blender, a free, open-source modeling software for Windows, Mac, and Linux operating systems. This guide assumes you already have a basic knowledge of Blender. While pointers will be given when possible as to where things are, it is still recommended to learn Blender's user-interface first if you are unfamiliar with it.
Note
This guide is meant for Blender 3.3 LTS. While future versions of Blender should work, certain tools may be relocated, and compatability may not be guaranteed.
This guide will cover these topics:
- Importing your model into Blender and setting everything up.
- Exporting the model to RiiStudio and converting it into a .brres.
- Using BrawlCrate to add in custom models and textures to the .cmpres archive.
- Setting up a .scene file.
Blender 3.3 LTS (for editing 3D models):
https://www.blender.org/download/releases/3-3/
RiiStudio (for importing .fbx models and extracting them as .brres archives):
https://github.com/riidefi/RiiStudio/releases/tag/Alpha-5.11.1
BrawlCrate (for importing models, textures, and other data to a .cmpres archive):
https://github.com/soopercool101/BrawlCrate/releases
Starter Files. Eveything else you need to make a custom enviornment will be included in this download. It contains an empty .cmpres only containing camera movement, and a template .scene file.
https://drive.google.com/uc?export=download&id=1KVQ2pOyhLkD4nDw8BjISzl_8FrvEDilP
An environment rip of some sort. (For the purposes of this guide, I will be importing Wild Woods from Mario Kart 8):
https://www.models-resource.com/wii_u/mariokart8/model/15595/
Visual Studio Code (Optional) (Recommended for editing .scene files!):
https://code.visualstudio.com/
Dolphin Emulator (Optional, but HIGHLY recommended):
https://dolphin-emu.org/download/
Important
-
Fortune Street Wii is a pretty beefy game. In other words, it can handle models with very high poly-counts. Even certain enviornments from some current-generation games will work just fine on an original Wii system with little polygon reduction needed.
- Most vanilla Fortune Street boards have a polycount of about 20,000-60,000 polygons.
- Generally speaking, the polycount of your custom environment should be around or below 100,000 polygons, if possible.
-
Despite the polygon/triangle limit being very high, vertices (the points that make up polygons) have a hard limit of 65,535 vertices per .mdl0. This can be avoided, however, by separating a mesh object, and having the game load each one individually.
-
Additionally, overly-large .cmpres filesizes (> ~5 MB) can cause the game to crash due to a lack of memory. Keep this in mind, especially with textures.
-
Having too many bones in your object can cause the venture card menu to break and crash the game. Unless you plan on animating your background using skeleton animations, it's recommended to delete most bones (if your model has a bunch), or have RiiStudio merge all the bones into one.
Decompress the downloaded .zip archive somewhere where you'll be working on the custom enviornment. Once that is done, open Blender. If you get the splash screen, choose General under the New File column. If the splash screen does not show, go to File > New > General. Once you've done this, take a look at the Collection pane in the top-right. In that pane, select the Camera, the Cube, and the Light and delete each of them by either pressing DEL or Right-Clicking on the object and selecting Delete from the context menu* so the scene will be empty.
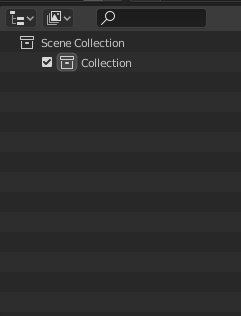
A very empty scene.
Next, hover to File > Import. There will be a list of model types you can import. Generally, most models are in .dae format, though there may be some that are in different formats such as .obj.
Select the one that applies to the model you've downloaded, and import it.

World of Nothingness.
The scene should come in completely gray. This is okay and is only because the viewport, by default, shows all objects with solid shading. To enable the textures, simply click the Material Preview button in the upper-right corner of Blender's 3D viewport:

Let there be textures!

Woah!
After setting the viewport shading mode to Material Preview, your model should now be visible with textures!
Note
If you notice transparent textures behaving strangely, such as their background region appearing opaque or clipping behind geometry, this is perfectly normal! Everything will be fixed upon importing into RiiStudio, and the transparent textures should behave normally in-game.
If you are using a standard three-button mouse and are running Windows, the controls for the viewport are as follows:
Rotate the camera: click and hold the scroll wheel down and drag the mouse around.
Move the camera around: Shift + press and hold the scroll wheel down and drag the mouse around.
Move the camera forward and backward: Ctrl + click and hold the scroll wheel down and drag the mouse around.
Camera zoom: Scroll wheel up and down.
Free look: Press Shift + ~. You'll enter free look mode. Refer to the below image for navigating in free look mode. Once you are done, Left Click to exit at your current position, or Right Click to exit and revert to your previous position.

If the model is really big, it may clip out of Blender's viewport rendering region. While the rendering region can be changed if needed, it may be more simple to downsize the model. To do so, select everything by pressing the A key on the keyboard. Everything should be outlined now.
Click on the Scale Tool, and you should now see a draggable circle. Click and hold on the white circle, and drag it inwards whilst holding CTRL. Holding down CTRL will make the model's scale snap to tenths. This'll make it easier to re-scale models in the future, if needed. It should now be exactly 1/10th the size it once was. Repeat this process if needed.

If you haven't already, ensure the Overlay button is blue (enabled), and navigate to the Viewport Overlay menu. Ensure Statistics is enabled.
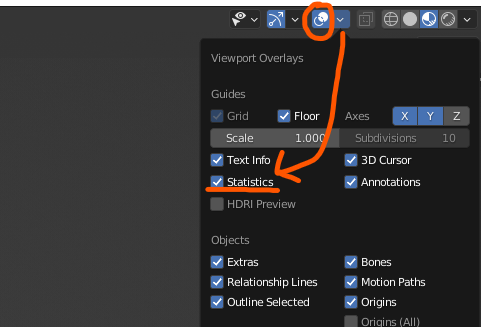
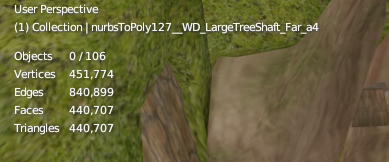
Some additional information about your model should appear at the upper-left corner of your viewport. Pay attention to your Triangles count. In the model I just imported, it's over 440,000 triangles, which probably won't run on original hardware very well. This is where reducing the polygon count comes into play.
Since the custom enviornment will only be a certain portion of the track, everything outside the viewable area should be deleted. Do that first.
Next, if the polygon count is still too high, then each model will have to be cleaned up. Cleaning up models is not something the guide will cover, and it requires a lot of time and paitence to do just right. To start off, enter Edit Mode by selecting a model and pressing TAB (or click on the mode selection dropdown in the upper-left corner of the viewport). Select what you want to clean up, and navigate to the following menu:

There will be several options for cleaning up the model and reducing its polygon count. Explore each option and find the one that suits your need the best.
Additionally, if the vertex count is too high, using Merge by Distance at a very low merge distance can merge two vertices at the same position, greatly reduing the vertex count.

The cleaned-up result!
From here, we're ready to save and export. Save the .blend file somewhere you will know where to find it by using File > Save. Then go to File > Export > FBX (.fbx). On this screen, change the Path Mode to Copy. Next, deselect all Object Types except Mesh, then under Armature, uncheck Add Leaf Bones. Name the file and save it somewhere you will be able to find it.

Do all these things before you export!
In the directory in which you saved your .fbx file, there should be a folder with all the textures. If the textures are not already in the same directory as your .fbx file, move the contents of the folder into the same directory as the .fbx, then delete the emptied folder.


Ensure the images are placed in the same directory as the .fbx.
Open RiiStudio.

The starting window should be pretty blank. To open your .fbx file, either Navigate to File > Open, and select your .fbx from the file selection dialogue, or simply drag your .fbx file to the RiiStudio window to import it.
If the program asks you which file format to create, choose the BRRES Model option.
In the following menu, configure the options so your window apperas as below.

Note
Note the Model Scale option. I set the scale to 1000 as I find that is what works best for me. It may be diffrerent for everyone. I'd recommend setting a scale of 100. It's not a big deal what you set it to, as if the model needs to be resized, it can be done through the .scene file.
Note
The options marked with an asterisk (*) should be the opposite as they appear in the picture if you plan to use animations for your model. If you are not, or have no idea what you're doing, leave them as they are in the picture.
Click Next to proceed.
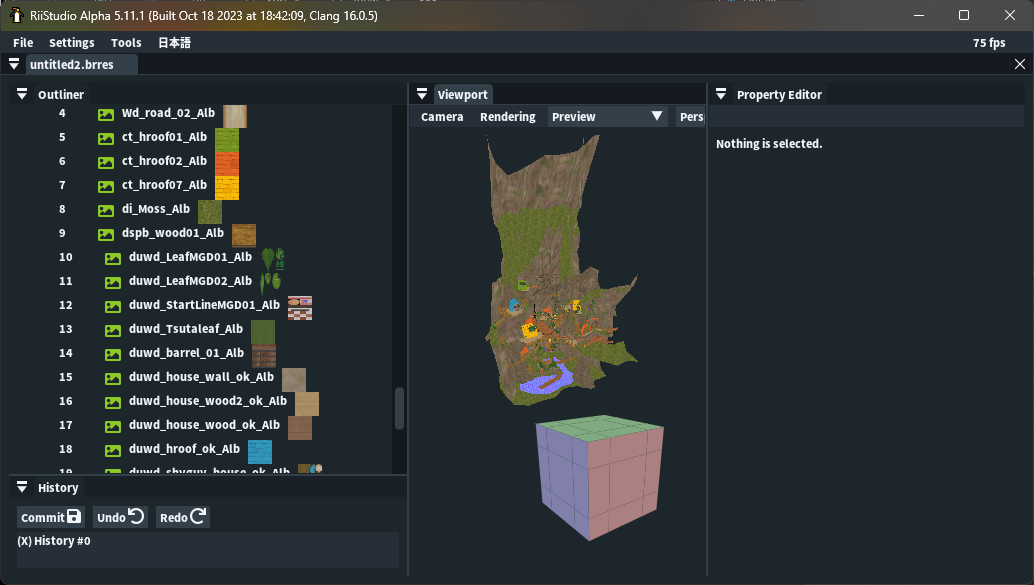
If nothing went wrong with the conversion, your model should be successfully imported! Navigation around the 3D space is pretty similar to Blender's Free Look mode.
As for transparent textures, if they are not automatically configured, they can be configured pretty easily by clicking on each material (multi-selection via holding down CTRL is supported), and setting their transparency option to Stencil Alpha or Translucent, depending on if the transparent texture has translucent pixels or not.

The model should then be ready to export as a .brres! Go to File > Save As, and save the .brres.
In BrawlCrate, open the BRRES file by choosing File > Open.... Select the .brres you just saved, and click Open.

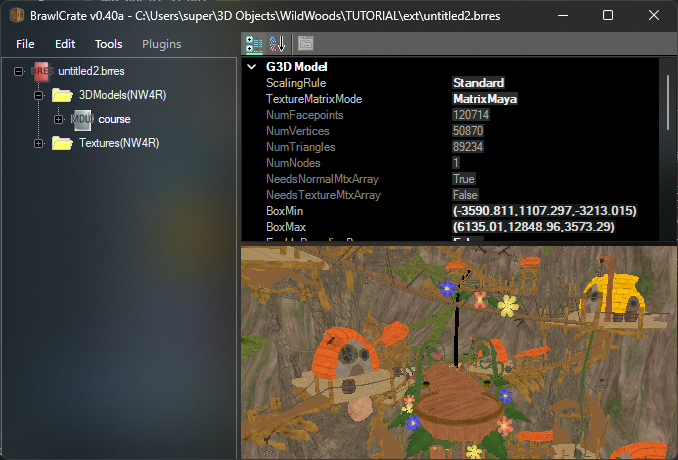
Upon clicking on the .mdl0 in the 3DModels(NW4R) folder, you should see your 3D model!
Check the file size of the .brres you just opened. If it's very large (over ~3 MB), you may want to reduce the filesize by reducing the size of textures. This can be done easily by going into the Textures(NW4R) folder, right-clicking on a .TEX0 image that is large in size (256x256 or over is considered large), and clicking on Re-Encode.

In the following window that opens, you can reduce the image size by changing the values in Dimensions to something lower. Ensure both image dimensions are a power of 2 (2,4,8,16,32,64,128,256...). Click Okay when finished.
Once you are satisfied with what you have, save the .brres file by navigating to File > Save, or pressing CTRL + S.
Then, right-click on the red .brres file in BrawlCrate, and select Export All. Create a new folder where everything will be exported, and then proceed. If BrawlCrate asks for an output format for TEX0Node, select NW4R Texture (*.tex0) from the drop-down menu. Select OK.


The folder in which you exported the .brres assets to should appear something like this.
It's time to import the assets of your model into the .cmpres file! Open that template .cmpres file you downloaded into BrawlCrate.
Once opened, right click on the red .cmpres file and navigate to Import > Models. Import the extracted .mdl0 file. Repeat the process for Textures, and anything else (if applicable).
Tip
You can import all the textures at once by multiselection through the File Explorer window by pressing CTRL + A.

At this point, you may also want to consider renaming the 'course' .mdl0. This is the default name for every model exported by RiiStudio. Especially do this if your board is going to be made up of multiple models. You can rename a file in the .brres in BrawlCrate simply by right-clicking the grey .mdl0 file and navigating to Rename, or pressing CTRL + N.

That should be it! Remember to save the .cmpres in BrawlCrate by pressing CTRL + S.
Start by opening a text editor of your choice. I highly recommend Visual Studio Code for this. Open the template.scene file that was provided to you.
Tip
Before editing your .scene, it is best you understand what is going on in it, first.
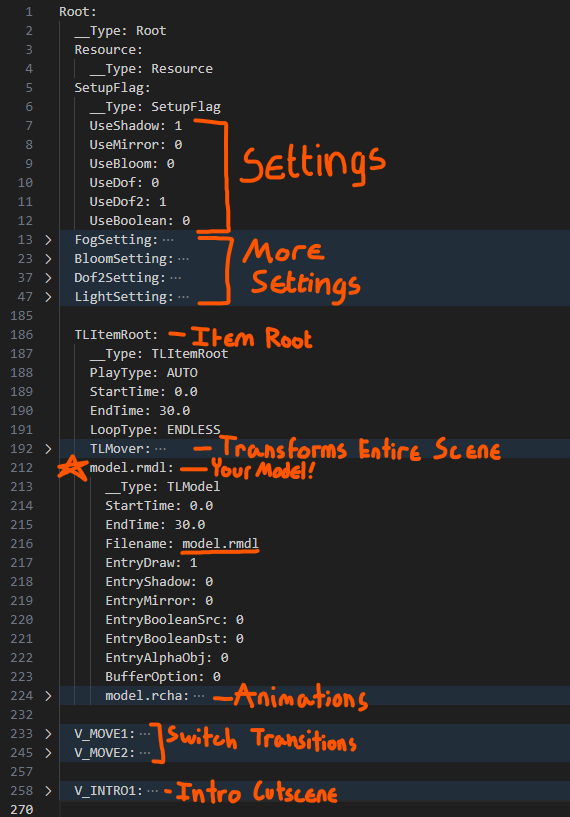
Everything is laid out in a hierarchical manner. There is one root, and one TLItemRoot. This TLItemRoot contains every item that is shown in the background at all times. Anything not in TLItemRoot but inside other roots such as V_MOVE1 or V_MOVE2 are shown under certain circumstances. Generally, you wont be needing to use those, unless your board has multiple switch states, in which case using those V_MOVE roots becomes necessary. Otherwise, just leave those alone for the time being. These will be explained in a separate tutorial.
Additionally, there is the special V_INTRO1 root, which contains the camera used for the opening cutscene of the board. Generally, you wont need to change this unless you plan on changing the opening cutscene, so leave this alone too.
There's also Setup Flags near the top of the .scene file, which displays a list of graphical enchancements the background uses, such as Depth of Field, or Bloom. Settings with a value of 0 are false, and thus de-activated. Settings with a value of 1 are true, and thus activated. Certain settings also have additional parameters that can be adjusted to fine-tune your settings. These will also be explained in another separate tutorial.
For each model in your enviornment, there should be a .rmdl item for each one. Since we're only just importing one (which is pretty much already our entire background), we can just rename the model portion of the .rmdl entry.
Replace the word model in your .rmdl entry (for both the entry's name and the Filename parameter) to whatever your .mdl0 is named in your .cmpres.

Save the .scene file!
Now it is time to test it in Dolphin!!
Here is an easy way to start testing your board quickly between edits! Dolphin supports running a game from a game's extracted filesystem. This is exactly what we're going to be doing.
If you haven't already, dump a clean copy of your Fortune Street game. You can do this by adding your .iso/.wbfs/etc. to a path set up in Dolphin, and then proceeding by right-clicking your game on the list, and opening the Properties menu.

Inside the properties window that appears, chose the Filesystem tab from the top selector (you may have to press a button to scroll for it).
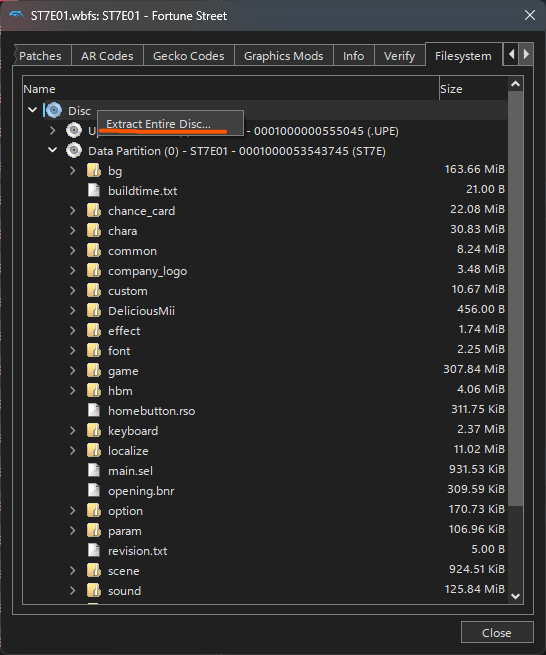
Upon entering the Filesystem menu, you should come across something like this. Right-click on Disk, and select Extract Entire Disc.... Extract it somewhere.
Navigate to the directory in which you extracted your game. Inside the extracted filesystem, navigate to \DATA\files\bg\langXX\. (XX is the language of your game. Select the language you use for the game. If using an American copy of the game, use langEN, not langUK).

The boards here are refered to by their internal IDs. Boards prefixed with bg0XX are Super Mario series boards. Boards prefixed with bg1XX are Dragon Quest series boards. bg901 is the tutorial background. bg103 and bg103_e are the exact same, however bg103 is only used in Standard mode, while bg103_e is used in Easy mode.
Replace the .cmpres of a board of your choice with your custom .cmpres. Ensure your custom .cmpres is renamed to the board you are replacing once moved here. Here is a guide as to what is what:
| Background ID | Board Name |
|---|---|
| 001 | Yoshi's Island |
| 002 | Mario Circut |
| 003 | Peach's Castle |
| 004 | Mario Stadium |
| 005 | Delfino Plaza |
| 006 | Super Mario Bros. |
| 007 | Bowser's Castle |
| 008 | Starship Mario |
| 009 | Good Egg Galaxy |
| 101 | Castle Trodain |
| 102 | Ghost Ship |
| 103 | Colossus (Standard) |
| 103_e | Colossus (Easy) |
| 104 | Mt Magmageddon |
| 105 | Slimenia |
| 106 | Robbin' Hood Ruins |
| 107 | Alefgard |
| 108 | Alltrades Abbey |
| 109 | The Observatory |
| 901 | Tutorial Board |
Next, go back until you reach the \files\ directory. Navigate to the scene\ folder. This is where your custom .scene will go. Again, replace the .scene of the board you are replacing with your custom .scene, renaming your .scene to the board you are replacing in the process.
You can test your edited filesystem of Fortune Street now by opening the main.dol file located in DATA\sys\ of your extracted game in Dolphin. I recommend setting a path in Dolphin to there, so you can easily test subsequently.
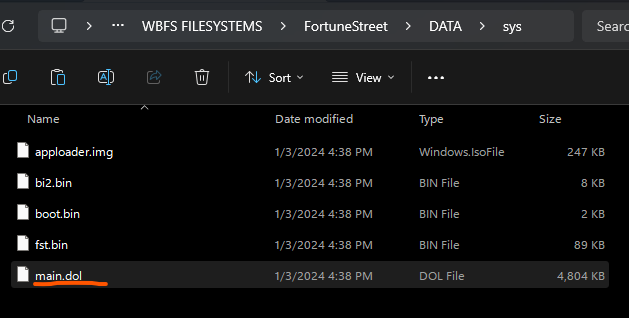
Now load into your board and see if everything works!

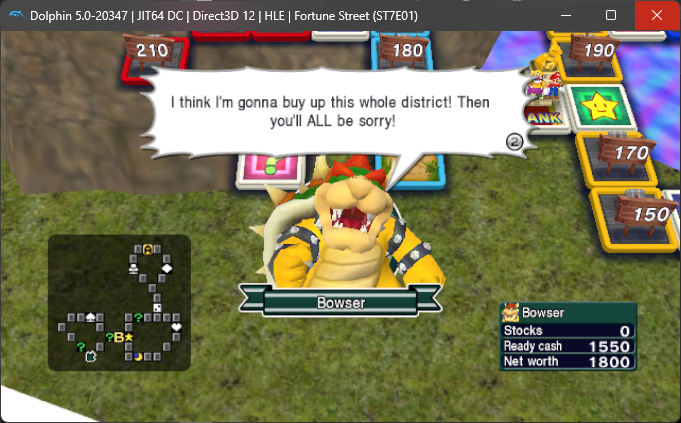
It's in! ...kind of?
You should be able to see your background in-game. If not, try using Dophin's free-look camera to see if you can find your background somewhere. If it is just off screen, you'll have to adjust the TLMover node in your .scene file.
Noticed the little TLMover node inside the TLItemRoot? This is what is used to adjust not only the placement of your background, but also its scale and rotation, too!
What happens next will be a bit of trial and error. Adjust the parameters of the Trans, Rot, and Scale so your background appears where you want it to be. For instance, if the background is too big, decrease the scale. If the background is too high up, lower the Y value.
Remember to save the .scene file, and replace the .scene in the filesystem if you're not editing directly from it!

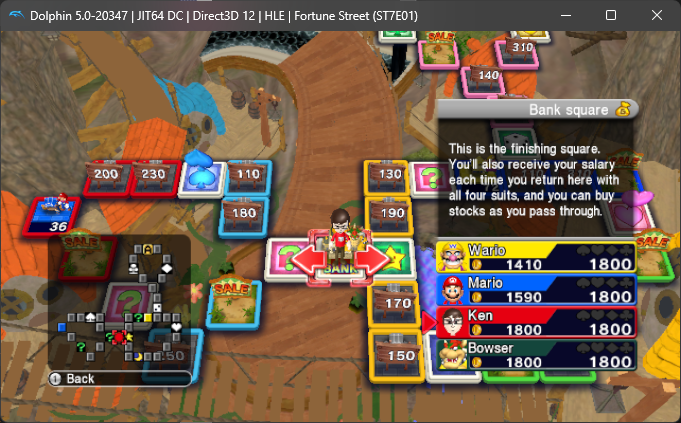
Bazinga!
This concludes the basic walkthrough of taking a 3D model and importing it as an enviornment in Fortune Street. However, this is only scratching the surface of the possibilities of custom backgrounds! While the background may not be very pretty-looking right now, in the future parts of this mega-tutorial, we will be covering adding effects such as bloom, lighting, and shading to make your boards really pop and shine!

Runs just fine on 2006 hardware too!
If you'd like to have your board or environment uploaded to the repo, you'll need to do a little extra work on top of the normal upload process.
First you'll need to create a zip with all the files for the environment:
- the .scene file
- the .cmpres file
- the three
ui_menuimages - a map icon
- (Optionally) music you'd like associated with your board
Start by uploading this .zip file to Google Drive. Then, create a fork of the fortunestreetmodding.github.io repo on Github. In your fork, you must edit _data/background.yml to include the details of your environment at the bottom. Follow the format of the other backgrounds for guidance. Make sure to include the Google Drive link here too.
Now, navigate to the _backgrounds folder and add a new .webp image of your environment for use on the Backgrounds webpage.
Finally, create a pull request to the main repo requesting that your background be added to the repo, and our reviewers will look over the submission and let you know if there are any adjustments that need to be made.
Once that's done, your board will be uploaded to the repo, and board creators can then use the uploaded background by referring to its name in their .yaml files.
If you would like to add custom music to your new environment, continue forward with our guide, Creating Custom Music for your Board!
If you need help with anything else, feel free to reach out! The best place to reach out is on Discord: there are several active communities that can help with the various aspects of mod-making.
Custom Street on Discord:
https://discord.gg/DE9Hn7T
Brawl Knowledge Compendium (for help with BrawlCrate):
https://discord.gg/s7c8763
Custom Brawl Modding (for help with all non-Fortune-Street-specific
aspects of the modding process):
https://discord.gg/GbxJhbv
OpenVFX: The Blender Hub (for help with Blender):
https://discord.gg/blender
For the latest Fortune Street modding tools:
https://github.com/FortuneStreetModding
Additional Fortune Street discussion:
https://gamefaqs.gamespot.com/boards/632973-fortune-street