在实际开发的过程中,除了广为人知的利用 StateListDrawable 设置按钮点击特效,我们有时可能会接到一些这样的需求,比如要求我们的头像显示成圆形或者圆角矩形,甚至要加上可变颜色的边框,或者要求你做一套启动、暂停、快进和快退的视频控制按钮并且可以改变按钮图标颜色。可能某些时候第一反应就是用自定义 View 来实现,但是如果熟悉了 Drawable 的用法之后,这些效果同样可以利用它来完成,而选择哪种 Drawable 来实现也大有讲究。
Google 官方文档中列出了各种各种各样的 Drawable,那么它们都是如何使用的呢?
本系列文章将分为两个部分,介绍其中大部分 Drawable 的用法。
BitmapDrawable 可以看作是对 Bitmap 的一种包装,它可以设定 Bitmap 的显示方式、位置等属性。
BitmapDrawable 对应 <bitmap> 标签定义,xml 语法如下:
<?xml version="1.0" encoding="utf-8"?>
<bitmap
    xmlns:android="http://schemas.android.com/apk/res/android"
    android:src="@[package:]drawable/drawable_resource"
    android:antialias=["true" | "false"]
    android:dither=["true" | "false"]
    android:filter=["true" | "false"]
    android:gravity=["top" | "bottom" | "left" | "right" | "center_vertical" |
                      "fill_vertical" | "center_horizontal" | "fill_horizontal" |
                      "center" | "fill" | "clip_vertical" | "clip_horizontal"]
    android:mipMap=["true" | "false"]
    android:tileMode=["disabled" | "clamp" | "repeat" | "mirror"]  />
其中各个属性的含义分别是:
| 属性 | 含义 |
|---|---|
| src | Bitmap 对象的引用路径 |
| antialias | 抗锯齿效果,建议开启 |
| dither | 是否防抖动。当位图像素与屏幕像素不匹配(如 ARGB_8888 的位图显示在 RGB_565 的屏幕上)时,防止图片失真,建议开启 |
| filter | 是否启用位图过滤。开启后,当图片进行拉伸或者压缩时,能够进行平滑过渡 |
| gravity | 当位图尺寸小于容器尺寸时在容器中的摆放位置 |
| mipMap | 启用或停用 mipmap 提示,默认为 false |
| tileMode | 平铺模式。默认:disable;clamp:复制边沿的颜色;repeat:水平和垂直方向重复绘制图片;mirror:水平和垂直方向交替镜像进行重复绘制 |
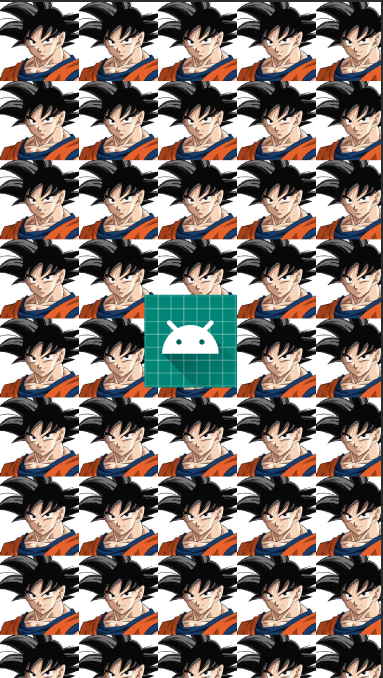
下面以定义一个使用图片作为背景的 Drawable 为例,展示 BitmapDrawable 的简单实用方法。
定义
<?xml version="1.0" encoding="utf-8"?>
<bitmap xmlns:android="http://schemas.android.com/apk/res/android"
    android:src="@mipmap/kakarotto"
    android:antialias="true"
    android:dither="true"
    android:filter="true"
    android:gravity="center"
    android:tileMode="repeat"/>
使用
<?xml version="1.0" encoding="utf-8"?>
<androidx.constraintlayout.widget.ConstraintLayout xmlns:android="http://schemas.android.com/apk/res/android"
    xmlns:app="http://schemas.android.com/apk/res-auto"
    xmlns:tools="http://schemas.android.com/tools"
    android:layout_width="match_parent"
    android:layout_height="match_parent"
    android:background="@drawable/bitmap_drawable"
    tools:context=".MainActivity">

    <TextView
        android:layout_width="wrap_content"
        android:layout_height="wrap_content"
        android:text="Hello World!"
        app:layout_constraintBottom_toBottomOf="parent"
        app:layout_constraintLeft_toLeftOf="parent"
        app:layout_constraintRight_toRightOf="parent"
        app:layout_constraintTop_toTopOf="parent" />

</androidx.constraintlayout.widget.ConstraintLayout>
效果图
官方文档中对 ShapeDrawable 的定义是这样的:
A Drawable object that draws primitive shapes. A ShapeDrawable takes a
Shapeobject and manages its presence on the screen. If no Shape is given, then the ShapeDrawable will default to aRectShape.This object can be defined in an XML file with the
<shape>element.
即它是一个用来绘制原始形状的 Drawable 对象。
而对 GradientDrawable 的定义是:
A Drawable with a color gradient for buttons, backgrounds, etc.
It can be defined in an XML file with the
<shape>element. For more information, see the guide to Drawable Resources.
根据描述可知,它是一个具有色彩梯度(color gradient)的 Drawable。
GradientDrawable 和 ShapeDrawable 都采用 shape 标签来定义,和 ShapeDrawable 最大的不同的就是它拥有 gradient 属性,下面以 GradientDrawable 为例,讲解 shape 标签的用法,它的语法如下:
<?xml version="1.0" encoding="utf-8"?>
<shape
    xmlns:android="http://schemas.android.com/apk/res/android"
    android:shape=["rectangle" | "oval" | "line" | "ring"] >
    <corners
        android:radius="integer"
        android:topLeftRadius="integer"
        android:topRightRadius="integer"
        android:bottomLeftRadius="integer"
        android:bottomRightRadius="integer" />
    <gradient
        android:angle="integer"
        android:centerX="integer"
        android:centerY="integer"
        android:centerColor="integer"
        android:endColor="color"
        android:gradientRadius="integer"
        android:startColor="color"
        android:type=["linear" | "radial" | "sweep"]
        android:usesLevel=["true" | "false"] />
    <padding
        android:left="integer"
        android:top="integer"
        android:right="integer"
        android:bottom="integer" />
    <size
        android:width="integer"
        android:height="integer" />
    <solid
        android:color="color" />
    <stroke
        android:width="integer"
        android:color="color"
        android:dashWidth="integer"
        android:dashGap="integer" />
</shape>
其中各个属性标签的含义分别是:
android:shape
表示形状,它的值可以是 rectangle(矩形)、oval(椭圆)、line(横线)和 ring(圆环),默认为 rectangle。 此外,当形状值是 ring 的时候,还有一下几个属性可配置:
| 属性 | 含义 |
|---|---|
| android:innerRadius | 圆环的内半径。与 innerRadiusRatio 同时设置时,以 innerRadiusRatio 为准 |
| android:innerRadiusRatio | 圆环的内半径占环宽度的比率 |
| android:thickness | 圆环厚度。与 thicknessRatio同时设置时,以 thicknessRatio 为准 |
| android:thicknessRatio | 圆环的厚度占环宽度的比率 |
| android:useLevel | 一般为 false,否则可能达不到预期显示效果,除非把它当作 LevelListDrawable 来使用 |
<corners>
<corners
    android:radius="integer"
    android:topLeftRadius="integer"
    android:topRightRadius="integer"
    android:bottomLeftRadius="integer"
android:bottomRightRadius="integer" />指图形的圆角半径,仅当 shape 属性为 rectangle 即形状是矩形时生效,数值越小越接近直角,android:radius 同时设置四个角的半径,其他四个属性则可单独设置某个角的半径。
<gradient>
<gradient
    android:angle="integer"
    android:centerX="integer"
    android:centerY="integer"
    android:centerColor="integer"
    android:endColor="color"
    android:gradientRadius="integer"
    android:startColor="color"
    android:type=["linear" | "radial" | "sweep"]
    android:usesLevel=["true" | "false"] />
表示颜色渐变,它的各个属性值的含义分别是:
| 属性 | 含义 |
|---|---|
| android:angle | 渐变的角度。必须是 45 的倍数,默认值为 0。0 为从左到右,90 为从上到下 |
| android:centerX | 渐变中心的相对 X 轴位置 (0 - 1.0) |
| android:centerY | 渐变中心的相对 Y 轴位置 (0 - 1.0) |
| android:startColor | 渐变的起始颜色 |
| android:centerColor | 渐变的中间颜色 |
| android:endColor | 渐变的结束颜色 |
| android:gradientRadius | 渐变的半径,仅在 android:type="radial" 时适用 |
| android:useLevel | 一般为 false,否则可能达不到预期显示效果,除非把它当作 LevelListDrawable 来使用 |
| android:type | 渐变类别。它的值可以为:linear(线性),默认值、radial(径内渐变)和sweep(扫描渐变) |
<padding>
距离内容或者子元素的内边距,每个方向可以单独设置。
<size>
设置 shape 大小,width 表示宽度,height 表示高度。需要注意的是,这个一般并不是 shape 的最终大小,如果用作 View 的背景,它的大小是由 View 的大小来决定的。
<solid>
表示纯色填充,color 属性为填充的颜色。
<stroke>
边框描述,它的各个属性值的含义分别是:
| 属性 | 含义 |
|---|---|
| android:width | 边框宽度 |
| android:color | 边框颜色 |
| android:dashWidth | 虚线的线段宽度 |
| android:dashGap | 虚线之间的空白间隔 |
需要注意的是,如果需要设置边框虚线效果,则需要同时设置 dashWidth 和 dashGap 的值不为 0,否则无法显示虚线效果。
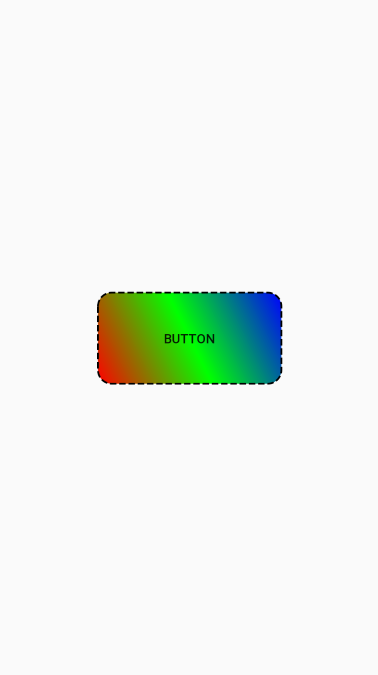
下面以定义一个圆角并带有其他效果的 Drawable 为例,展示 GradientDrawable 的简单用法。
定义
<?xml version="1.0" encoding="utf-8"?>
<shape xmlns:android="http://schemas.android.com/apk/res/android"
       android:shape="rectangle">

    <!--圆角半径-->
    <corners
            android:topLeftRadius="15dp"
            android:topRightRadius="15dp"
            android:bottomLeftRadius="15dp"
            android:bottomRightRadius="15dp"/>

    <!--内边距-->
    <padding
            android:left="10dp"
            android:top="10dp"
            android:right="10dp"
            android:bottom="10dp" />

    <!--渐变效果-->
    <gradient android:angle="45"
              android:type="linear"
              android:startColor="#ff0000"
              android:centerColor="#00ff00"
              android:endColor="#0000ff" />

    <!--预设大小-->
    <size
        android:width="200dp"
        android:height="100dp" />

    <!--边框样式-->
    <stroke
            android:width="2dp"
            android:color="#000000"
            android:dashWidth="7dp"
            android:dashGap="3dp" />

</shape>
使用
<?xml version="1.0" encoding="utf-8"?>
<androidx.constraintlayout.widget.ConstraintLayout xmlns:android="http://schemas.android.com/apk/res/android"
    xmlns:app="http://schemas.android.com/apk/res-auto"
    xmlns:tools="http://schemas.android.com/tools"
    android:layout_width="match_parent"
    android:layout_height="match_parent"
    tools:context=".GradientDrawableActivity">

    <Button
            android:text="Button"
            android:layout_width="200dp"
            android:layout_height="100dp"
            android:background="@drawable/gradient_drawable"
            android:id="@+id/textView"
            app:layout_constraintTop_toTopOf="parent"
            app:layout_constraintBottom_toBottomOf="parent"
            app:layout_constraintStart_toStartOf="parent"
            app:layout_constraintEnd_toEndOf="parent"/>

</androidx.constraintlayout.widget.ConstraintLayout>
效果图
StateListDrawable 可以根据对象的状态并使用不同的 item(Drawable) 对象来表示同一个图形。如可以根据 Button 的状态(按下、获取焦点等)来显示不同的 Drawable 从而实现点击的效果。
定义 StateListDrawable 的语法格式如下:
<?xml version="1.0" encoding="utf-8"?>
<selector xmlns:android="http://schemas.android.com/apk/res/android"
    android:constantSize=["true" | "false"]
    android:dither=["true" | "false"]
    android:variablePadding=["true" | "false"]
    android:autoMirrored=["true" | "false"]
    android:enterFadeDuration="integer"
    android:exitFadeDuration="integer">
    <item
        android:drawable="@[package:]drawable/drawable_resource"
        android:state_pressed=["true" | "false"]
        android:state_focused=["true" | "false"]
        android:state_hovered=["true" | "false"]
        android:state_selected=["true" | "false"]
        android:state_checkable=["true" | "false"]
        android:state_checked=["true" | "false"]
        android:state_enabled=["true" | "false"]
        android:state_activated=["true" | "false"]
        android:state_window_focused=["true" | "false"] />
</selector>
StateListDrawable 的根标签为 **<selector>,**各个属性标签的含义分别是:
android:constantSize
由于 StateListDrawable 会根据不同的状态来显示不同的 Drawable,而每个 Drawable 的大小不一定相同,因此当 constantSize 属性的值为 true 时表示固定大小(值为所有 Drawable 固有大小的最大值),值为 false 时则大小为当前状态下对应的 Drawable 的大小。默认值为 false。
android:variablePadding
表示 StateListDrawable 的 padding 值是否随状态的改变而改变,默认为 false。
android:dither
是否开启抖动效果,默认为 true,建议开启。
android:autoMirrored
某些西亚国家文字是从右至左的,设置此值表示当系统为 RTL (right-to-left) 布局的时候,是否对图片进行镜像翻转。
android:enterFadeDuration 和 android:exitFadeDuration
状态改变时的淡入淡出效果的持续时间
<item>
每个 item 表示一个 Drawable,item 的属性含义分别是:
| 属性 | 含义 |
|---|---|
| android:drawable | drawable 资源,可引用现有的的 Drawable |
| android:state_pressed | 是否处于被按下状态 |
| android:state_focused | 是否已得到焦点状态 |
| android:state_hovered | 光标是否停留在View的自身大小范围内的状态 |
| android:state_selected | 是否处于被选中状态 |
| android:state_checkable | 是否处于可勾选状态 |
| android:state_checked | 是否处于已勾选状态 |
| android:state_enabled | 是否处于可用状态 |
| android:state_active | 是否处于激活状态 |
| android:state_window_focused | 是否窗口已得到焦点状态 |
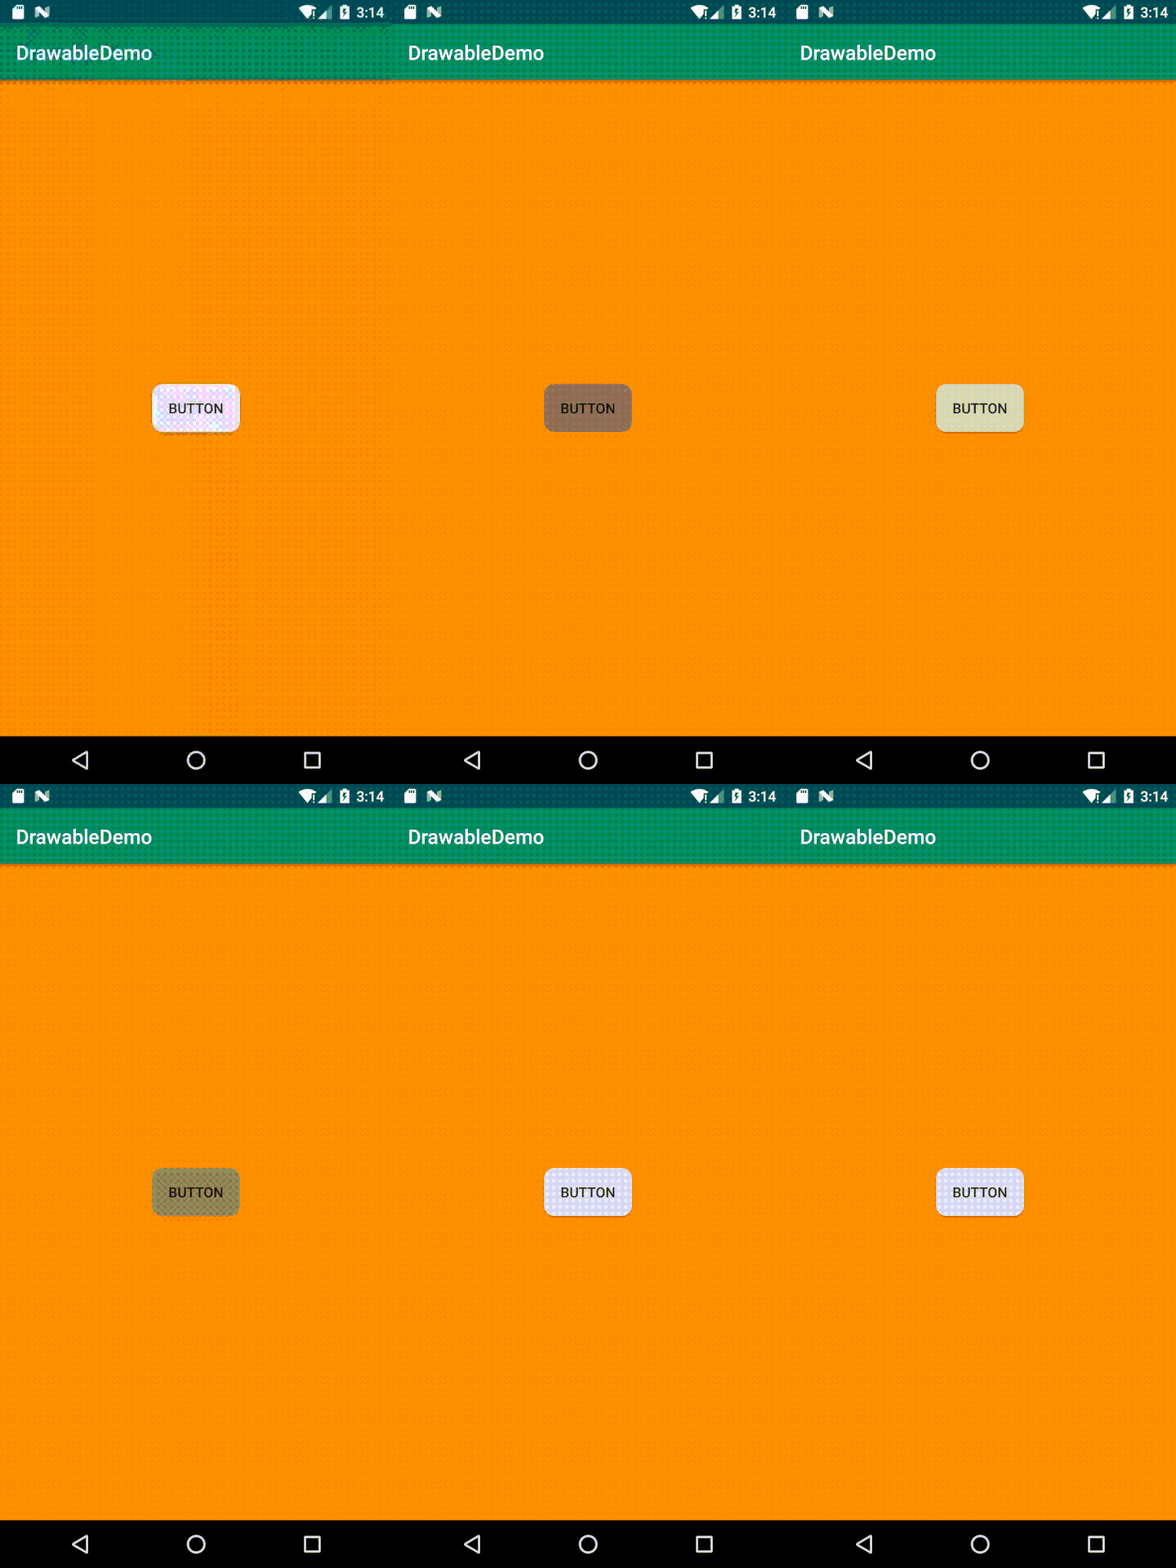
下面以定制一个具有点击效果 Button 的背景为例,展示 StateListDrawable 的用法。
定义
<?xml version="1.0" encoding="utf-8"?>
<selector
        xmlns:android="http://schemas.android.com/apk/res/android"
        android:visible="true"
        android:dither="true"
        android:autoMirrored="true"
        android:enterFadeDuration="200"
        android:exitFadeDuration="200" >
    <!--获取焦点状态-->
    <item
            android:state_focused="true"
            android:drawable="@drawable/shape_dark" />

    <!--按下状态-->
    <item
            android:state_pressed="true"
            android:drawable="@drawable/shape_dark"/>

    <!--默认状态-->
    <item
            android:drawable="@drawable/shape_light"/>
</selector>
使用
<?xml version="1.0" encoding="utf-8"?>
<androidx.constraintlayout.widget.ConstraintLayout xmlns:android="http://schemas.android.com/apk/res/android"
    xmlns:app="http://schemas.android.com/apk/res-auto"
    xmlns:tools="http://schemas.android.com/tools"
    android:layout_width="match_parent"
    android:layout_height="match_parent"
    android:background="@android:color/holo_orange_dark"
    tools:context=".LayerDrawableActivity">

    <Button
            android:text="Button"
            android:background="@drawable/drawable_state_list"
            android:layout_width="wrap_content"
            android:layout_height="wrap_content"
            app:layout_constraintTop_toTopOf="parent"
            app:layout_constraintBottom_toBottomOf="parent"
            app:layout_constraintStart_toStartOf="parent"
            app:layout_constraintEnd_toEndOf="parent" />

</androidx.constraintlayout.widget.ConstraintLayout>
效果图
LayerDrawable 是管理 Drawable 列表的 Drawable。列表中的每个 item 按照列表的顺序绘制,列表中的最后 item 绘于顶部。
定义 LayerDrawable 的语法格式如下:
<?xml version="1.0" encoding="utf-8"?>
<layer-list
    xmlns:android="http://schemas.android.com/apk/res/android" >
    <item
        android:drawable="@[package:]drawable/drawable_resource"
        android:id="@[+][package:]id/resource_name"
        android:top="dimension"
        android:right="dimension"
        android:bottom="dimension"
        android:left="dimension"
        android:gravity=["top" | "bottom" | "left" | "right" | "center_vertical" |
                          "fill_vertical" | "center_horizontal" | "fill_horizontal" |
                          "center" | "fill" | "clip_vertical" | "clip_horizontal"] />
</layer-list>
LayerDrawable 顶层标签为 <layer-list>,它可以包含多个 <item> 标签,每个 item 表示一个 Drawable,item 的属性含义分别是:
| 属性 | 含义 |
|---|---|
| android:drawable | drawable 资源,可引用现有的的 Drawable |
| android:id | item 的 id,使用"@+id/name"的形式表示。可通过 View.findViewById() 或者 Activity.findViewById() 方法查找到这个 Drawable |
| android:top、android:right、android:bottom、android:left | Drawable 相对于 View 在各个方向的偏移量 |
| android:gravity | 尺寸小于容器尺寸时在容器中的摆放位置 |
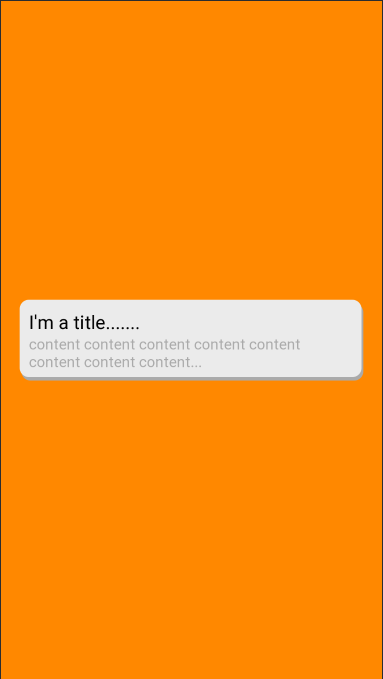
下面以定义一个圆角并带阴影效果的 Drawable 为例,展示 LayerDrawable 的简单使用。
定义
<?xml version="1.0" encoding="utf-8"?>
<layer-list xmlns:android="http://schemas.android.com/apk/res/android">
    <!--内部定义一个 Drawable-->
    <item
            android:left="2dp"
            android:top="4dp">
        <shape>
            <solid android:color="@android:color/darker_gray" />
            <corners android:radius="10dp" />
        </shape>
    </item>

    <!--指定现有的 Drawable-->
    <item
            android:bottom="4dp"
            android:right="2dp"
            android:drawable="@drawable/shape_light">
    </item>
</layer-list>
使用
<?xml version="1.0" encoding="utf-8"?>
<androidx.constraintlayout.widget.ConstraintLayout xmlns:android="http://schemas.android.com/apk/res/android"
    xmlns:app="http://schemas.android.com/apk/res-auto"
    xmlns:tools="http://schemas.android.com/tools"
    android:layout_width="match_parent"
    android:layout_height="match_parent"
    android:background="@android:color/holo_orange_dark"
    tools:context=".LayerDrawableActivity">

    <LinearLayout
            android:orientation="vertical"
            android:background="@drawable/layer_drawable"
            android:layout_width="match_parent"
            android:layout_height="wrap_content"
            android:padding="10dp"
            android:layout_margin="20dp"
            tools:layout_editor_absoluteY="331dp"
            tools:layout_editor_absoluteX="190dp"
            app:layout_constraintTop_toTopOf="parent"
            app:layout_constraintBottom_toBottomOf="parent"
            app:layout_constraintStart_toStartOf="parent"
            app:layout_constraintEnd_toEndOf="parent">

        <TextView android:layout_width="match_parent"
                  android:layout_height="wrap_content"
                  android:textColor="#000000"
                  android:text="I'm a title......."
                  android:textSize="20sp" />

        <TextView android:layout_width="match_parent"
                  android:layout_height="wrap_content"
                  android:textColor="@android:color/darker_gray"
                  android:text="content content content content content content content content..."
                  android:textSize="16sp" />

    </LinearLayout>

</androidx.constraintlayout.widget.ConstraintLayout>
效果图
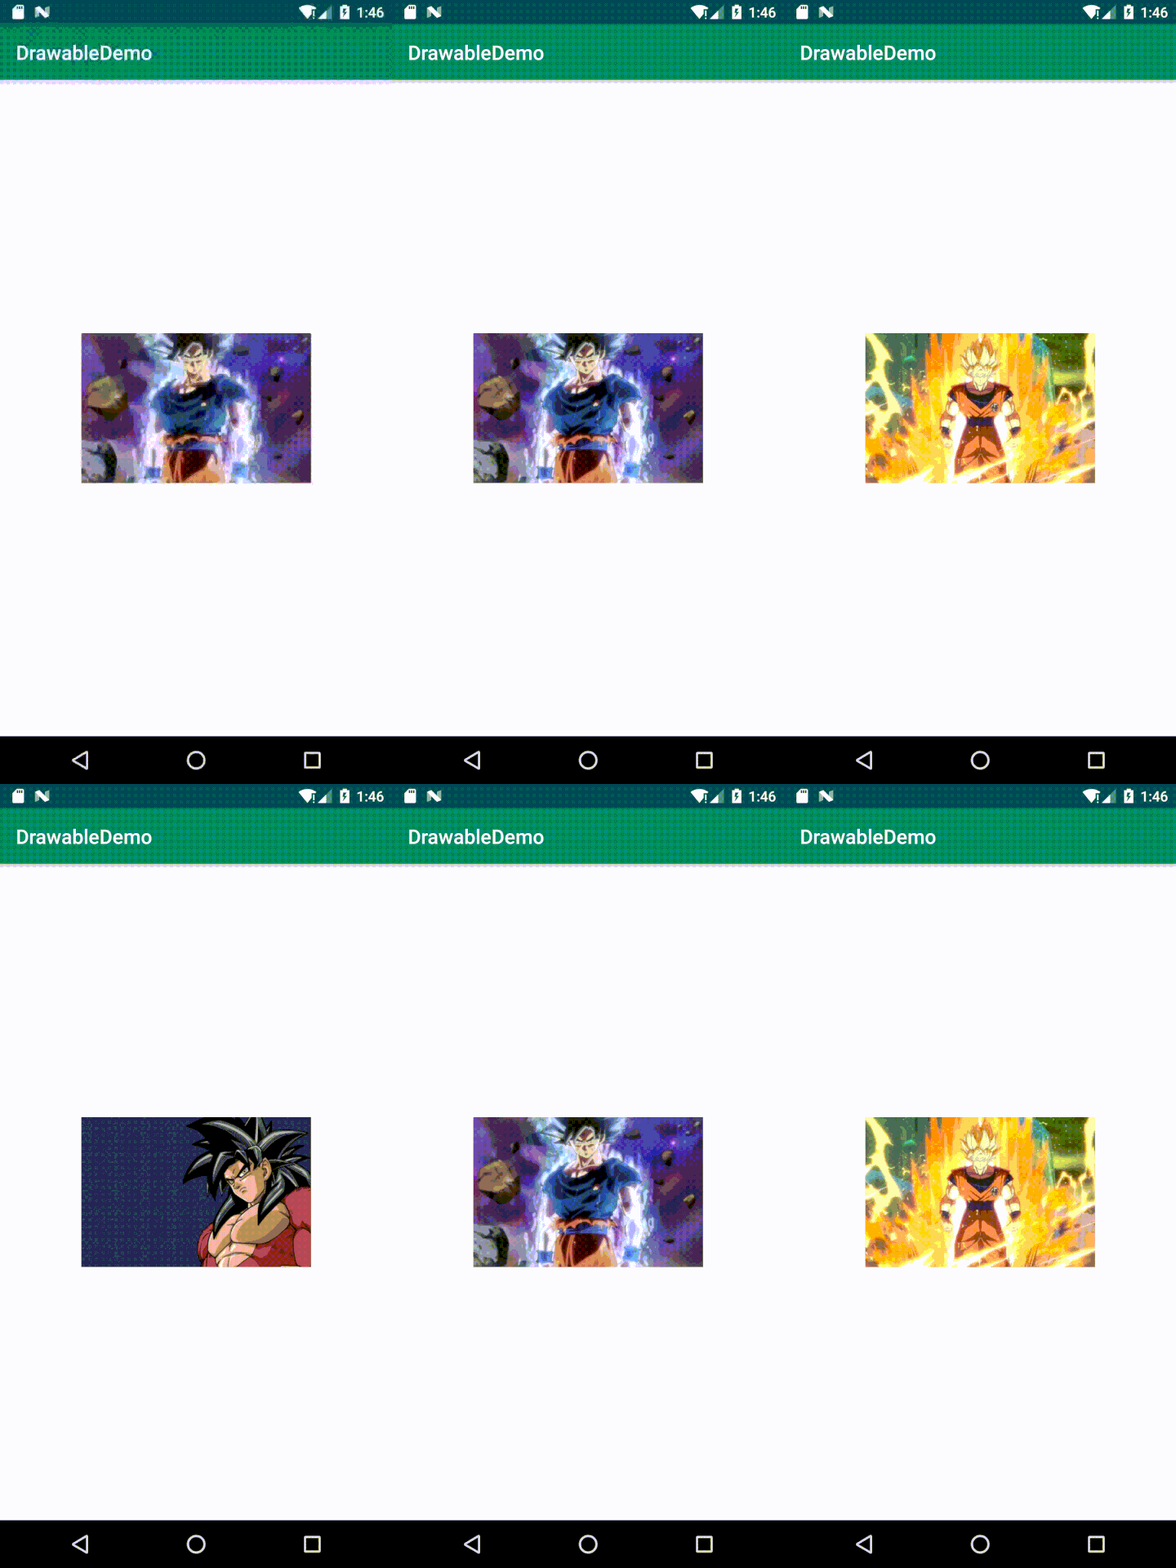
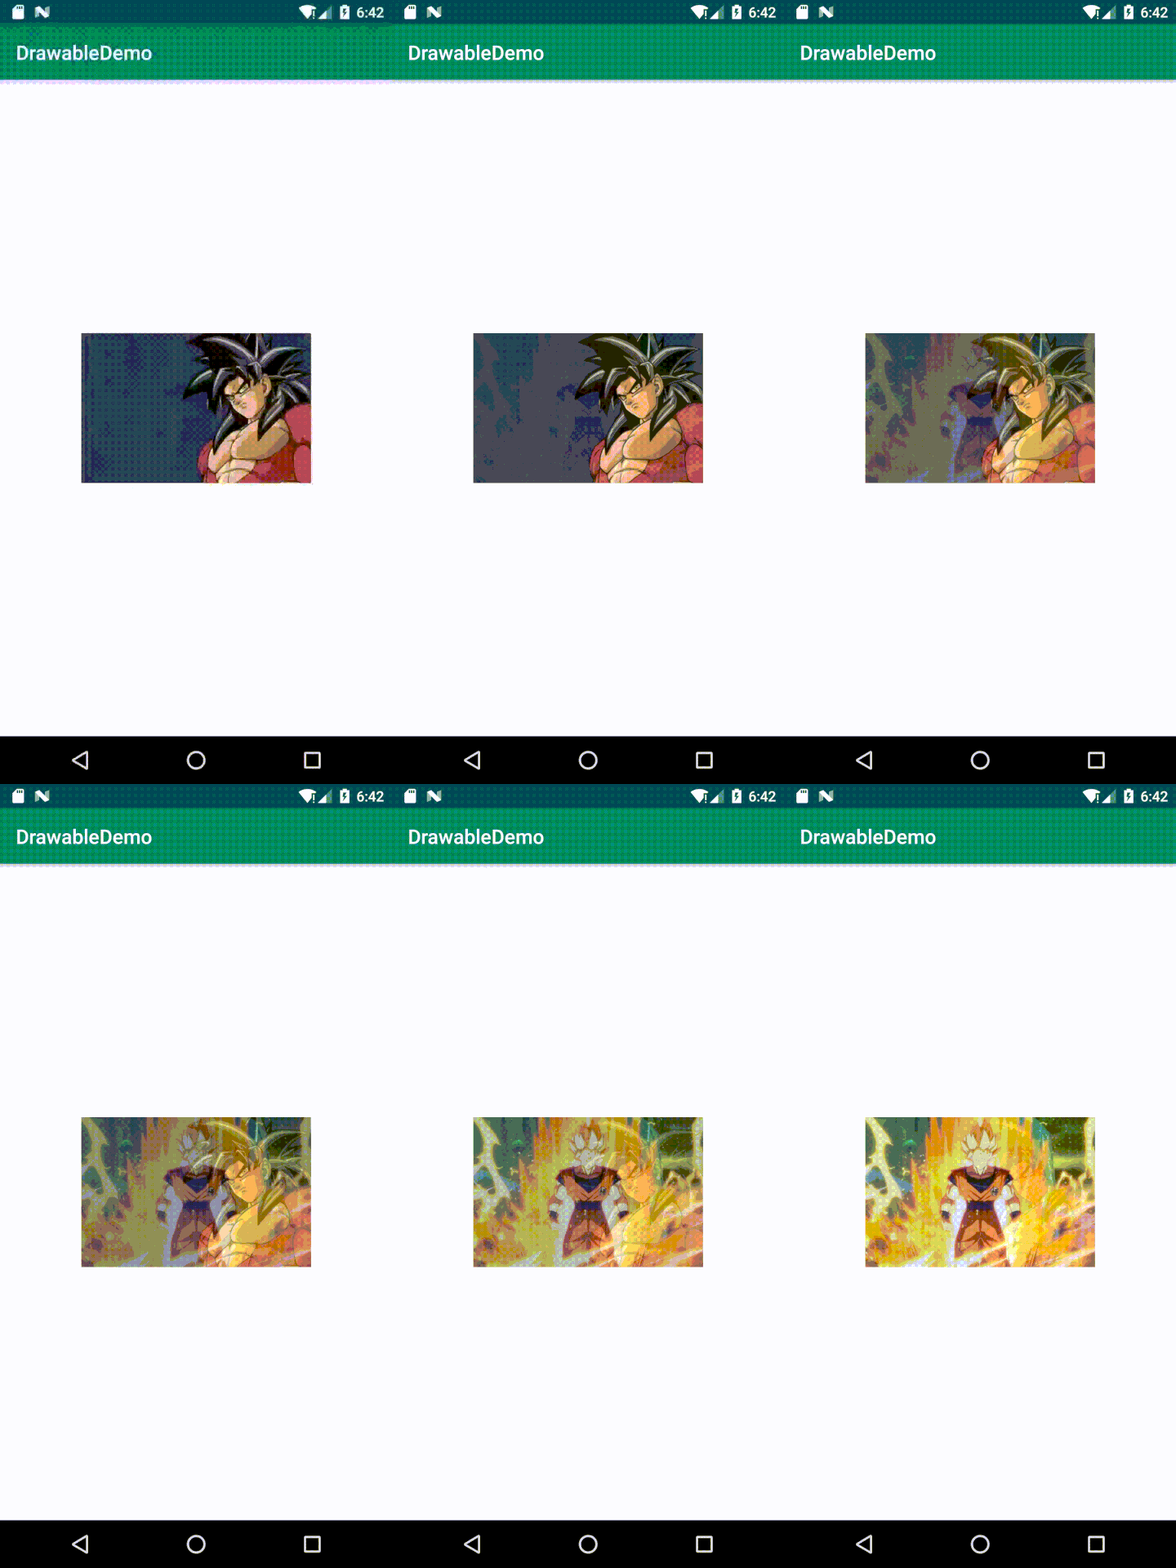
LevelListDrawable 同样表示一个 Drawable 列表,列表中的每个 item 都有一个 level 值, LevelListDrawable 会根据不同的 level 在不同的 item 之间进行切换。
定义 LevelListDrawable 的语法格式如下:
<?xml version="1.0" encoding="utf-8"?>
<level-list
    xmlns:android="http://schemas.android.com/apk/res/android" >
    <item
        android:drawable="@drawable/drawable_resource"
        android:maxLevel="integer"
        android:minLevel="integer" />
</level-list>
LayerDrawable 根标签为 <layer-list>,它可以包含多个 <item> 标签,每个 item 表示一个 Drawable,item 的属性含义分别是:
| 属性 | 含义 |
|---|---|
| android:drawable | drawable 资源,可引用现有的的 Drawable |
| android:maxLevel | 该 item 允许的最大级别,取值范围为[0, 10000] |
| android:minLevel | 该 item 允许的最小级别,取值范围为[0, 10000] |
定义
<?xml version="1.0" encoding="utf-8"?>
<level-list xmlns:android="http://schemas.android.com/apk/res/android">
    <item
            android:drawable="@drawable/kakarotto1"
            android:maxLevel="0" />

    <item
            android:drawable="@drawable/kakarotto2"
            android:maxLevel="1" />

    <item
            android:drawable="@drawable/kakarotto3"
            android:maxLevel="2" />

    <item
            android:drawable="@drawable/kakarotto4"
            android:maxLevel="3" />

    <item
            android:drawable="@drawable/kakarotto5"
            android:maxLevel="4" />
</level-list>
使用
<?xml version="1.0" encoding="utf-8"?>
<androidx.constraintlayout.widget.ConstraintLayout xmlns:android="http://schemas.android.com/apk/res/android"
    xmlns:app="http://schemas.android.com/apk/res-auto"
    xmlns:tools="http://schemas.android.com/tools"
    android:layout_width="match_parent"
    android:layout_height="match_parent"
    tools:context=".GradientDrawableActivity">

    <ImageView
            android:text="Button"
            android:layout_width="230dp"
            android:layout_height="150dp"
            android:src="@drawable/drawable_level_list"
            android:id="@+id/img"
            app:layout_constraintTop_toTopOf="parent"
            app:layout_constraintBottom_toBottomOf="parent"
            app:layout_constraintStart_toStartOf="parent"
            app:layout_constraintEnd_toEndOf="parent"/>

</androidx.constraintlayout.widget.ConstraintLayout>
然后控制 ImageView 的 level 即可显示出效果:
class LevelListDrawableActivity : AppCompatActivity() {
    lateinit var mImageView: ImageView

    override fun onCreate(savedInstanceState: Bundle?) {
        super.onCreate(savedInstanceState)
        setContentView(R.layout.activity_level_list_drawable)

        mImageView = findViewById(R.id.img)
        for (i in 0..15) {
            mHandler.sendEmptyMessageDelayed(i, (1000 * i).toLong())
        }
    }

    var mHandler: Handler = object: Handler() {
        override fun handleMessage(msg: Message?) {
            msg?.what?.let { mImageView.setImageLevel(it%5) }
        }
    }
}
效果图
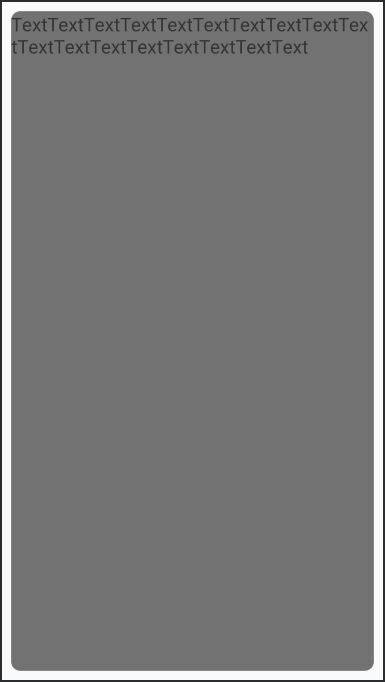
在有些场景下,我们可能需要设置一个全屏的背景图片,但又想让背景图片跟边框留出一些间隙,这时使用 InsetDrawable 就能很好地解决问题了。
<?xml version="1.0" encoding="utf-8"?>
<inset
    xmlns:android="http://schemas.android.com/apk/res/android"
    android:drawable="@drawable/drawable_resource"
    android:insetTop="dimension"
    android:insetRight="dimension"
    android:insetBottom="dimension"
    android:insetLeft="dimension" />
根标签为 <inset>,它的各个属性含义分别是:
| 属性 | 含义 |
|---|---|
| android:drawable | drawable 资源,可引用现有的的 Drawable |
| android:insetTop、android:insetRight、android:insetBottom、android:insetLeft | 内容距离各个边框的距离 |
定义
<?xml version="1.0" encoding="utf-8"?>
<inset xmlns:android="http://schemas.android.com/apk/res/android"
       android:drawable="@drawable/shape_dark"
       android:insetBottom="10dp"
       android:insetTop="10dp"
       android:insetLeft="10dp"
       android:insetRight="10dp" />
使用
<?xml version="1.0" encoding="utf-8"?>
<androidx.constraintlayout.widget.ConstraintLayout
        xmlns:android="http://schemas.android.com/apk/res/android"
        xmlns:app="http://schemas.android.com/apk/res-auto"
        android:layout_width="match_parent"
        android:layout_height="match_parent"
        android:background="@drawable/drawable_inset">

    <TextView
            android:textSize="20sp"
            android:text="TextTextTextTextTextTextTextTextTextTextTextTextTextTextTextTextTextText"
            android:layout_width="match_parent"
            android:layout_height="wrap_content"
            app:layout_constraintStart_toStartOf="parent"
            app:layout_constraintEnd_toEndOf="parent"
            app:layout_constraintTop_toTopOf="parent"/>

</androidx.constraintlayout.widget.ConstraintLayout>
效果图
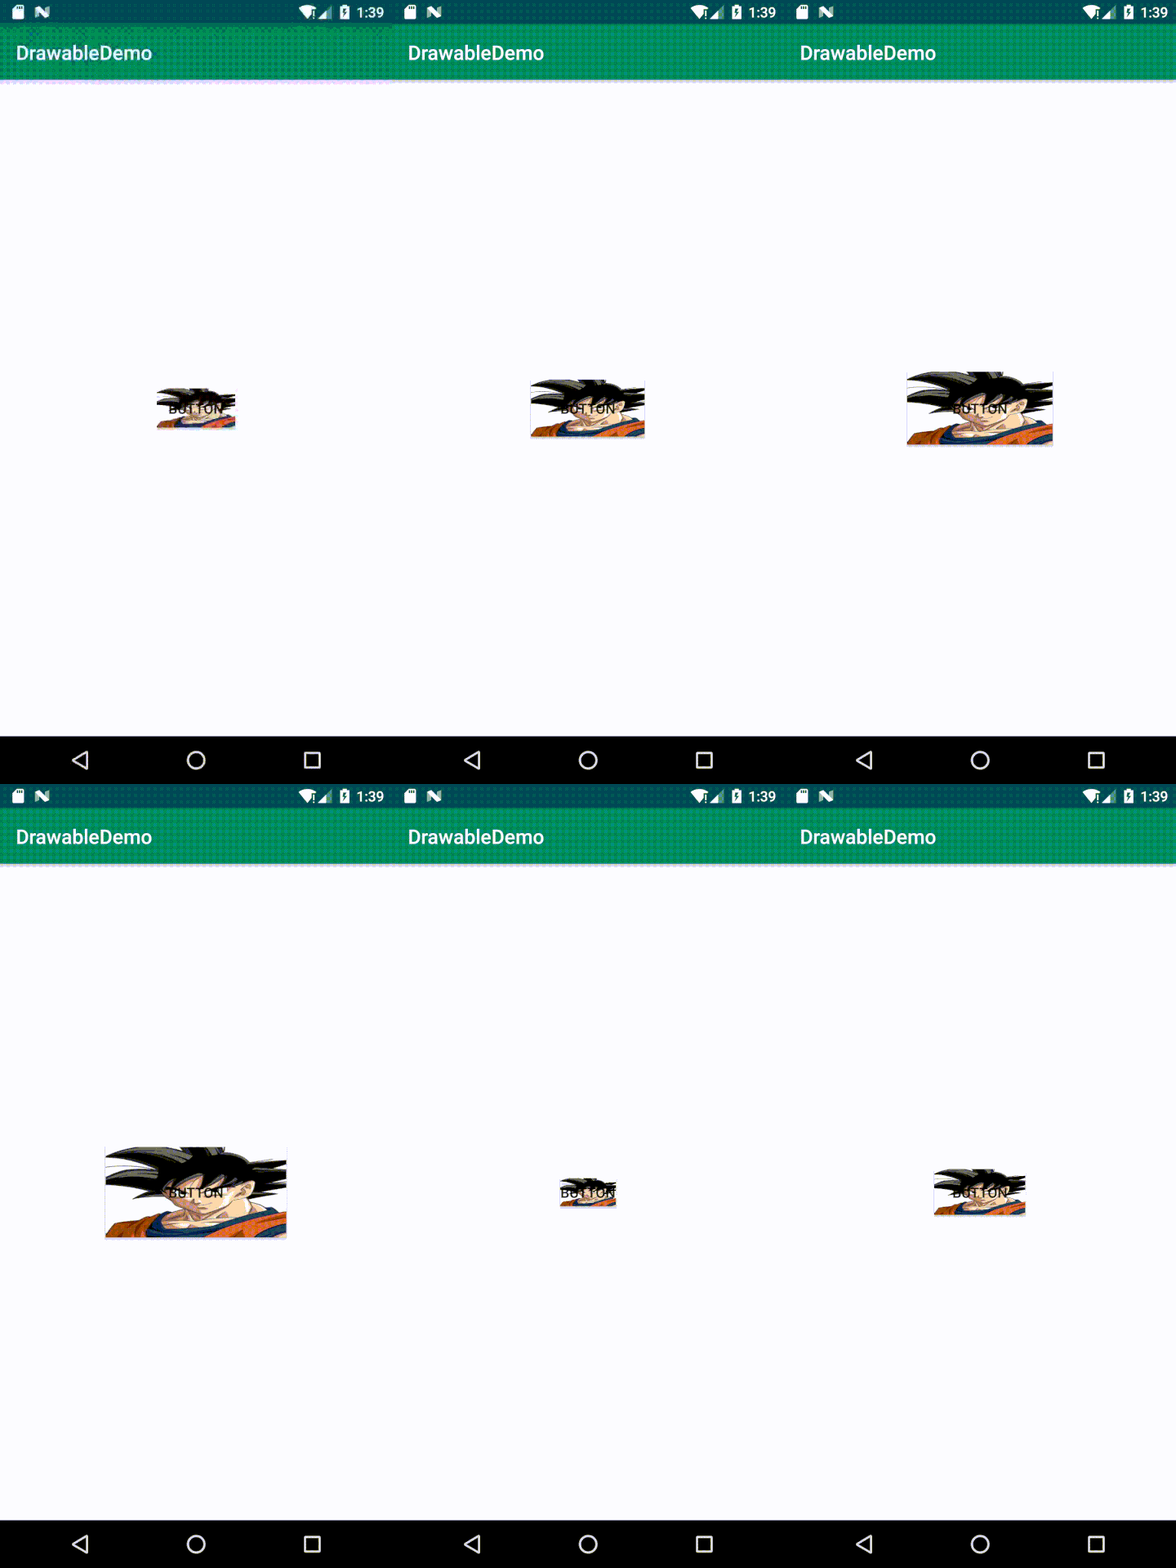
ScaleDrawable 可以根据 level 值动态地将 Drawable 进行一定比例的缩放。当 level 的取值范围为 [0, 10000],当 level 为 0 时表示隐藏;当 level 值为 1 时,Drawable 的大小为初始化时的缩放比例,当 level 值为 10000 时,Drawable 大小为 100% 缩放比例。
定义 ScaleDrawable 的语法如下:
<?xml version="1.0" encoding="utf-8"?>
<scale
    xmlns:android="http://schemas.android.com/apk/res/android"
    android:drawable="@drawable/drawable_resource"
    android:scaleGravity=["top" | "bottom" | "left" | "right" | "center_vertical" |
                          "fill_vertical" | "center_horizontal" | "fill_horizontal" |
                          "center" | "fill" | "clip_vertical" | "clip_horizontal"]
    android:scaleHeight="percentage"
    android:scaleWidth="percentage" />
它的根标签为 <scale>,它的各个属性的含义分别是:
android:drawable
drawable 资源,可引用现有的的 Drawable
android:scaleGravity
当图片尺寸小于 View 时,设置这个属性值可以对图片进行定位,可以使用 ”|“ 符号组合使用,所有值的含义分别为:
| 值 | 说明 |
|---|---|
| top | 将对象放在其容器顶部,不改变其大小。 |
| bottom | 将对象放在其容器底部,不改变其大小。 |
| left | 将对象放在其容器左边缘,不改变其大小。这是默认值。 |
| right | 将对象放在其容器右边缘,不改变其大小。 |
| center_vertical | 将对象放在其容器的垂直中心,不改变其大小。 |
| fill_vertical | 按需要扩展对象的垂直大小,使其完全适应其容器。 |
| center_horizontal | 将对象放在其容器的水平中心,不改变其大小。 |
| fill_horizontal | 按需要扩展对象的水平大小,使其完全适应其容器。 |
| center | 将对象放在其容器的水平和垂直轴中心,不改变其大小。 |
| fill | 按需要扩展对象的垂直大小,使其完全适应其容器。 |
| clip_vertical | 可设置为让子元素的上边缘和/或下边缘裁剪至其容器边界的附加选项。裁剪基于垂直重力:顶部重力裁剪上边缘,底部重力裁剪下边缘,任一重力不会同时裁剪两边。 |
| clip_horizontal | 可设置为让子元素的左边和/或右边裁剪至其容器边界的附加选项。裁剪基于水平重力:左边重力裁剪右边缘,右边重力裁剪左边缘,任一重力不会同时裁剪两边。 |
android:scaleHeight
Drawable 高的缩放比例,值越高最终结果越小。
android:scaleWidth
Drawable 宽的缩放比例
这里采用定制一个大小可变的背景为例,展示 ScaleDrawable 的简单用法。
定义
<?xml version="1.0" encoding="utf-8"?>
<scale xmlns:android="http://schemas.android.com/apk/res/android"
       android:drawable="@drawable/kakarotto"
       android:scaleHeight="80%"
       android:scaleWidth="80%"
       android:scaleGravity="center" />
使用
<?xml version="1.0" encoding="utf-8"?>
<androidx.constraintlayout.widget.ConstraintLayout xmlns:android="http://schemas.android.com/apk/res/android"
    xmlns:app="http://schemas.android.com/apk/res-auto"
    android:layout_width="match_parent"
    android:layout_height="match_parent">

    <Button
            android:text="Button"
            android:layout_width="200dp"
            android:layout_height="100dp"
            android:background="@drawable/drawable_scale"
            android:id="@+id/button"
            app:layout_constraintTop_toTopOf="parent"
            app:layout_constraintBottom_toBottomOf="parent"
            app:layout_constraintStart_toStartOf="parent"
            app:layout_constraintEnd_toEndOf="parent"/>

</androidx.constraintlayout.widget.ConstraintLayout>
class ScaleDrawableActivity : AppCompatActivity() {
lateinit var scaleDrawable: ScaleDrawable
var curLevel = 0
override fun onCreate(savedInstanceState: Bundle?) {
super.onCreate(savedInstanceState)
setContentView(R.layout.activity_scale_drawable)
scaleDrawable = findViewById<Button>(R.id.button).background as ScaleDrawable
scaleDrawable.level = 0
Observable.interval(200, TimeUnit.MILLISECONDS)
.subscribeOn(Schedulers.io())
.observeOn(AndroidSchedulers.mainThread()).subscribe {
scaleDrawable.level = curLevel
curLevel += 200
if (curLevel >= 10000) {
curLevel = 0
}
Log.e("gpj", "level ${curLevel}")
}
}
}效果图
与 ScaleDrawable 原理相同,ClipDrawable 则可以根据 level 值动态地将 Drawable 进行一定比例的剪裁。当 level 的取值范围为 [0, 10000],当 level 为 0 时表示隐藏;当 level 值为 1 时,Drawable 的大小为初始化时的剪裁比例,当 level 值为 10000 时,Drawable 大小为 100% 剪裁比例。
定义 ClipDrawable 的语法规则如下:
<?xml version="1.0" encoding="utf-8"?>
<clip xmlns:android="http://schemas.android.com/apk/res/android"
    android:drawable="@drawable/drawable_resource"
    android:clipOrientation=["horizontal" | "vertical"]
    android:gravity=["top" | "bottom" | "left" | "right" | "center_vertical" |
                     "fill_vertical" | "center_horizontal" | "fill_horizontal" |
                     "center" | "fill" | "clip_vertical" | "clip_horizontal"] />
它的根标签为 <clip>,各个属性的含义分别是:
android:drawable
drawable 资源,可引用现有的的 Drawable
android:clipOrientation
剪裁方向,horizontal 表示水平方向剪裁,vertical 表示竖直方向剪裁
android:gravity
gravity 属性需要配合 clipOrientation 来使用,可以使用 ”|“ 符号组合使用,所有值的含义分别为:
| 值 | 说明 |
|---|---|
| top | 将对象放在其容器顶部,不改变其大小。当 clipOrientation 是 "vertical" 时,在可绘制对象的底部裁剪。 |
| bottom | 将对象放在其容器底部,不改变其大小。当 clipOrientation 是 "vertical" 时,在可绘制对象的顶部裁剪。 |
| left | 将对象放在其容器左边缘,不改变其大小。这是默认值。当 clipOrientation 是 "horizontal" 时,在可绘制对象的右边裁剪。这是默认值。 |
| right | 将对象放在其容器右边缘,不改变其大小。当 clipOrientation 是 "horizontal"时,在可绘制对象的左边裁剪。 |
| center_vertical | 将对象放在其容器的垂直中心,不改变其大小。裁剪行为与重力为 "center" 时相同。 |
| fill_vertical | 按需要扩展对象的垂直大小,使其完全适应其容器。当 clipOrientation 是 "vertical" 时,不会进行裁剪,因为可绘制对象会填充垂直空间(除非可绘制对象级别为 0,此时它不可见)。 |
| center_horizontal | 将对象放在其容器的水平中心,不改变其大小。裁剪行为与重力为 "center" 时相同。 |
| fill_horizontal | 按需要扩展对象的水平大小,使其完全适应其容器。当 clipOrientation 是 "horizontal" 时,不会进行裁剪,因为可绘制对象会填充水平空间(除非可绘制对象级别为 0,此时它不可见)。 |
| center | 将对象放在其容器的水平和垂直轴中心,不改变其大小。当 clipOrientation 是 "horizontal" 时,在左边和右边裁剪。当 clipOrientation 是 "vertical" 时,在顶部和底部裁剪。 |
| fill | 按需要扩展对象的垂直大小,使其完全适应其容器。不会进行裁剪,因为可绘制对象会填充水平和垂直空间(除非可绘制对象级别为 0,此时它不可见)。 |
| clip_vertical | 可设置为让子元素的上边缘和/或下边缘裁剪至其容器边界的附加选项。裁剪基于垂直重力:顶部重力裁剪上边缘,底部重力裁剪下边缘,任一重力不会同时裁剪两边。 |
| clip_horizontal | 可设置为让子元素的左边和/或右边裁剪至其容器边界的附加选项。裁剪基于水平重力:左边重力裁剪右边缘,右边重力裁剪左边缘,任一重力不会同时裁剪两边。 |
定义
<?xml version="1.0" encoding="utf-8"?>
<clip xmlns:android="http://schemas.android.com/apk/res/android"
    android:drawable="@drawable/drawable_resource"
    android:clipOrientation=["horizontal" | "vertical"]
    android:gravity=["top" | "bottom" | "left" | "right" | "center_vertical" |
                     "fill_vertical" | "center_horizontal" | "fill_horizontal" |
                     "center" | "fill" | "clip_vertical" | "clip_horizontal"] />
使用
<?xml version="1.0" encoding="utf-8"?>
<androidx.constraintlayout.widget.ConstraintLayout xmlns:android="http://schemas.android.com/apk/res/android"
    xmlns:app="http://schemas.android.com/apk/res-auto"
    android:layout_width="match_parent"
    android:layout_height="match_parent">

    <Button
            android:text="Button"
            android:layout_width="200dp"
            android:layout_height="100dp"
            android:background="@drawable/drawable_clip"
            android:id="@+id/button"
            app:layout_constraintTop_toTopOf="parent"
            app:layout_constraintBottom_toBottomOf="parent"
            app:layout_constraintStart_toStartOf="parent"
            app:layout_constraintEnd_toEndOf="parent"/>

</androidx.constraintlayout.widget.ConstraintLayout>
class ClipDrawableActivity : AppCompatActivity() {
lateinit var clipDrawable: ClipDrawable
var curLevel = 0
override fun onCreate(savedInstanceState: Bundle?) {
super.onCreate(savedInstanceState)
setContentView(R.layout.activity_clip_drawable)
clipDrawable = findViewById<Button>(R.id.button).background as ClipDrawable
clipDrawable.level = 0
Observable.interval(50, TimeUnit.MILLISECONDS)
.subscribeOn(Schedulers.io())
.observeOn(AndroidSchedulers.mainThread()).subscribe {
clipDrawable.level = curLevel
curLevel += 200
if (curLevel >= 10000) {
curLevel = 0
}
Log.e("gpj", "level ${curLevel}")
}
}
}效果图
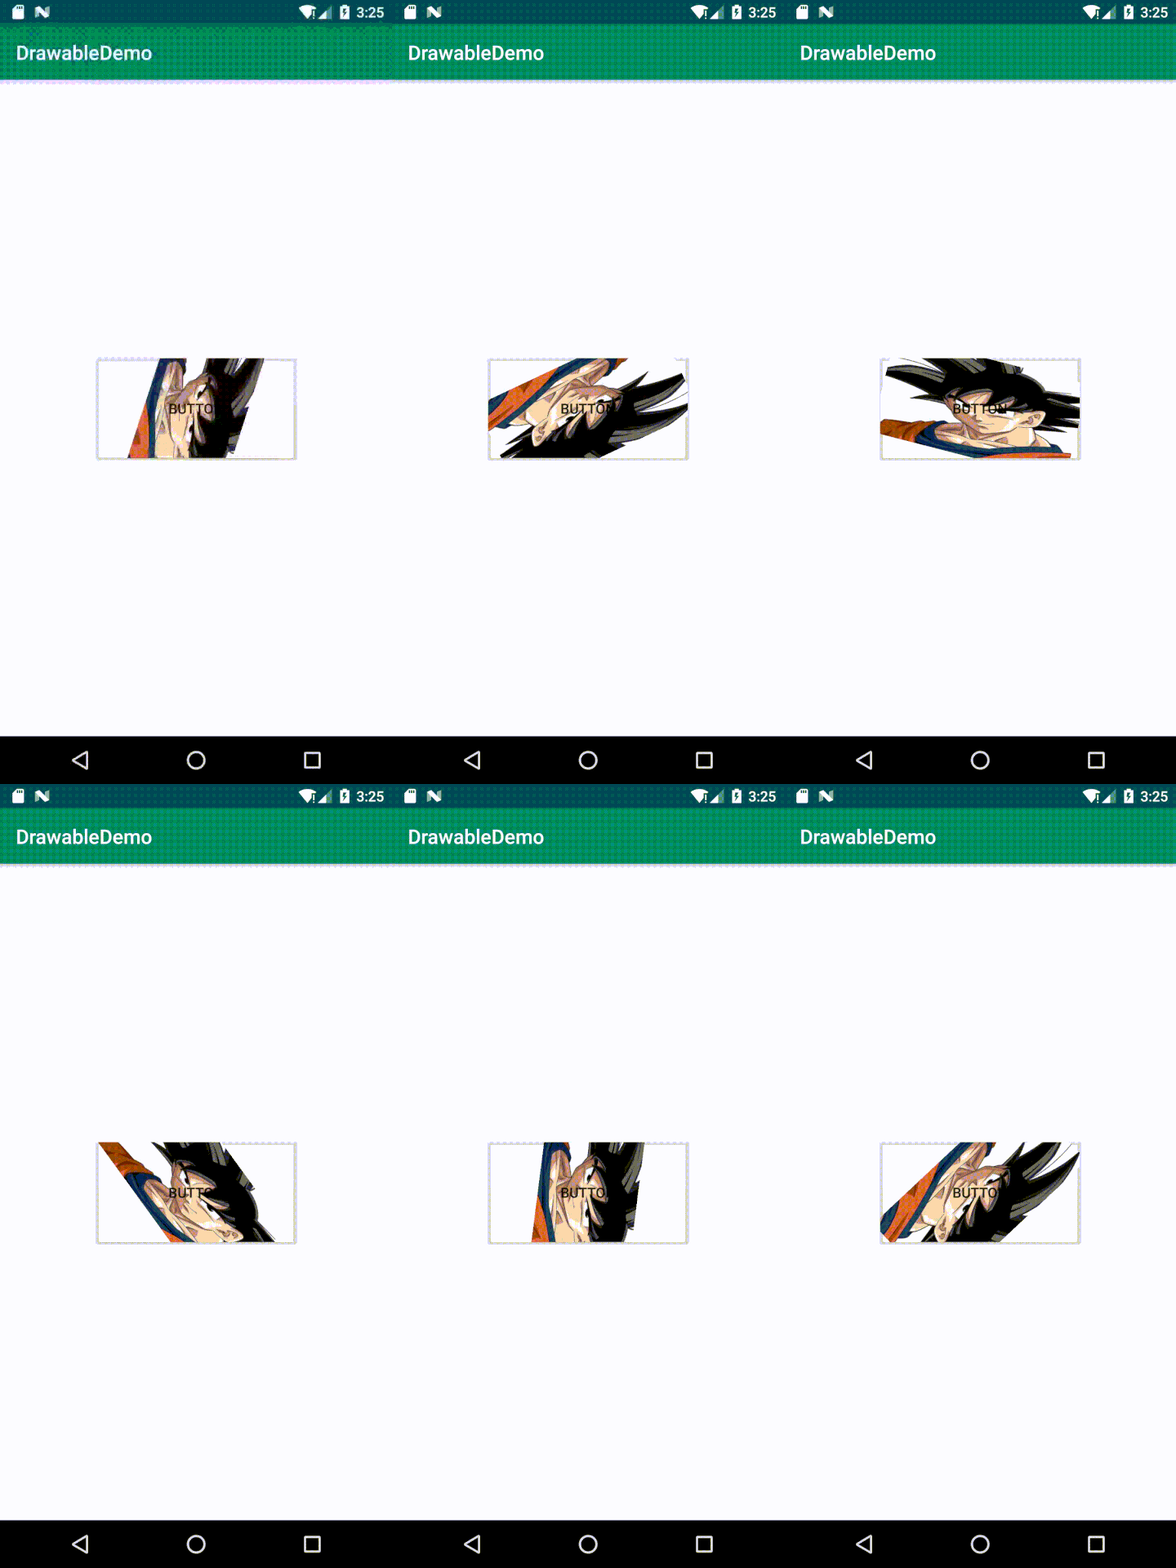
与 ScaleDrawable 和 ClipDrawable 类似,RotateDrawable 可以根据 level 值将 Drawable 进行动态旋转。
RotateDrawable 的定义方法如下:
<?xml version="1.0" encoding="utf-8"?>
<rotate xmlns:android="http://schemas.android.com/apk/res/android"
    android:drawable="@drawable/drawable_resource"
    android:visible=["true" | "false"]
    android:fromDegrees="integer"
    android:toDegrees="integer"
    android:pivotX="percentage"
    android:pivotY="percentage" />
它的根标签为 <clip>,各个属性的含义分别是:
| 属性 | 含义 |
|---|---|
| android:drawable | drawable 资源,可引用现有的的 Drawable |
| android:visible | 是否可见 |
| android:fromDegrees | 旋转起始角度 |
| android:toDegrees | 旋转结束角度 |
| android:pivotX | 旋转中心位于 X 轴的百分比 |
| android:pivotY | 旋转中心位于 Y 轴的百分比 |
下面以定义一个可旋转的背景为例展示 RotateDrawable 的简单使用
定义
<?xml version="1.0" encoding="utf-8"?>
<rotate xmlns:android="http://schemas.android.com/apk/res/android"
        android:drawable="@drawable/kakarotto"
        android:fromDegrees="0"
        android:toDegrees="180"
        android:pivotX="50%"
        android:pivotY="50%"/>
使用
<?xml version="1.0" encoding="utf-8"?>
<androidx.constraintlayout.widget.ConstraintLayout xmlns:android="http://schemas.android.com/apk/res/android"
    xmlns:app="http://schemas.android.com/apk/res-auto"
    android:layout_width="match_parent"
    android:layout_height="match_parent">

    <Button
            android:text="Button"
            android:layout_width="200dp"
            android:layout_height="100dp"
            android:background="@drawable/drawable_rotate"
            android:id="@+id/button"
            app:layout_constraintTop_toTopOf="parent"
            app:layout_constraintBottom_toBottomOf="parent"
            app:layout_constraintStart_toStartOf="parent"
            app:layout_constraintEnd_toEndOf="parent"/>

</androidx.constraintlayout.widget.ConstraintLayout>
class RotateDrawableActivity : AppCompatActivity() {
lateinit var rotateDrawable: RotateDrawable
var curLevel = 0
override fun onCreate(savedInstanceState: Bundle?) {
super.onCreate(savedInstanceState)
setContentView(R.layout.activity_rotate_drawable)
rotateDrawable = findViewById<Button>(R.id.button).background as RotateDrawable
rotateDrawable.level = 0
Observable.interval(50, TimeUnit.MILLISECONDS)
.subscribeOn(Schedulers.io())
.observeOn(AndroidSchedulers.mainThread()).subscribe {
rotateDrawable.level = curLevel
curLevel += 200
if (curLevel >= 10000) {
curLevel = 0
}
Log.e("gpj", "level ${curLevel}")
}
}
}效果图
有时候我们可能需要在两个图片切换的时候增加渐变效果,除了使用动画之外,这里还可以用 TransitionDrawable 轻松实现。
<?xml version="1.0" encoding="utf-8"?>
<transition
xmlns:android="http://schemas.android.com/apk/res/android" >
    <item
        android:drawable="@[package:]drawable/drawable_resource"
        android:id="@[+][package:]id/resource_name"
        android:top="dimension"
        android:right="dimension"
        android:bottom="dimension"
        android:left="dimension" />
</transition>
它的根标签为 <transition>,它可以包含多个 <item> 标签,每个 item 表示一个 Drawable,item 的属性含义分别是:
| 属性 | 含义 |
|---|---|
| android:drawable | drawable 资源,可引用现有的的 Drawable |
| android:id | iitem 的 id,使用"@+id/name"的形式表示。可通过 View.findViewById() 或者 Activity.findViewById() 方法查找到这个 Drawable |
| android:top、android:right、android:bottom、android:left | Drawable 相对于 View 在各个方向的偏移量 |
这里定义一个淡入淡出效果的图片切换效果,展示 TransitionDrawable 的基本使用。
定义
<?xml version="1.0" encoding="utf-8"?>
<transition xmlns:android="http://schemas.android.com/apk/res/android">
    <item android:drawable="@drawable/kakarotto1" />
    <item android:drawable="@drawable/kakarotto2" />
</transition>
使用
<?xml version="1.0" encoding="utf-8"?>
<androidx.constraintlayout.widget.ConstraintLayout xmlns:android="http://schemas.android.com/apk/res/android"
    xmlns:app="http://schemas.android.com/apk/res-auto"
    android:layout_width="match_parent"
    android:layout_height="match_parent">

    <ImageView
            android:layout_width="230dp"
            android:layout_height="150dp"
            android:background="@drawable/drawable_transition"
            android:id="@+id/img"
            app:layout_constraintTop_toTopOf="parent"
            app:layout_constraintBottom_toBottomOf="parent"
            app:layout_constraintStart_toStartOf="parent"
            app:layout_constraintEnd_toEndOf="parent"/>

</androidx.constraintlayout.widget.ConstraintLayout>
class TransitionDrawableActivity : AppCompatActivity() {
lateinit var disposable: Disposable
var reverse = false
override fun onCreate(savedInstanceState: Bundle?) {
super.onCreate(savedInstanceState)
setContentView(R.layout.activity_transition_drawable)
var transitionDrawable = findViewById<ImageView>(R.id.img).background as TransitionDrawable
Observable.interval(3000, TimeUnit.MILLISECONDS)
.subscribeOn(Schedulers.io())
.observeOn(AndroidSchedulers.mainThread())
.subscribe(object : Observer<Long> {
override fun onSubscribe(d: Disposable) {
disposable = d
}
override fun onComplete() {
}
override fun onNext(t: Long) {
if (!reverse) {
transitionDrawable.startTransition(3000)
reverse = true
} else {
transitionDrawable.reverseTransition(3000)
reverse = false
}
}
override fun onError(e: Throwable) {
}
})
}效果图
好了,传统的 Drawable 就介绍完了,但是随着 Android 版本的更新,Drawable 家族也不断得有新成员加入进来,让开发者有了更多的选择,下一部分文章,我将介绍从 Android 5.0(API 21) 之后加入进来的几个成员。
附:文章中的 Demo 地址:https://github.com/guanpj/DrawableDemo

