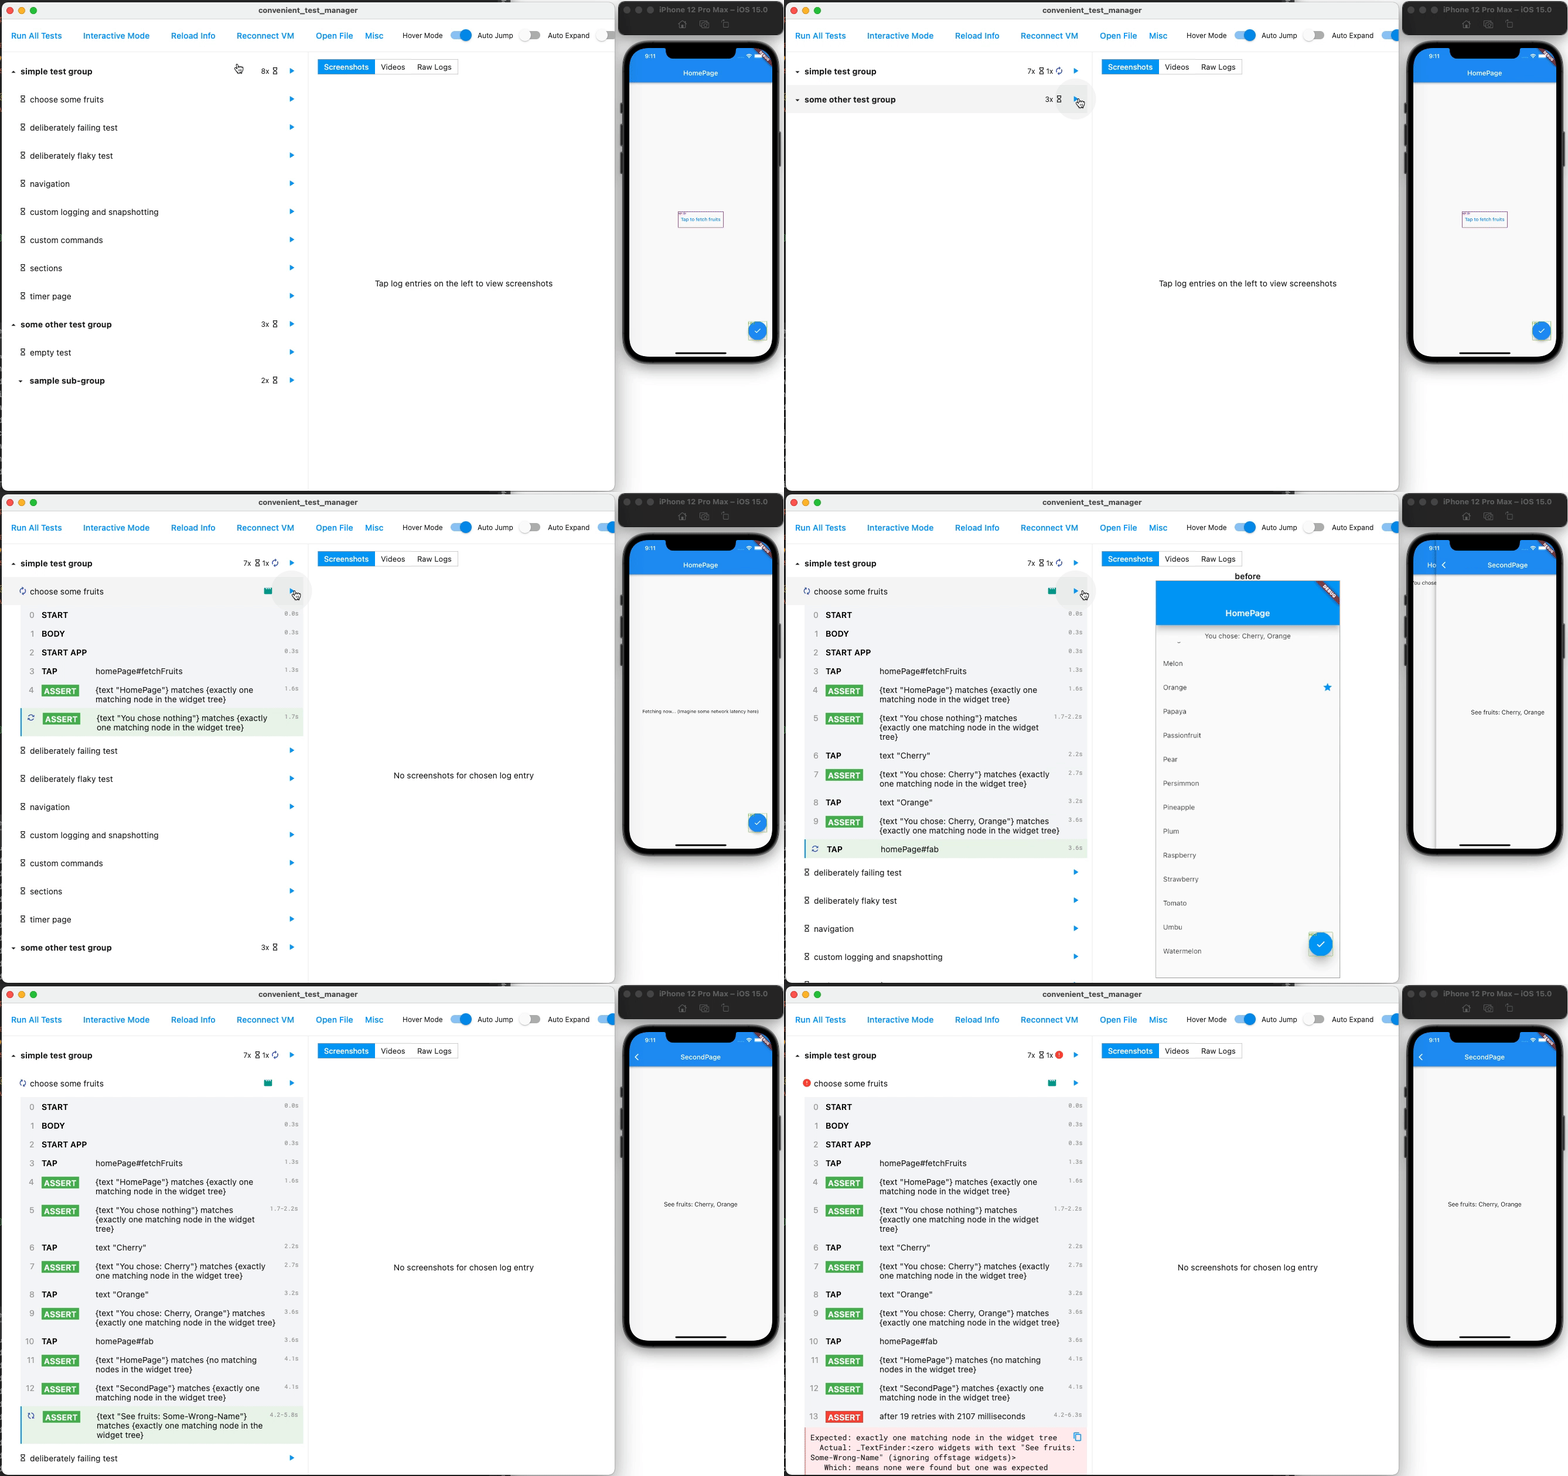
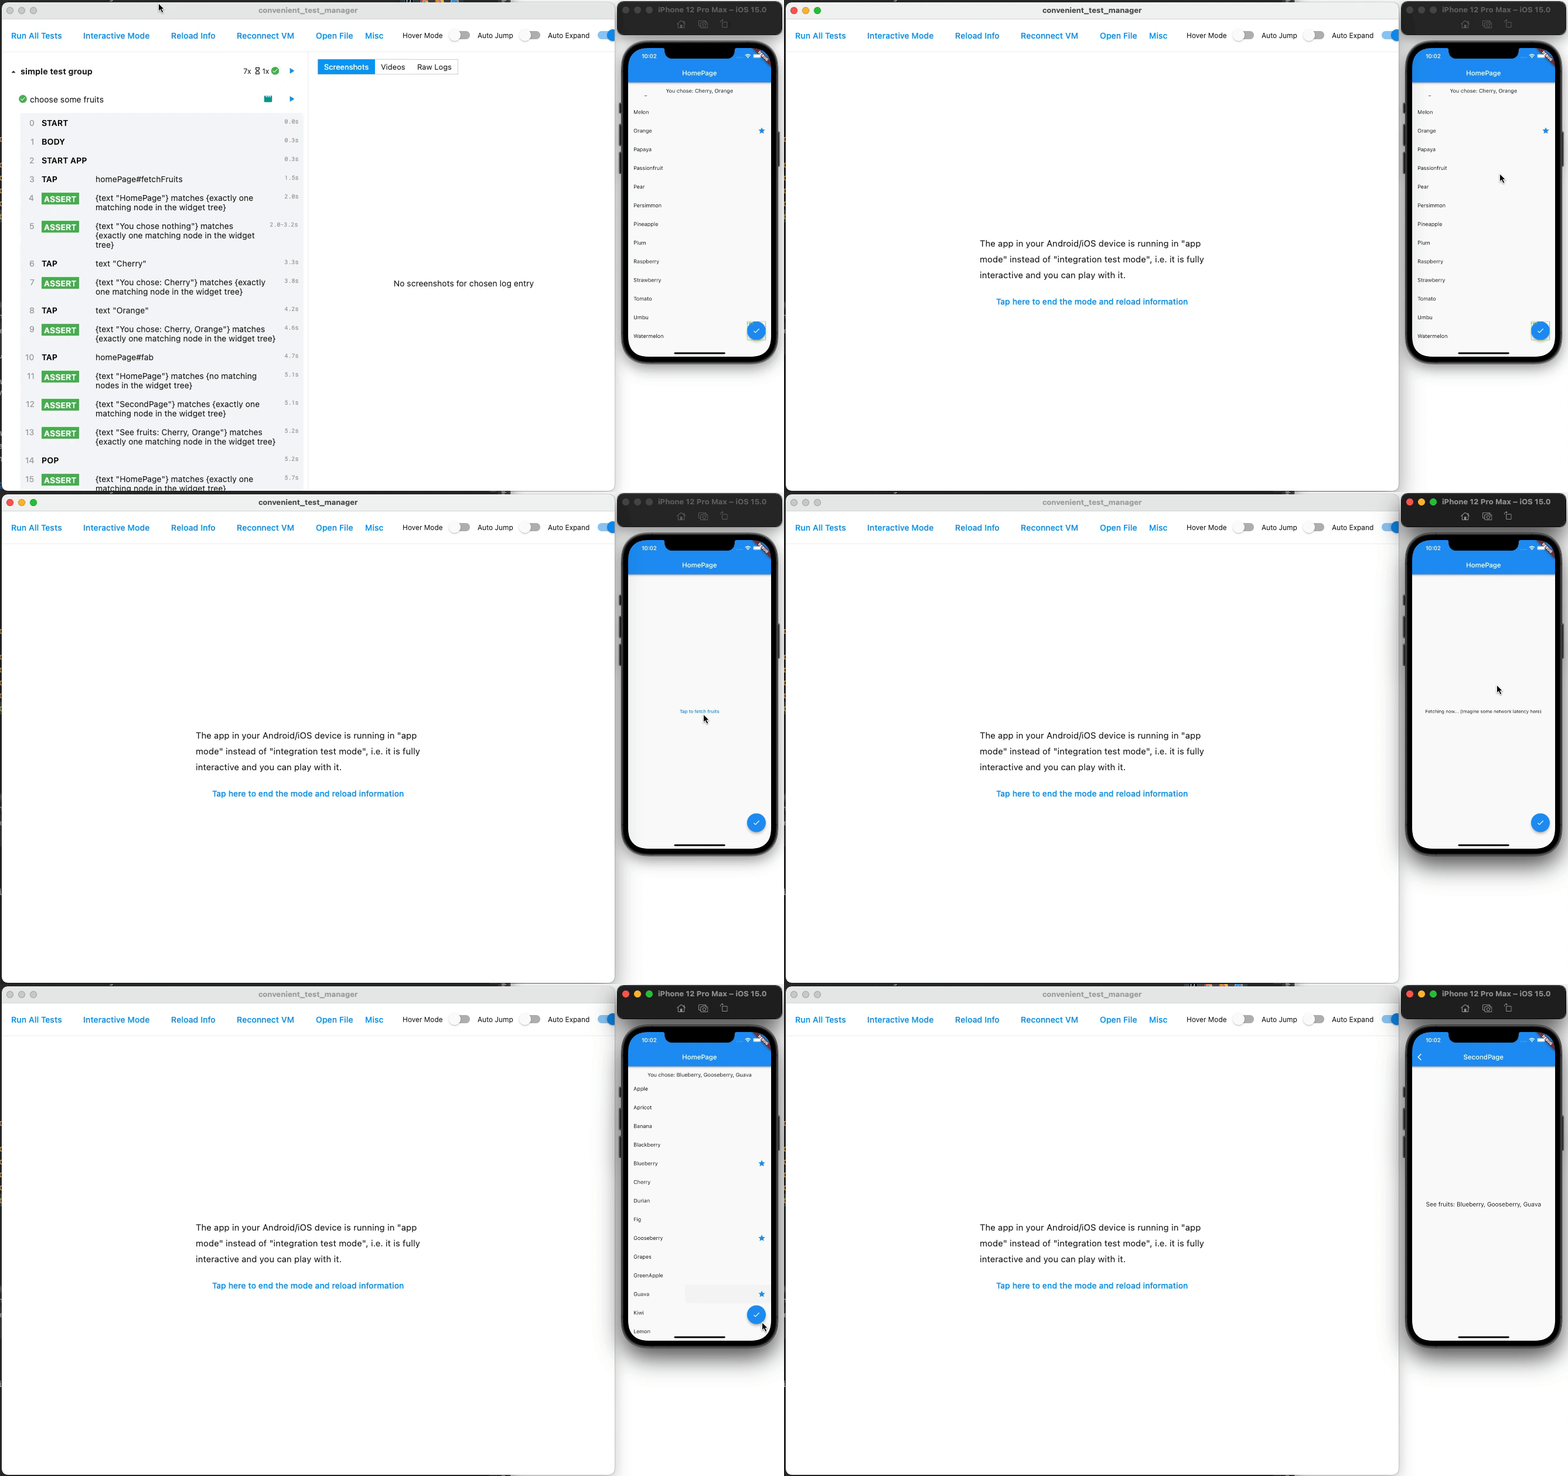
Write and debug tests easily, with full action history, time travel, screenshots, rapid re-execution, video records, retryability, interactivity, isolation and more.
- Full action history: Gain insight on what has happened to the tests - View all actions/assertions taken in the tests, with friendly descriptions.
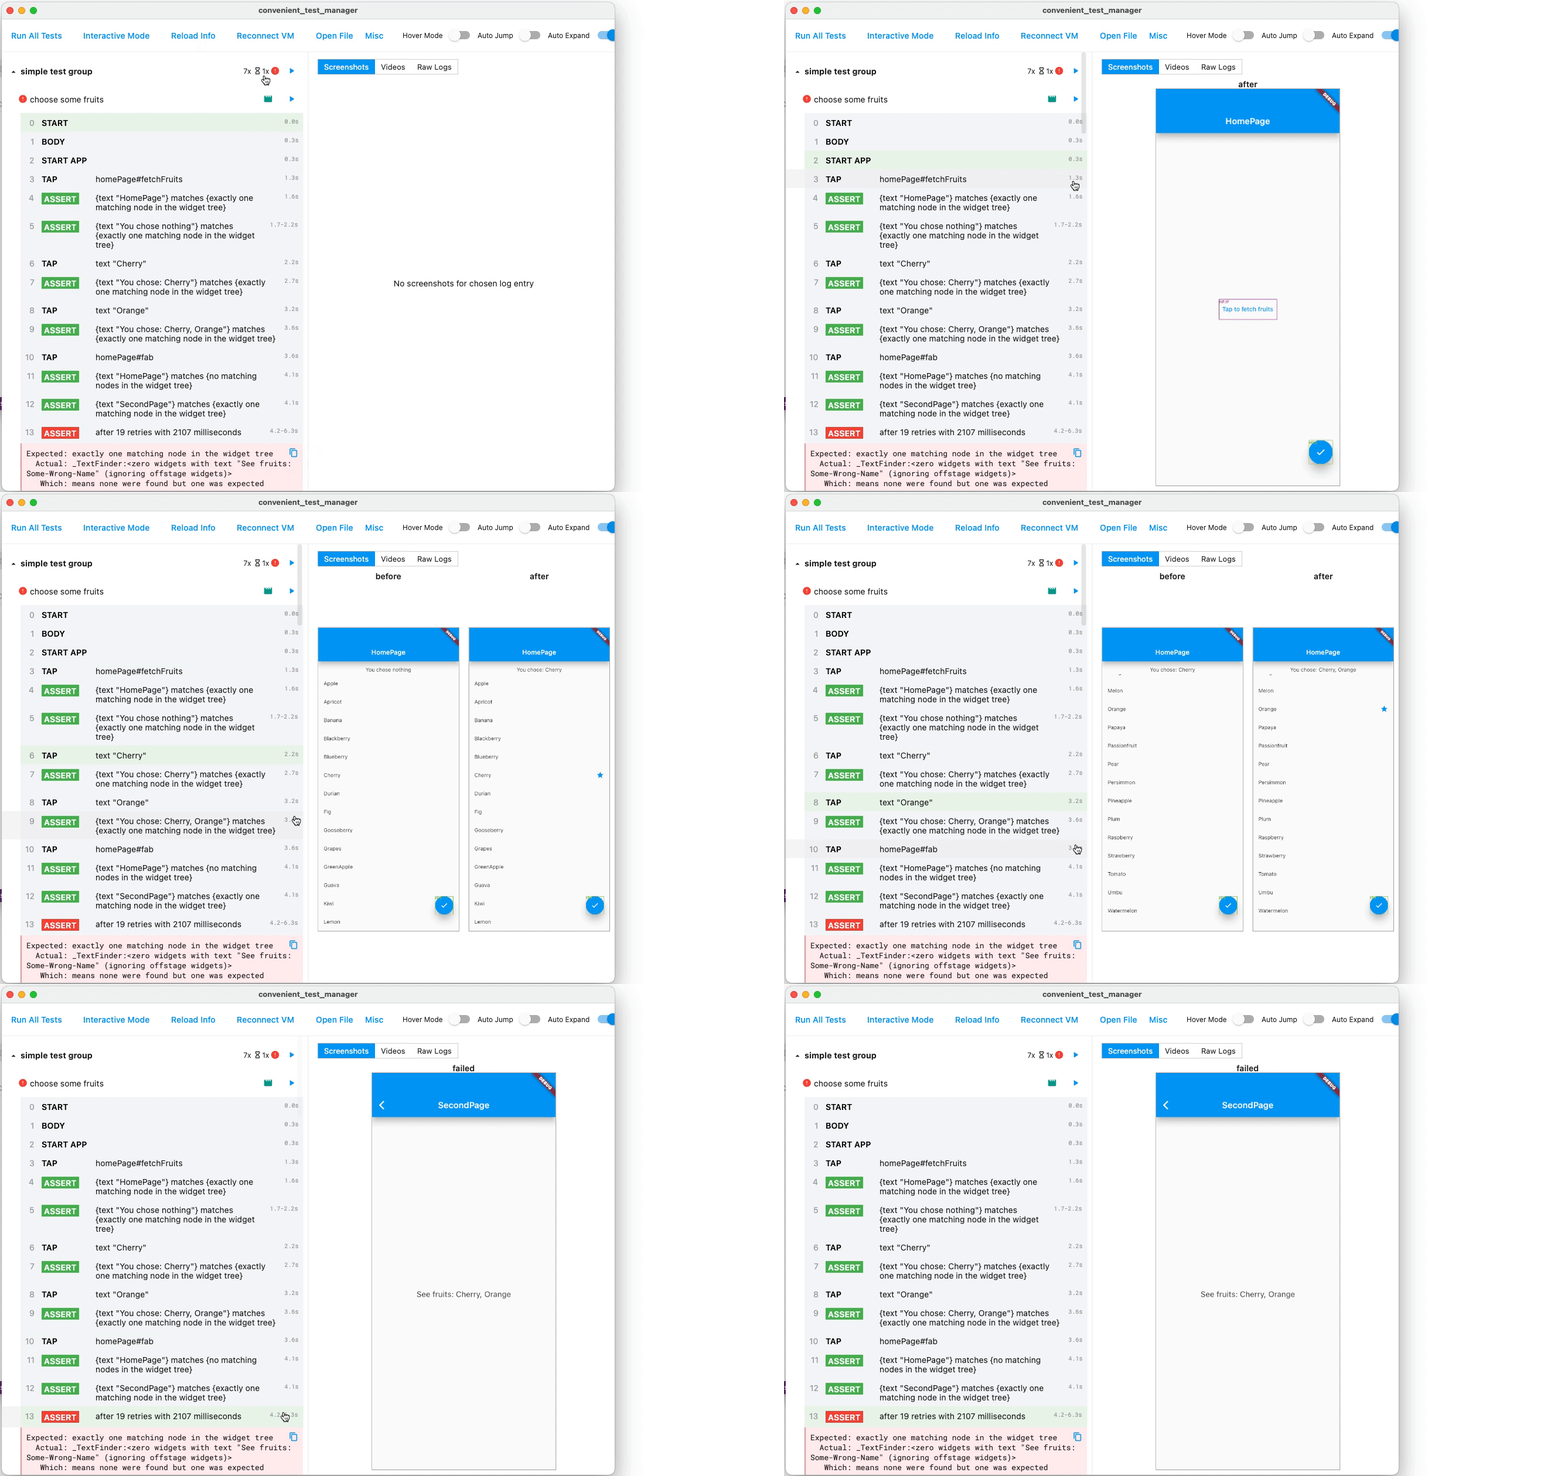
- Time travel, with screenshots: What did the UI look like when that button was tapped 50 steps ago? Now you know everything.
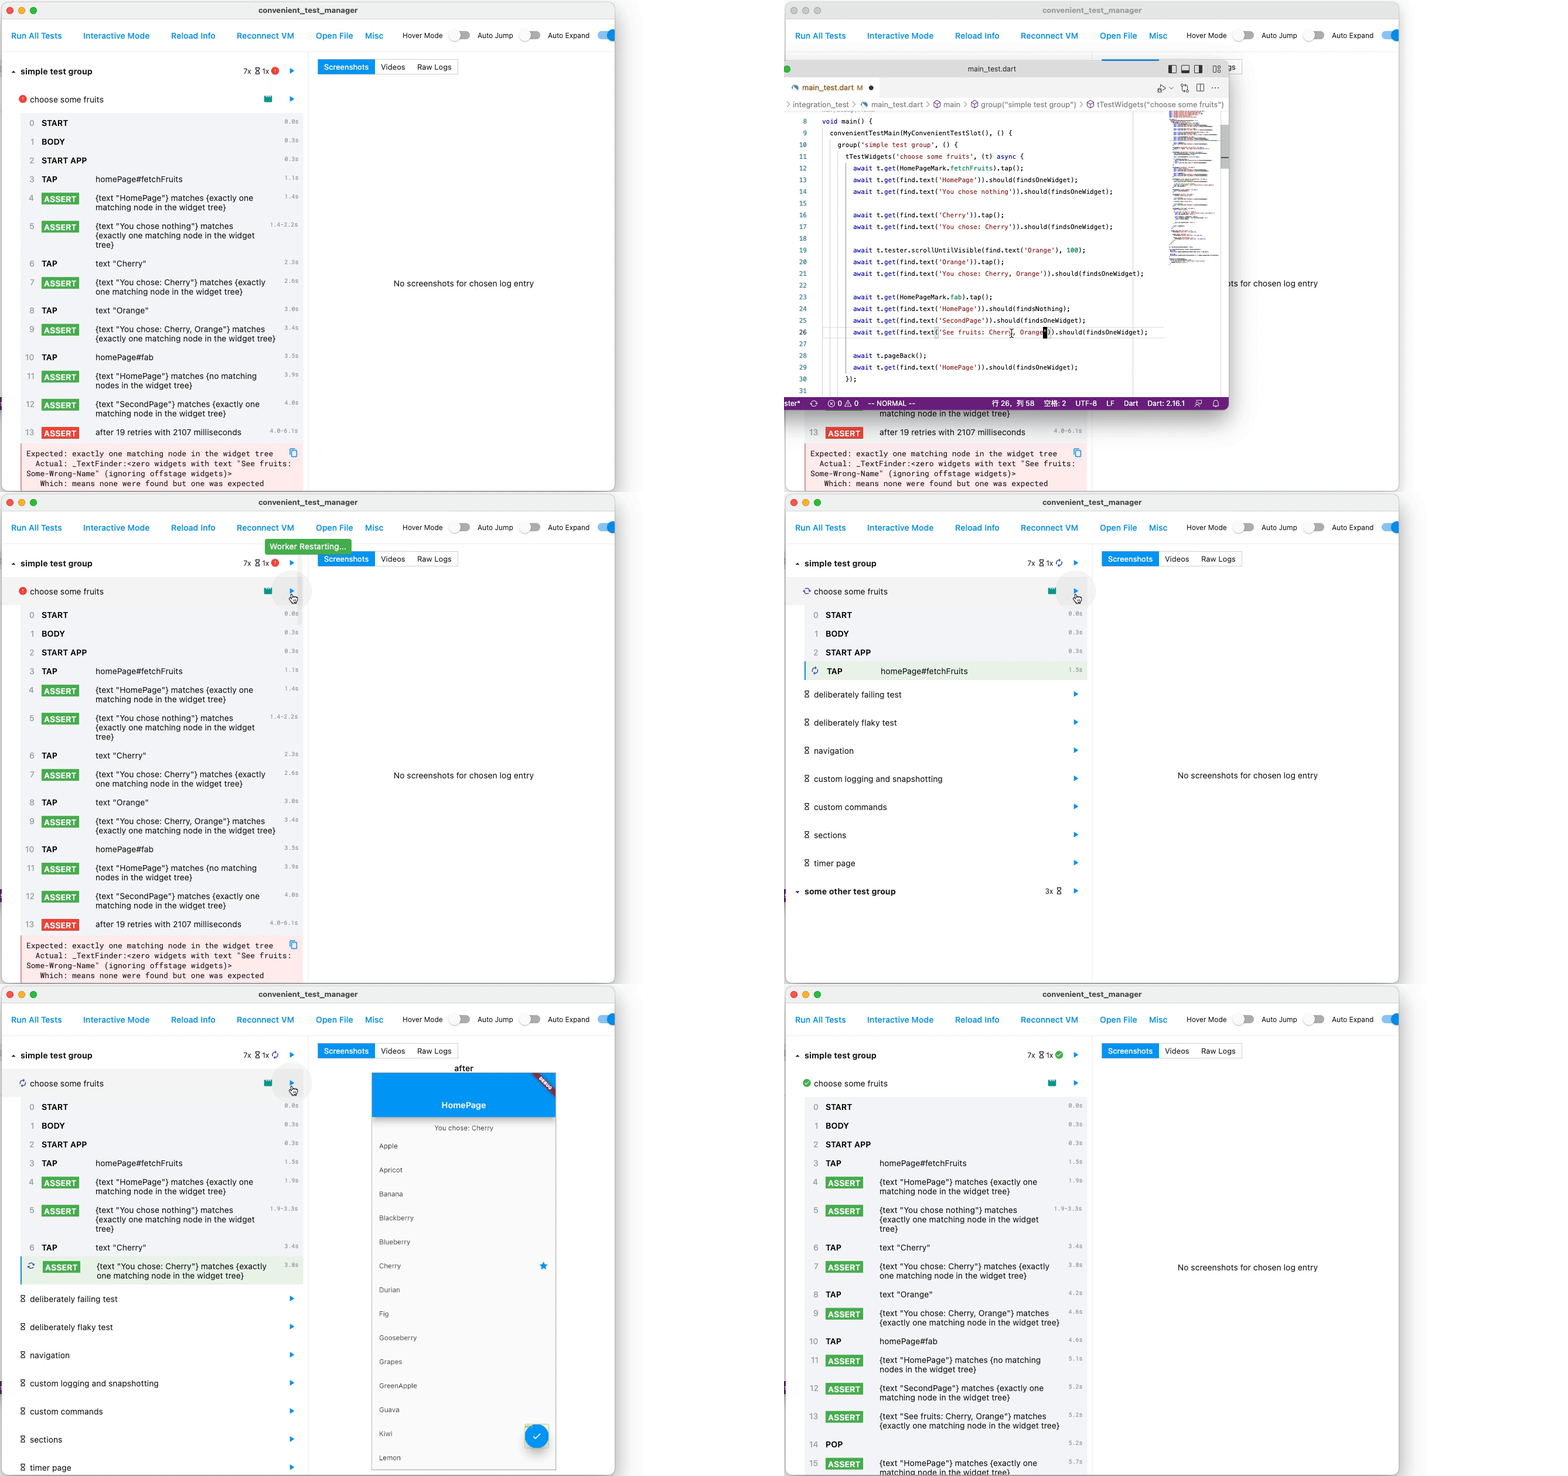
- Rapid re-execution: Edit code, save, run - done within seconds, not minutes.
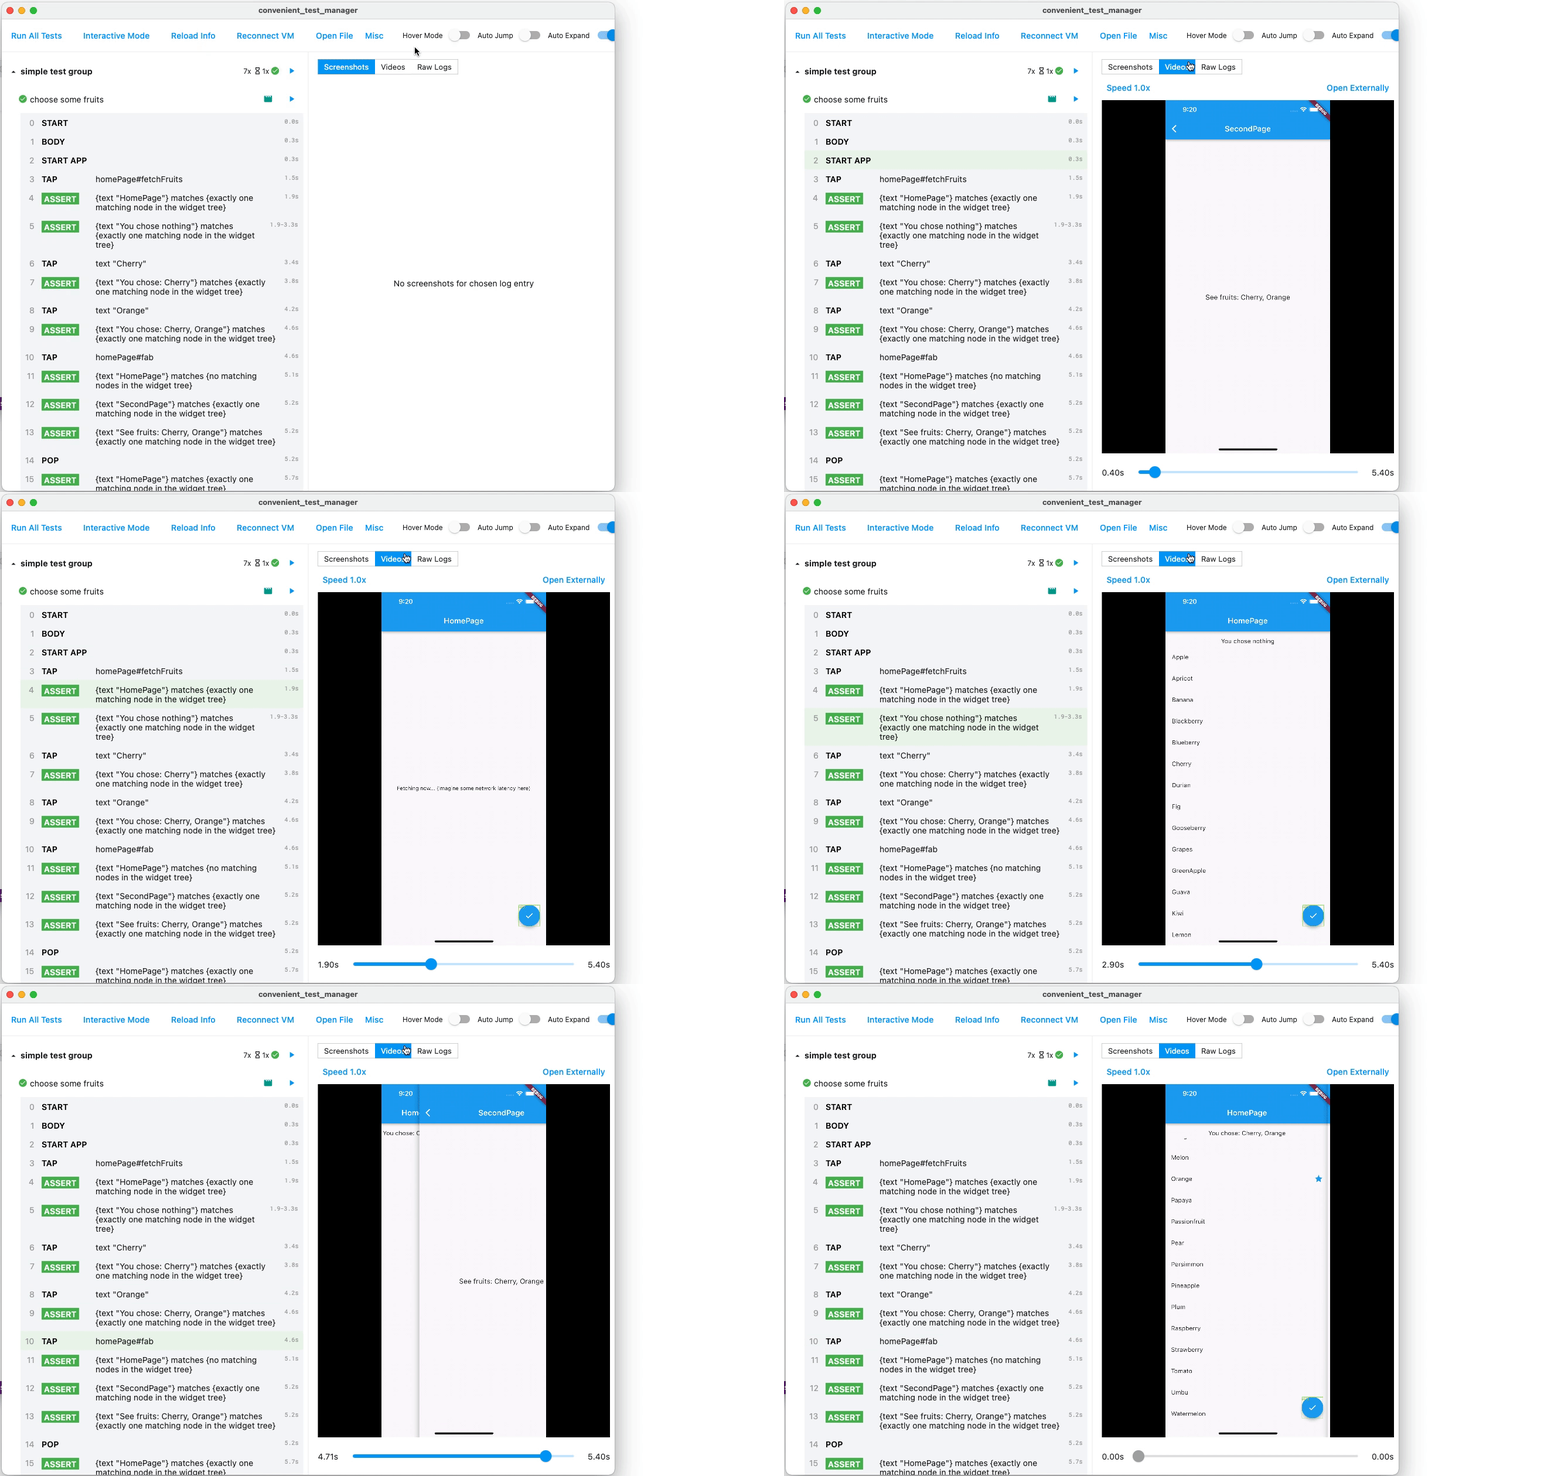
- Videos recorded: Watch what has happened, in full detail.
- Retryability: No manual
pump, wait or retry anymore. Just write down what you want, and the framework will retry and wait. - Being interactive: Play with the app interactively, again within seconds.
- Isolated: One test will no longer destroy environment of other tests - run each with full isolation (optional feature).
And also...
integration_teststill there: Freely use everything fromintegration_test,mockito,test, etc.- Flaky test awareness: No false alarms, while no blindly ignoring.
- Suitable for CI: Run headlessly, with logs to be visualized when needed.
- Miscellaneous: Visually see target regions, run single test/group within seconds, raw logs...
full_video.mov
It has been used extensively in my own 200kloc Flutter app in production environment.
P.S. Surely, this package - especially the doc - is not yet perfect. If having problems, just create an issue and I usually reply quite quickly.
See actions/taps/assertions taken in the tests, with friendly descriptions (in the left panel)
Tap an action to see its screenshots
P.S. Use mouse wheels and dragging to zoom and pan the screenshots.
Edit code, save, run - within seconds
Watch what has happened in full detail (in right panel)
P.S. Highlighted action is in sync with the playing video. Tap action to seek video.
Temporarily play with the app, interactively. (Flutter originally cannot interact with app in test mode)
No manual pump, wait or retry anymore. Just write down what you want, and the framework will retry and wait.
Example:
await t.get(find.byTooltip('Fetch Data From Backend')).tap();
// OK even if "fetch data" needs undeterministic time interval. Will automatically pump, wait and retry.
await t.get(find.text('New Data')).should(findsOneWidget);
More in quickstart and tutorials below.
One test will no longer destroy environment of other tests - now you can run run each with full isolation.
This is especially helpful in big projects (such as mine), when an end-to-end setup is not easy to tear down, and one failed test can cause all subsequent tests to have damaged execution environment and thus fail.
Technical details: If this mode is enabled, a hot restart will be performed after each attempt of each test.
You can still use everything from integration_test, mockito, test, etc. This package is not a reinvented wheel, and has exposed the underlying integration_test to you.
If you want to migrate to this package from raw integration_test, have a look at Getting Started section below.
Flaky is flaky, and we are aware of it. It is neither failed nor success, so you will not be alarmed by false positives, and not completely ignore it.
- Customizable tolerations - allow a portion of pixels to mismatch golden image
- Golden overview page - List and check all golden differences within one page with pan and zoom
- When a golden assertion fails, its image details will be also shown in the manager panel
- Crop golden images - when you only want a portion of the widget to be captured
(To be documented more thoroughly later #187)
This tool can be run without GUI and only produce log data and exit code, making it suitable to be run in a CI. If you want to examine the details with GUI, just open the generated artifact in the GUI using Load Report button.
// TODO: Add more doc about how to use it (informal doc here: fzyzcjy#240)
Tap "Run" icon button after each test or group to re-run only that test/group, without running anything else. All within seconds - no need to recompile like what the original test package did.
Useful when replaying videos and screenshots
Marks have colored borders- Gestures have visual feedbacks
Tap "Raw Logs" in the right panel to see raw outputs of a test.
Following is a brief description of the functionalities of each button in the header panel.
- Run All: Run all tests below
- Halt: Stop the currently running worker
- Interactive Mode: Enter "interactive mode" (described above)
- Reload Info: Reload test metadata such as the group names and test names
- Reconnect VM: Connect to the Dart VM of the worker app
- Load Report: Load and display a report generated when
SaveReporttoggle is enabled or run within CI/headless mode - Golden Diff Page: Enter the golden diff page (described above)
Following are about the toggles:
- Isolation: Whether to enable "isolation mode" (described above)
- UpdateGoldens: Whether to update the golden files on the disk, similar to
--update-goldensflag in a traditional Flutter test - Retry: When a test fails, whether to retry (and mark as flaky), or directly mark it failed
- SaveReport: Whether to save logs to a report file, such that it can be visualized later via "Load Report"
- Hover: When hovering the action log panel, whether highlight the hovered entry and immediately show related information
- AutoJump: Whether to jump to newly received action entries
- AutoExpand: Whether to expand and collapse automatically for the newly received test and action entries
- Clone this repository and enter the
packages/convenient_test/examplefolder. - Run the example app (e.g. using iOS simulator) via
flutter run /path/to/flutter_convenient_test/packages/convenient_test/example/integration_test/main_test.dart --host-vmservice-port 9753 --disable-service-auth-codes --dart-define CONVENIENT_TEST_APP_CODE_DIR=/path/to/this/app. Can also be run via VSCode or Android Studio with similar commands. - Run the GUI located in
packages/convenient_test_manager. (See details in section below) - Enjoy the GUI!
- In
pubspec.yaml, addconvenient_test: ^1.0.0to thedependenciessection, andconvenient_test_dev: ^1.0.0to thedev_dependenciessection. As normal, we need toflutter pub get. - Create
integration_test/main_test.dartfile in your app. Fill it likevoid main() => convenientTestMain(MyConvenientTestSlot(), () { ... the normal test code you write });. See the example package for demonstration. - Run your app (e.g. using iOS simulator) via
flutter run /path/to/your/app/integration_test/main_test.dart --host-vmservice-port 9753 --disable-service-auth-codes --dart-define CONVENIENT_TEST_APP_CODE_DIR=/path/to/this/app. Can also be run via VSCode or Android Studio with similar commands. - Run the GUI located in
packages/convenient_test_manager. (See details in section below) - Enjoy the GUI!
There are precompiled binaries for each commit, at the "artifacts" section in the CI page. For example, download manager_macos artifact, unzip it, and open it.
Currently only MacOS and Linux has CI for this, and I am willing to accept a PR for Windows.
packages/convenient_test_manager is nothing but a normal Flutter Windows/MacOS/Linux app, so run it following the Flutter official doc.
Surely, it can also be run via flutter profile mode to speed up. Or use flutter build and the standard approaches to generate a release version binary and use it.
There are a few ways to configure the manager:
- From
$HOME/.config/convenient_test.json. - From various environment variables.
- From command line arguments (when run via
convenient_test_manager_dartcommand line) - Change configurations via GUI (e.g. switches at right-top)
For all options that are configurable and all environment variable names, please see consts.dart. (By doing so you can always see the up-to-date information and there is no possiblility to see outdated doc.)
If you are trying to use this package with Android Virtual Emulator (AVD), you may need to set kConvenientTestManagerHost to 10.0.2.2 because of its network topology. Please see issue #253 for more details.
For detailed PRs (excluding myself), please see this link.
Rohith Gilla 💻 |
Mehran Kordi 💻 |
ethancadoo 💻 📖 |
Vishesh Handa 💻 |
Takuma Osada 💻 |
ronba 💻 |
Bartek Pacia 💻 |
Thanks for testing frameworks in JavaScript, especially Cypress, for giving inspirations!

