VisualAp is a visual framework for building application and systems based on visual components.
VisualAp can be used in order to perform audio processing, image processing, text and other process-driven emulation. VisualAp provides a visual framework based on lightweight components, called proclet. The user can create an application by selecting the components from a toolbox, configuring the parameters (via the Javabeans framework), and connecting the components together in order to set-up communication channels between the components. Please click here and read the user guide for more information.
This application has to be compiled and run with Java 8, later versions are currently not supported.
The batch file build.bat can be used to build the project. It generates the classes and two jar files: visualap-setup.jar and visualap.jar
VisualAp has to be installed by running visualap-setup.jar:
java -jar visualap-setup.jar
Please click here for additional information.
Launch VisualAp in one of the following alternatives:
java -jar visualap.jar
or
java visualap.VisualAp
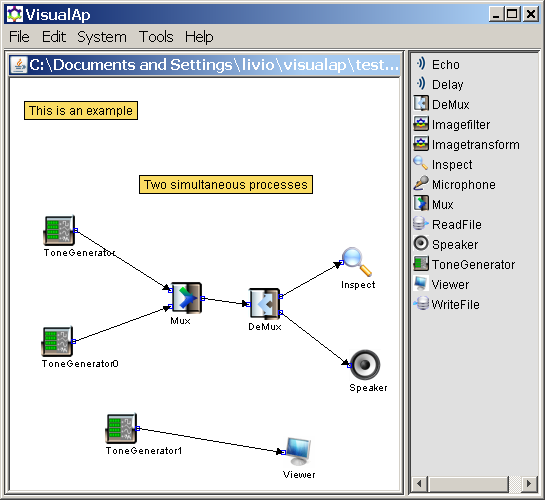
Here is a screenshot of the user interface:
The user interface is described in more details here.
- Launch the application VisualAp, or select File->New if it is already running
- Select in the toolbox the “ReadFile” component, move and click the mouse pointer in the left side of the workspace: the component ReadFile is placed in the left side of the workplace
- Double-click the ReadFile component in the workspace: the properties window for ReadFile appears.
- In the properties window press the “Choose Filter” button, select the file “sassi.jpg” and press “Done”.
- Now select in the toolbox the “”ImageFilter” component, move and click the mouse pointer in the center of the workspace: the component ImageFilter is placed in the workplace.
- Connect the output pin of ReadFile to the input pin of the ImageFilter component.
- Now select in the toolbox the “”Viewer” component, move and click the mouse pointer in the right side of the workspace: the component Viewer is placed in the workplace.
- Connect the output pin of ImageFilter to the input pin of the Viewer component.
- Now check the system: System->Check, you should get a dialog with “System Check Passed” answer.
- Eventually you can run the system: System->Run, a new window pops-up with the inverted image.
- Double-click the ImageFilter component in the workspace: the properties window for ImageFilter appears. You can change the effect to 5x5Edge.
- Run the system, again System->Run, the image will change due to the new filter.
Additional information are available in the developer guide.
