Deploy Authorizer using heroku with Postgres database for free and quickly play with it in 30seconds
Note: In case if you have paid heroku version and want to deploy authorizer with postgres and redis, please checkout button on this branch
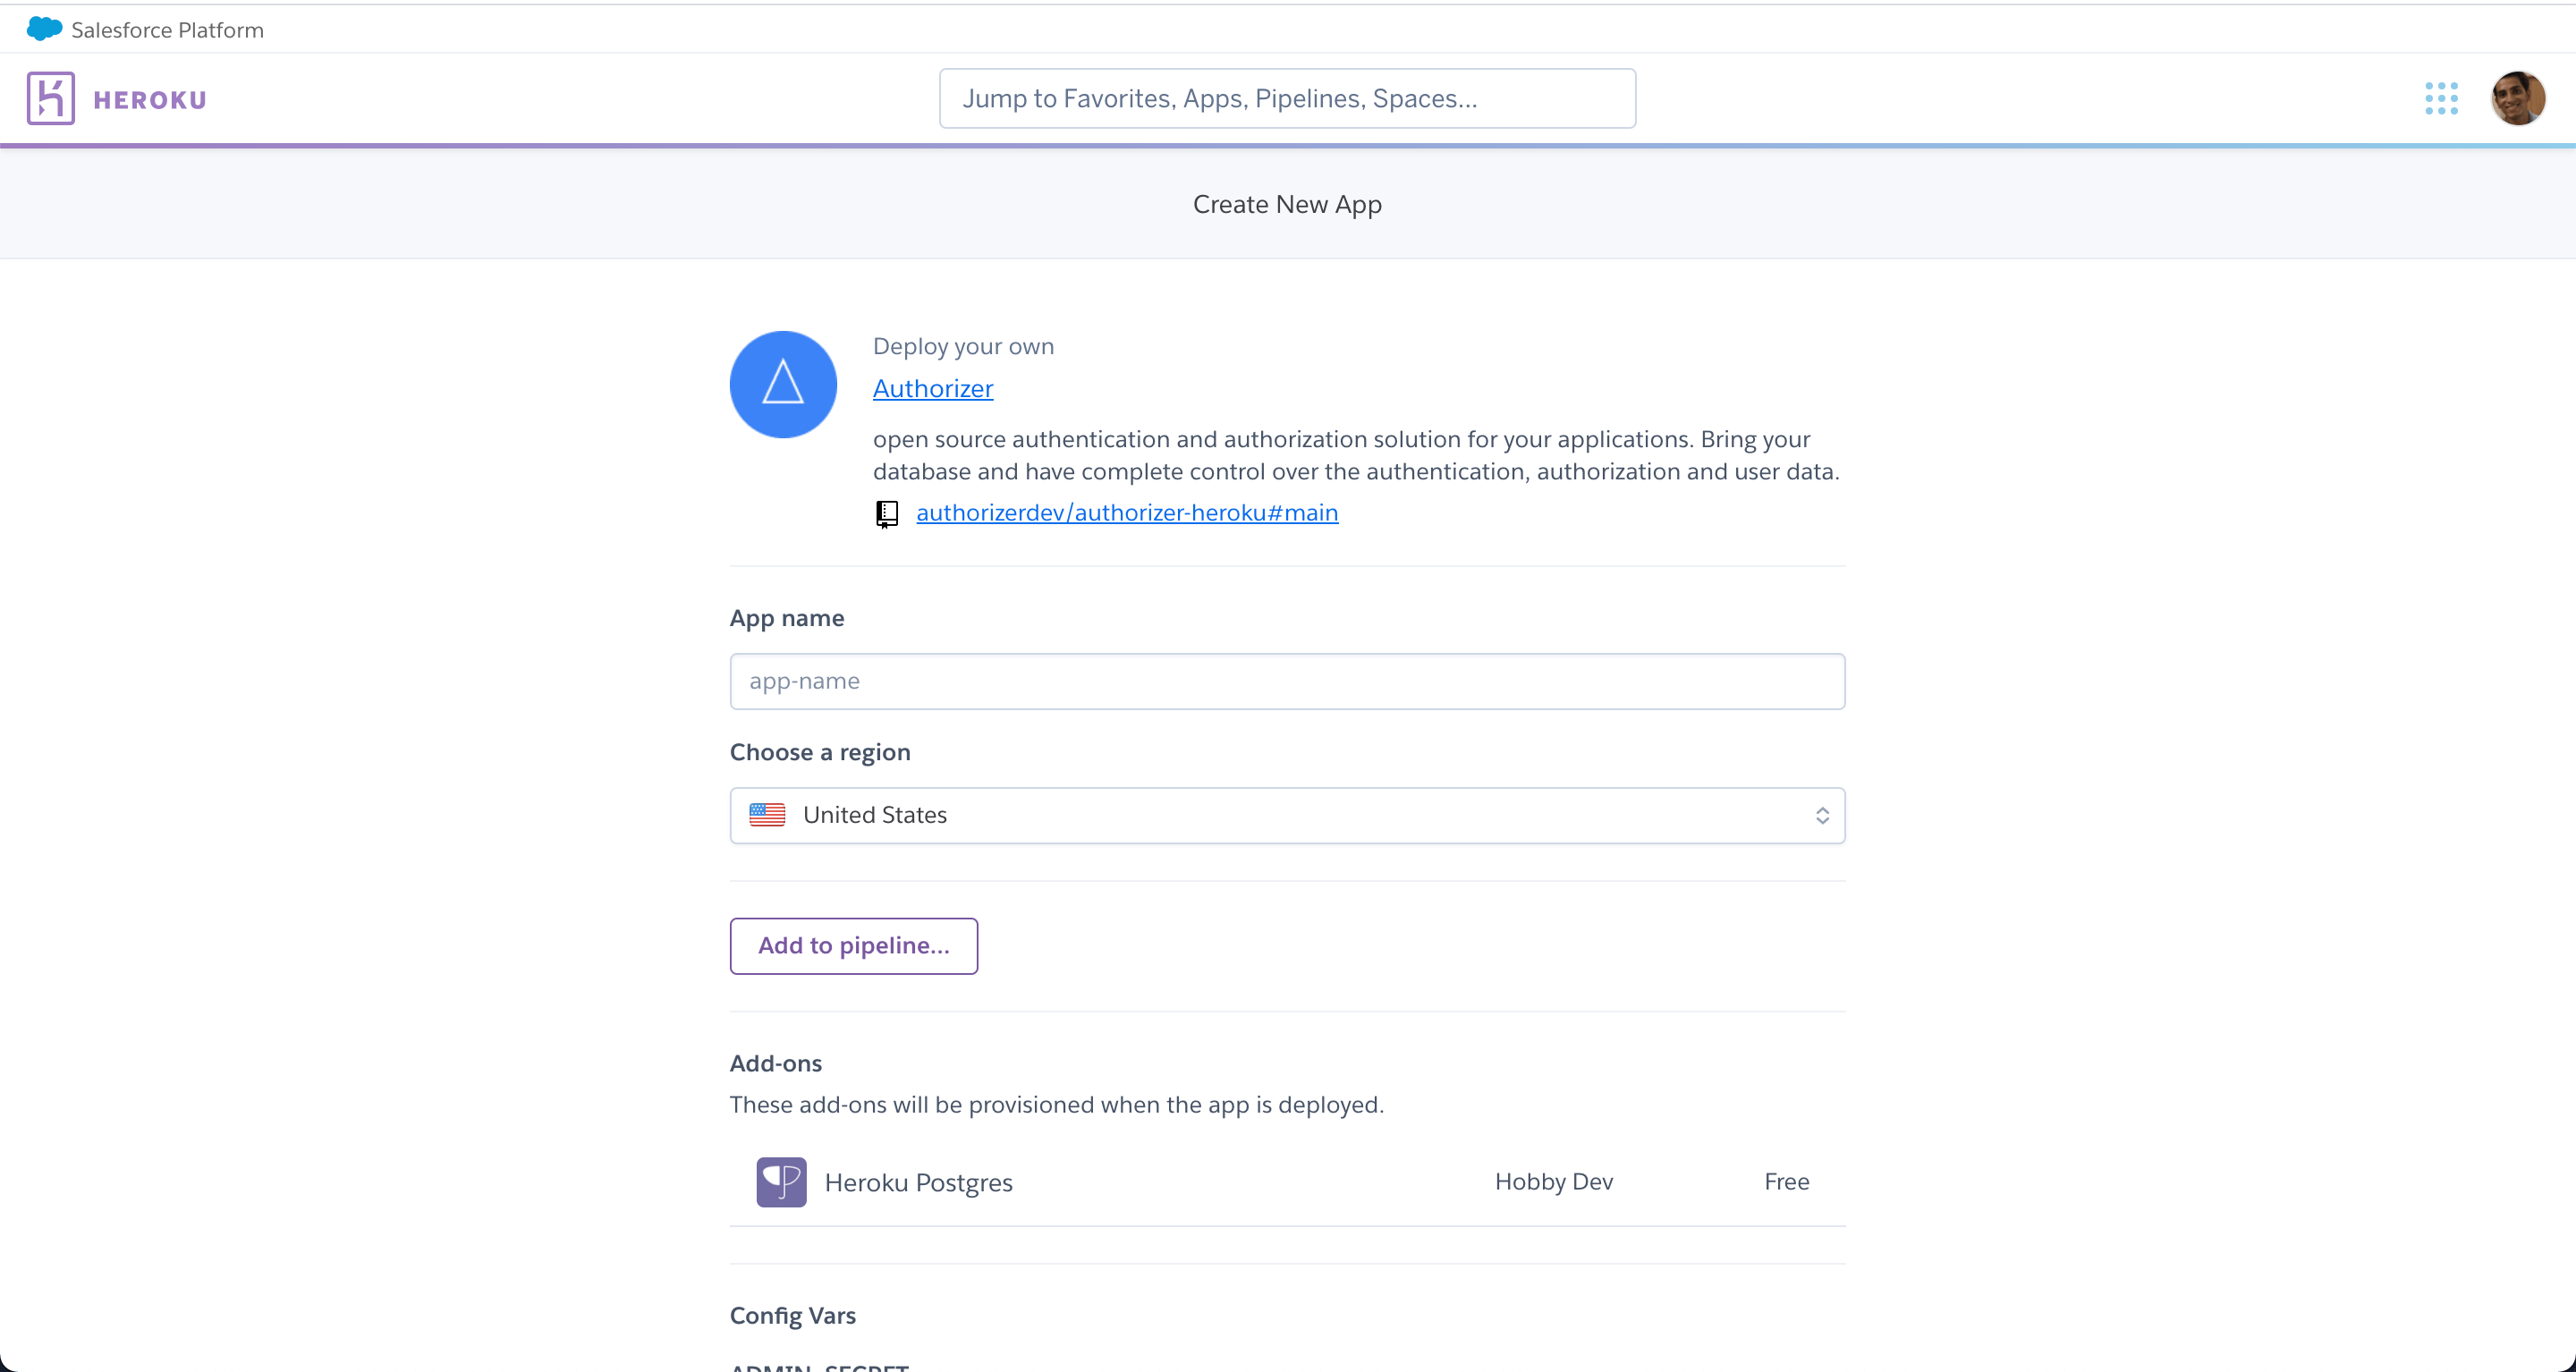
After click the above button you will see screen as below, follow the steps mentioned below:
App name becomes the url for your application. Example if you have entered authorizer-demo as the app name then the authorizer url will be authorizer-demo.herokuapp.com.
Select the region you want to deploy you application in. Heroku supports United States and Europe only.
Required envs are pre-configured, but based on the production and social logins, please configure the environment variables. Please refer to environment variables docs for more information
The Authorizer app with Heroku buildpack/configuration is available at: https://github.com/authorizerdev/authorizer-heroku.
Clone the above repository.
git clone https://github.com/authorizerdev/authorizer-heroku
cd authorizer-heroku
If you already have this, then pull the latest changes which will have the updated GraphQL engine Docker image.
Let’s say your Heroku app is called authorizer-heroku and is running on https://authorizer-heroku.herokuapp.com.
From inside the graphql-engine-heroku directory, use the Heroku CLI to configure the git repo you cloned in Step 1 to be able to push to this app.
# Replace <authorizer-heroku> with your Heroku app's name

heroku git:remote -a <authorizer-heroku>
heroku stack:set container -a <authorizer-heroku>
You can find your Heroku git repo in your Heroku - Settings - Info - Heroku Git URL
When you git push to deploy, the Heroku app will get updated with the latest changes:
git push heroku main