##REGISTRATION Create yourself an account to the Test My Code (TMC) server in address http://tmc.mooc.fi/hy/user/new USE YOUR STUDEN NUMBER AS ACCOUNTS NAME
If you already have an account in TMC, you do not need a new one. Ensure that you remember your password by logging in to http://tmc.mooc.fi/hy/
In the course we'll be using version 8.0 (or later) of the NetBeans Integrated Development Enviroinment and the TMC plugin to download and submit the programming assignments. NetBeans requires Java development kit (JDK) to be installed.
For C exercises you need version which comes with C support, or you need to install C plugin for NetBeans...
Currently we support only Linux and mac for C exercises. Windows can be configured with cygwin (install gcc and check and add them to your PATH), but we don't support it officially, ie. we only test our exercise templates using Ubuntu 12.04 and OSX 10.8.
NetBeans has a great installation guide for windows:
- Installing C plugin: https://netbeans.org/community/releases/72/cpp-setup-instructions.html
- Installing cygwin and gcc etc. NOTE THAT YOU MUST ALSO INSTALL CHECK https://netbeans.org/community/releases/72/cpp-setup-instructions.html#cygwin
You must have gcc and check installed., pkg-config is required on some systems. Valgrind is also used if available. These are installed in pajas computers.
apt-get install build-essential check valgrind pkg-config should get these installed for ubuntu.
If using mac, check can be installed using homebrew
When using mac, you also need to edit /etc/launchd.conf and add there
setenv PATH <your $PATH>
Substitute <your $PATH> with yout real path. In ths file no $HOME or such can't be used.
This path should include gcc, check and valgrind.
For this to take effect you need to restart your computer.
On my machine it looks like this:
$ cat /etc/launchd.conf
setenv PATH /usr/local/bin:/usr/bin:/bin:/usr/sbin:/sbin:/usr/local/bin
$
NOTE: If you have an old version of NetBeans on your computer, we recommend that you remove it before installing the new version. When the installation procedure asks if the old setting should be imported, answer "no".
If you already have JDK installed, go directly to step 2.
Download the most recent version of JDK "Java SE Development Kit 8uxx" from the address http://www.oracle.com/technetwork/java/javase/downloads/jdk8-downloads-2133151.html, if you are a Linux user, see the information below!
Accept the licence, select a suitable version for you computer and do the installation.
In Windows, the installation procedes similarly as installations of any Windows program.
In Mac, the installation resembles installation of any dmg-package. NOTE: you need Mac OS X 10.7.3:n (Lion) or a more recent OS X -version. Oracle provides detailed information about the installation http://docs.oracle.com/javase/8/docs/webnotes/install/mac/mac-jdk.html
In most Linux distributions you get JDK directly from the packet management. In Debian based distributions (eg. in Ubuntu) it is enought to install the package openjdk-8-jdk which can be done in command line with the command sudo apt-get install openjdk-8-jdk -y or by using the Synaptic Package Manager. In the case that your distribution does not provide a suitable JDK, you can do the installation by extracting the .tar.gz-file found on the Oracle page.
Download the NetBeans/TMC-bundle suitable for your computer by right clicking and selecting "save link as":
windows
mac
linux
Do the installation
In Windows, the installation is done by opening the downloaded exe-file
In Linux, the insallation is done by executing the installation script by giving the command ./tmc-netbeans_mooc-linux.sh in the directory where the file is located
The script can be executed only if it has been given right permissions eg. with command chmod o+x tmc-netbeans_mooc-linux.sh http://update.testmycode.net/installers/tmc-netbeans_hy/tmc-netbeans_hy_tmcbeans-windows.exe
In Ubuntu, for example, the execution permissions can be given using the File browser by right clicking the script and selecting properties/permissions/allowin execute file as program. After doing this, the script can be executed by right clicking it.
In Mac, the installation is done by extracting the contents of the downloaded package and then running the Netbeans with TMC Installer.app. The installer installs TMC-NetBeans to your computer. After the installation, the program is found from the Applications-folder.
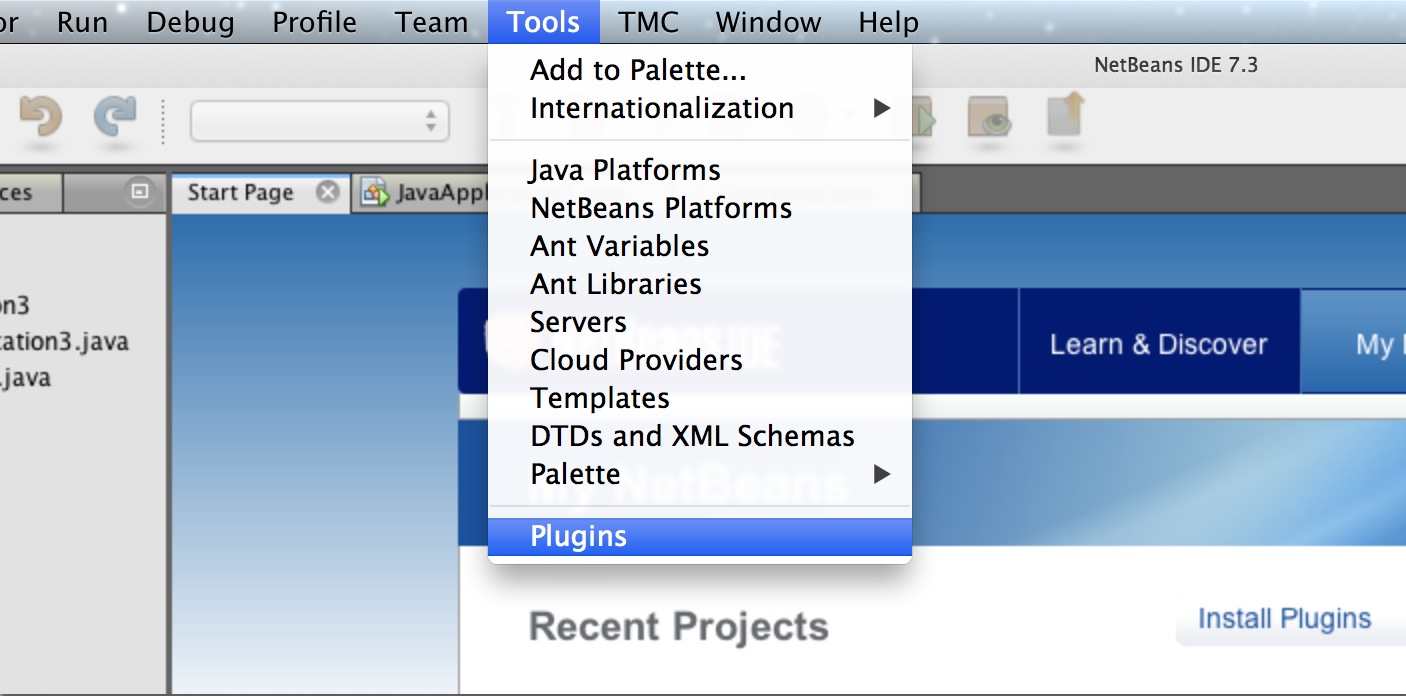
Open NetBeans. Make sure that version you are using is at least 8.0.2. (8.1 or newer is recommendend)
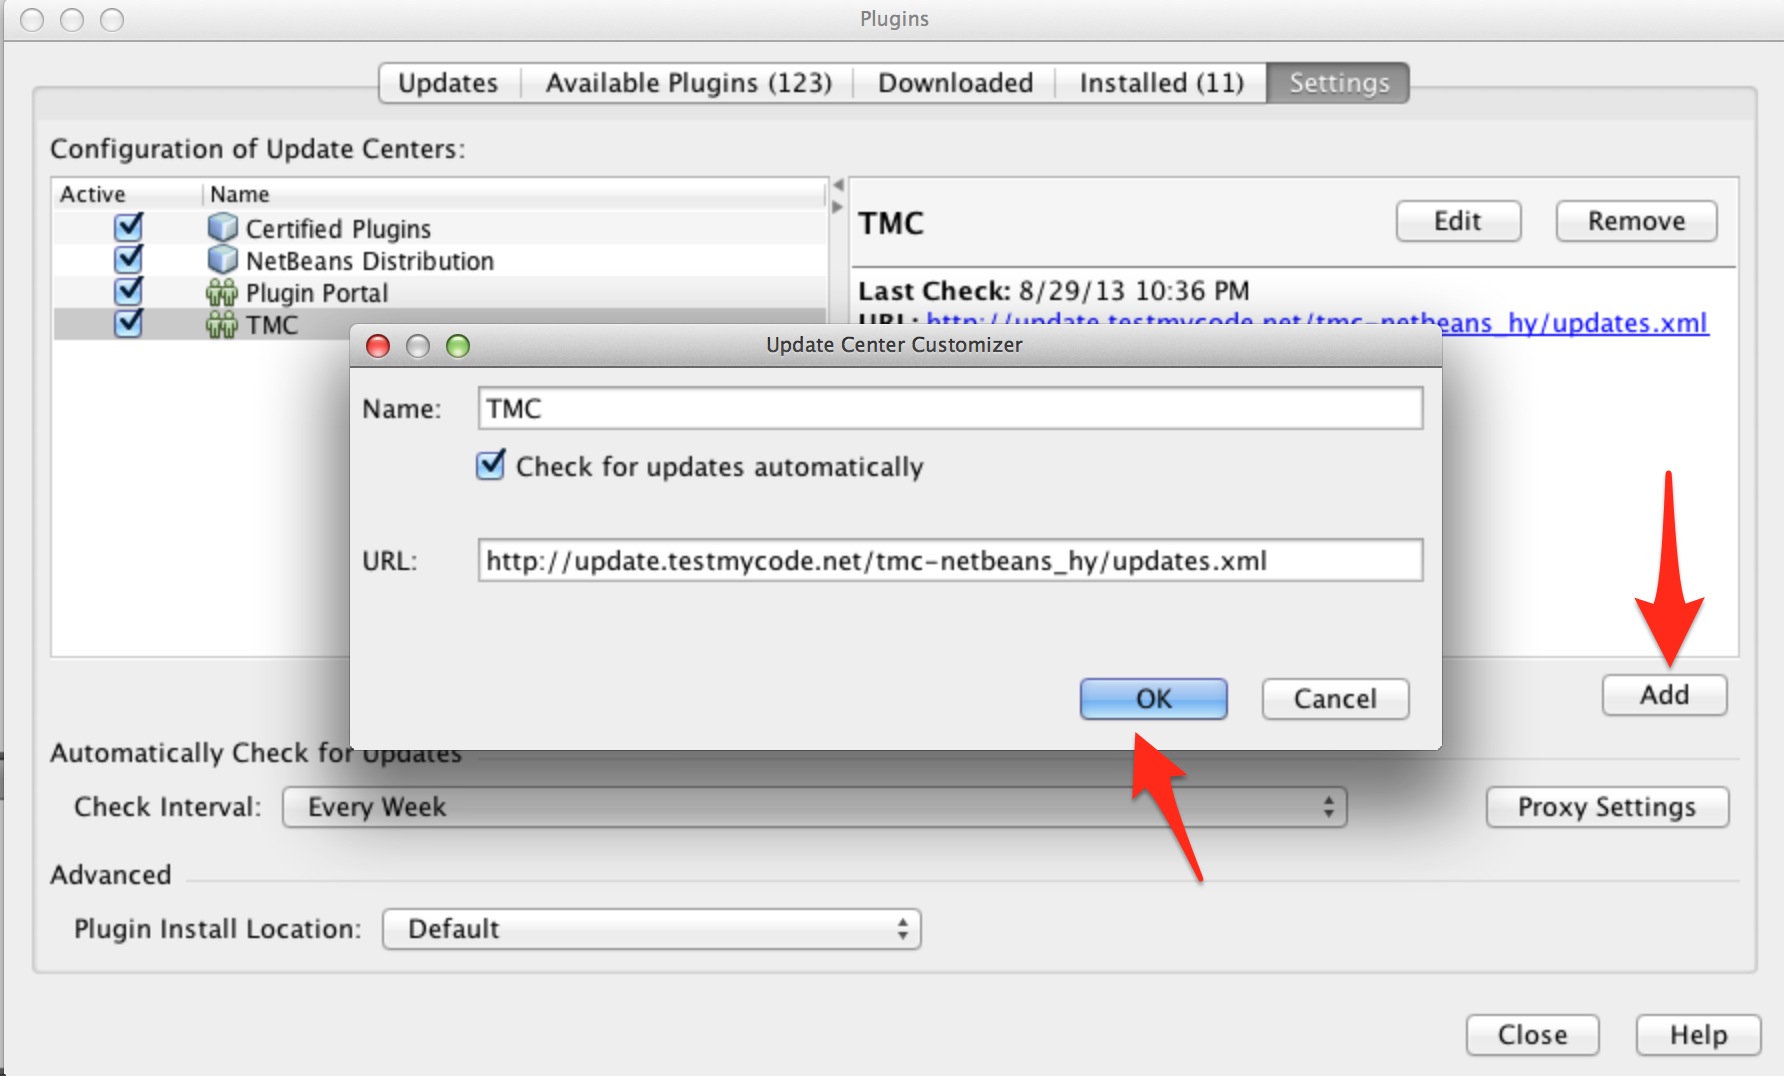
Select tab Settings click Add.
Set name to TMC
Url to http://update.testmycode.net/tmc-netbeans_hy/updates.xml
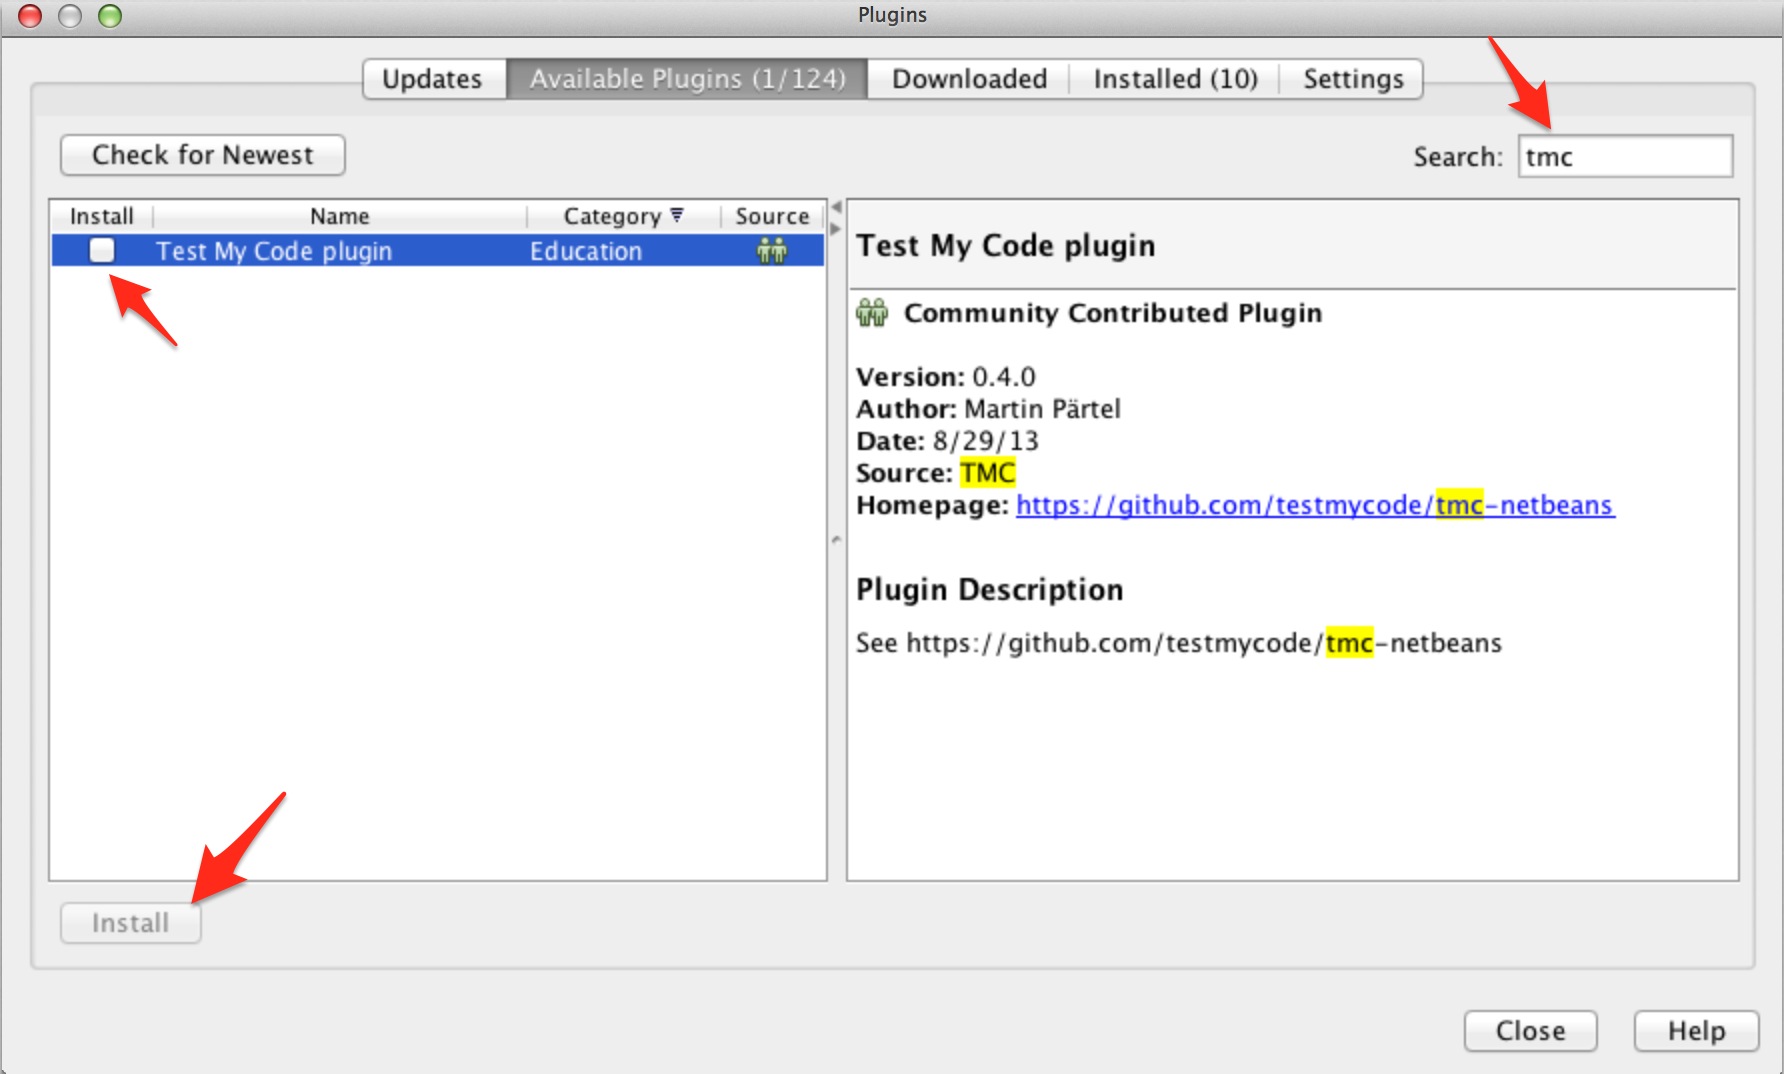
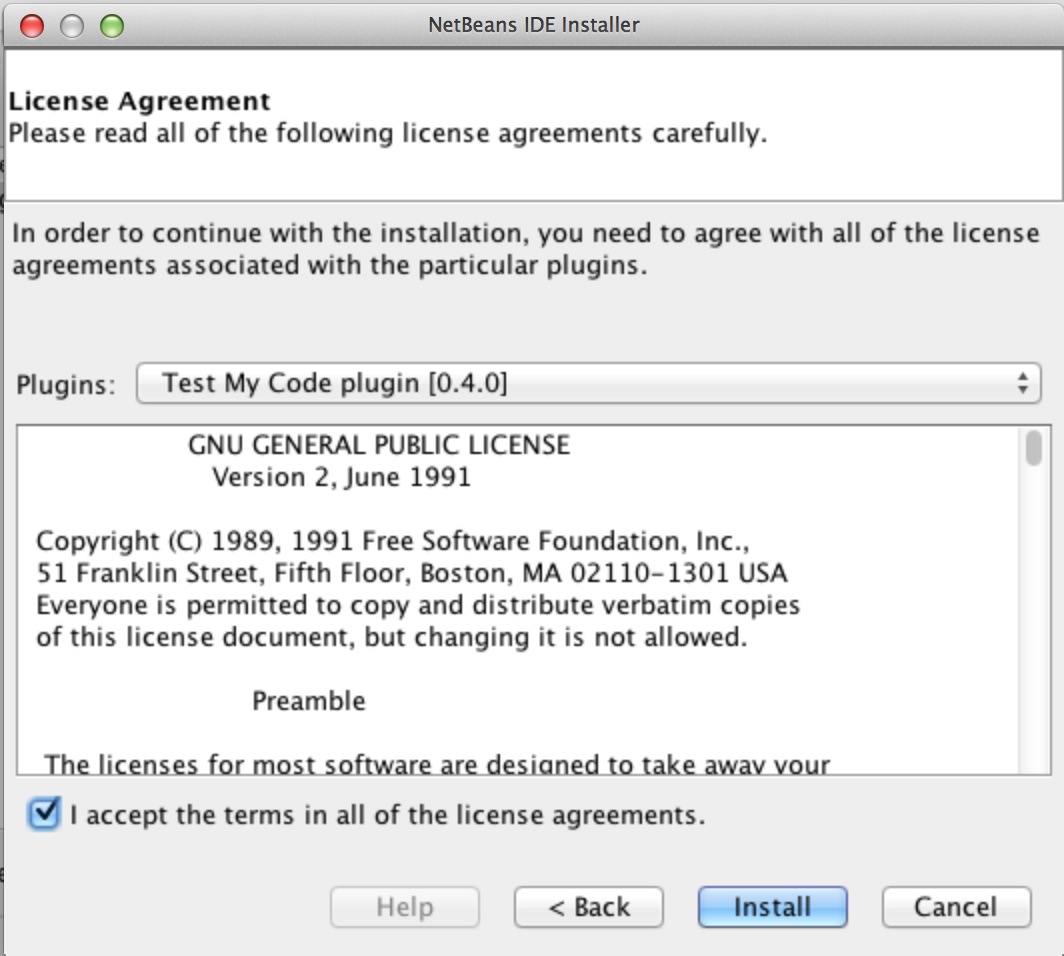
Select tab Available Plugins, search for TMC It should show only one result. Check checkbox on its row anw and select Install
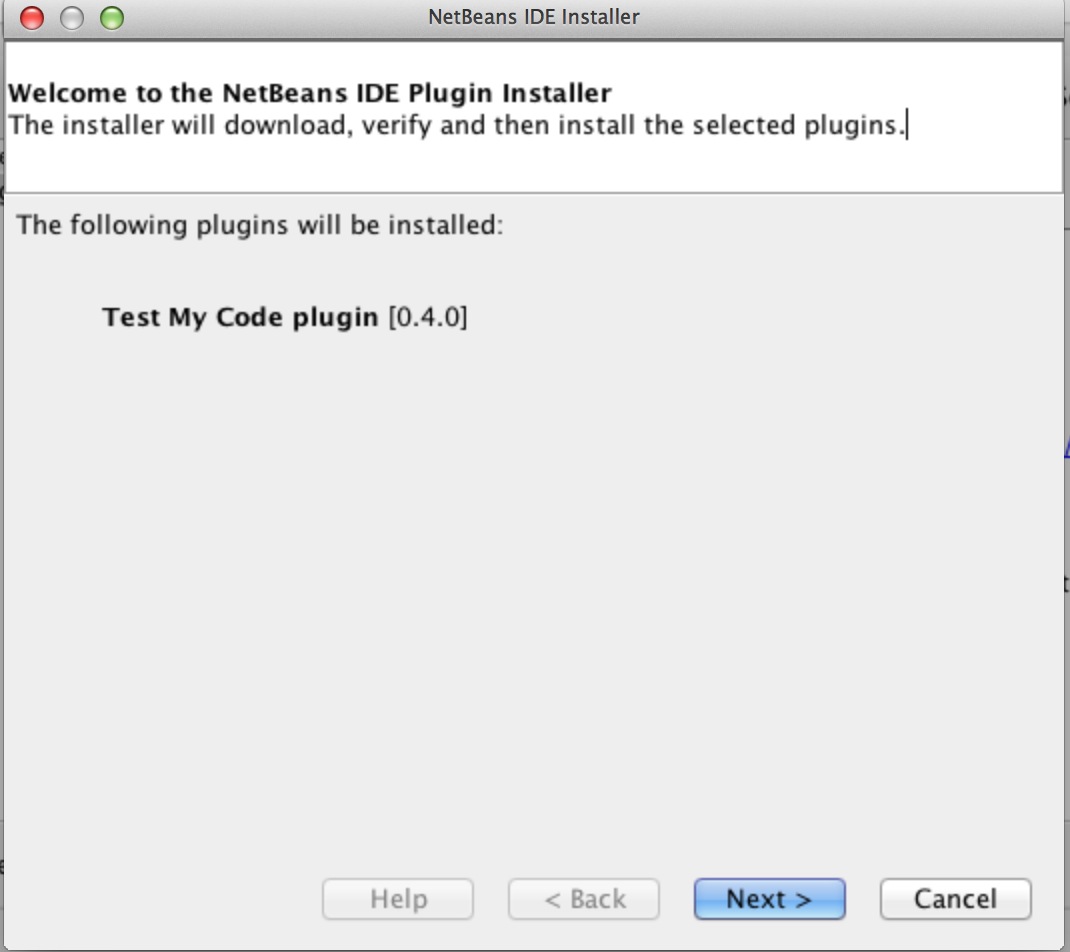
Check Accept the terms in all license agreements
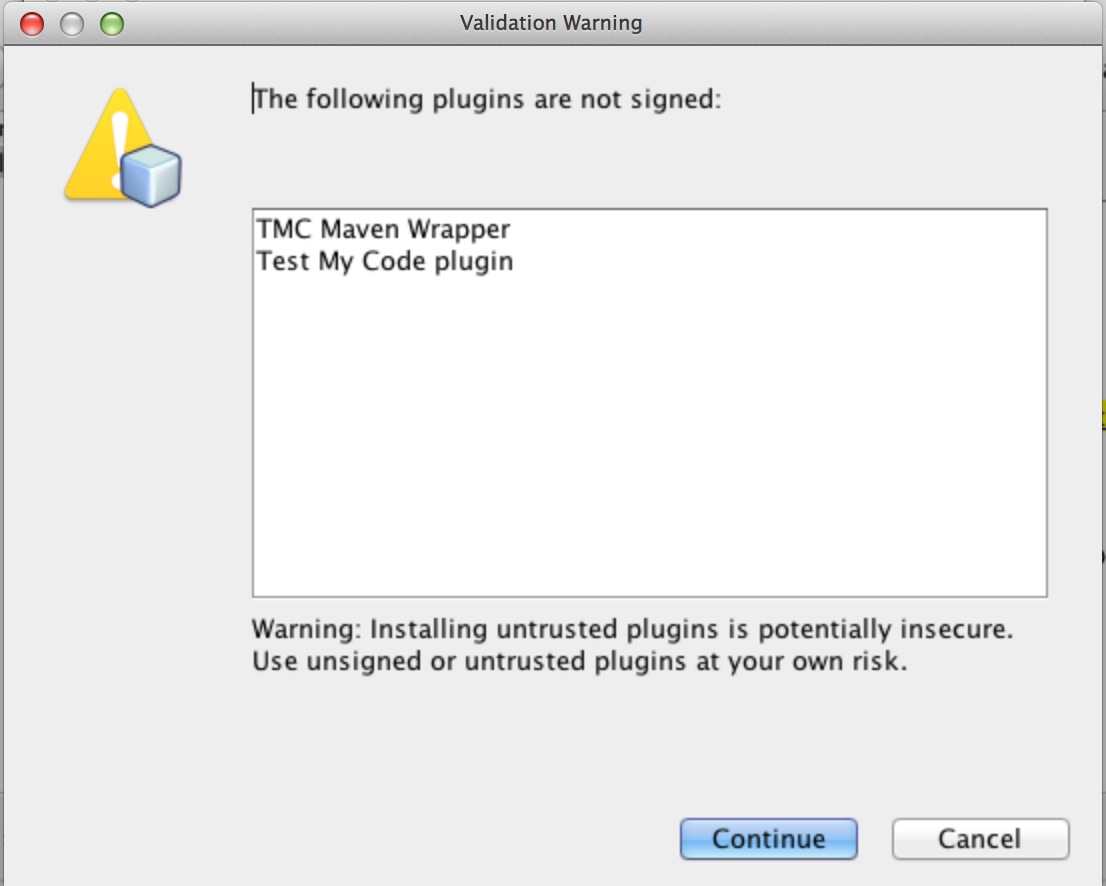
Click continue, when instaler complains that these plugins are not signed.
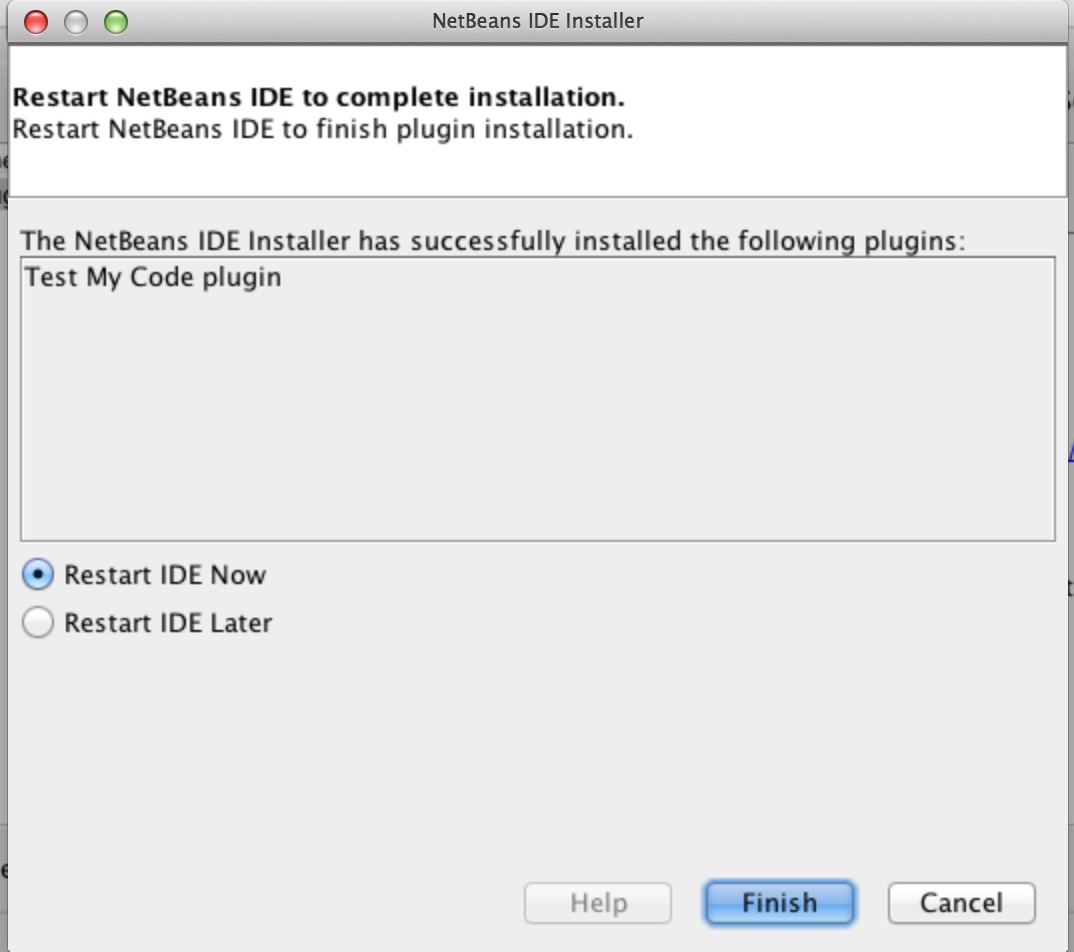
When installation is complete restart NetBeans
When you start TMC/NetBeans for the first time, the below window should open. If it does not open, you can find it from the TMC-part of the NetBeans menu bar.
Give the Username and Password that you gave during registration.
Press the button "refresh list" and select from "Current course" s2013-cee
By pressing "ok" the assignment "projects" are downloaded to your computer.
