-
Notifications
You must be signed in to change notification settings - Fork 2
1. The Hardware
The TLab μNode is an ESP8266-based board, that is widely used in the industry and by hobbyists.

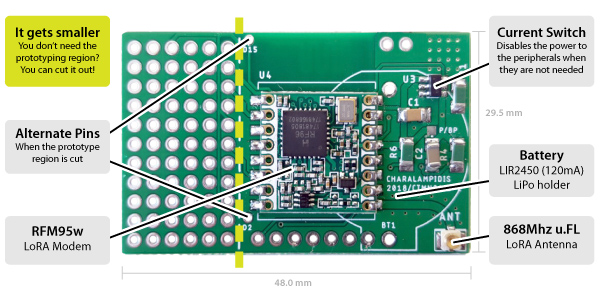
It is also coupled with an RFM95w (868Mhz) LoRa radio module that provides a Long-Range radio communication with minim power budget. This board is compatible with The Things Network specifications.

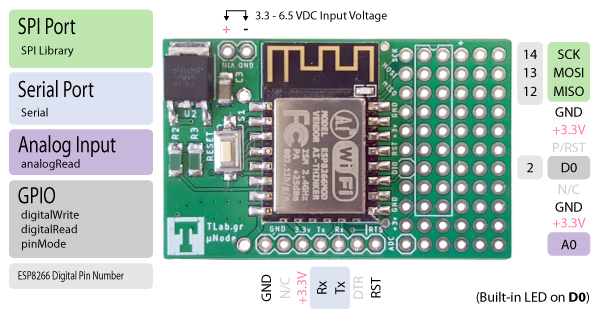
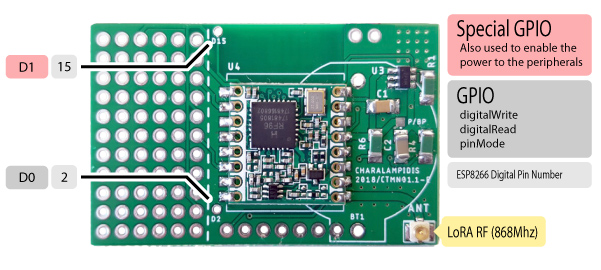
The bare board provides only one digital I/O (D0) and one analog Input (A0). The pin D0 is also connected to the built-in LED.

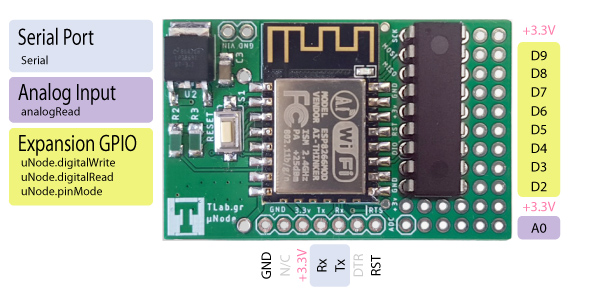
If you want more GPIOs you can solder a MCP23S08 GPIO expansion chip on the position indicated by the solder mask. The uNode library provides seamless interface to the new pins using the uNode.pinMode / uNode.digitalRead / uNode.digitalWrite functions.

If you have not soldered or bypassed the Current Limiting switch, you can also use D1 as a GPIO.

You can power the μNode in one of the following ways:
The node accepts a wide range of input voltage, from 3.3v to 6.5v. This means that you can use a simple battery pack to power it. A small AAA or a regular AA battery pack is enough for this purpose:

If you want to have a more compact result, you can solder a XX2450 coin-cell battery holder on the back of the node. It is recommended to use a LIR2450 120mAh LiPo coin-cell battery for this purpose, because it operates at 3.7V. A regular 3V CR2450 battery will not work!

You can also power the μNode with the TFTDI cable that you can also use for programming. Choose the 3.3v option from the adapter jumper. Higher voltage will permanently damage your board!
You will have to press the pins against the board. Alternatively you can solder 8 pin sockets and plug your TFTDI board there.
