- Funix 可将普通的 Python 函数或类转换为网络应用程序,并且可通过链接共享,在浏览器中访问。
- Funix 流动不居,可成为前端/后端亦或全栈工程师,也可成为架构/运维工程师,辅佐您这样的人工智能/数据/科学领域的独行侠。
- Funix 为那些编写最核心、最具创新性代码之人,提供无代码或低代码的解决方案。
- Funix 是开源软件,可在企业内部部署。
- 初创企业:快速构建演示产品,迭代原型,获取用户反馈并统计数据,向投资者或您的母亲推荐。
- 创成式 AI:让人们与你的 GenAI 模型或想法即时活动。
- STEM 研究:让人们不费吹灰之力就能运行您的模型或算法。
- 数据浏览器:Funix 可成为浏览数据、图表的工具。
- A/B 测试和数据标注:可用于收集人工标注的信息和偏好。
- 极简主义、开箱即用:仅需对现有代码进行少量修改,亦或不进行修改就可使用。
- Python 中的 CSS:部件(Widgets)基于变量类型和样式主题自动生成,而非手动单独设置,从而实现了跨 Funix 应用程序的集中、可重用和一致的用户界面。
- 非侵入性和声明式:用户界面配置作为 JSON 字符串,与核心逻辑分开。您的代码可照旧运行、导入和调用。
- 天生 Pythonic 者:将 Python 原生关键字对应到 Web 应用程序的功能:
global用于会话,yield用于流式传输,以及用于随时展示到前端的print。 - 应用,而非 Demo:开箱即支持访问控制,调用追踪和不追踪支持,多页面程序 和应用间数据传输,会话管理,动态输入,后端遥测等等……
-
安装 Funix (高级安装方式):
pip install funix
-
将下列代码保存为
hello.py:-def hello(your_name: str) -> str: return f"Hello, {your_name}."
-
运行如下代码:
funix hello.py
-
Funix 将会唤起您的浏览器,访问
http://localhost:3000:
Funix 之道便是根据函数的入参类型和返回类型生成部件,而非为每个参数挑选和定制部件。Funix 之于 Python,就如 CSS 之于 HTML,宏之于 LaTeX。UI 相关的内容不与核心逻辑混合,而是单独定义。类型-部件的映射由主题控制,还可在现有的类型基础上定义新的类型。
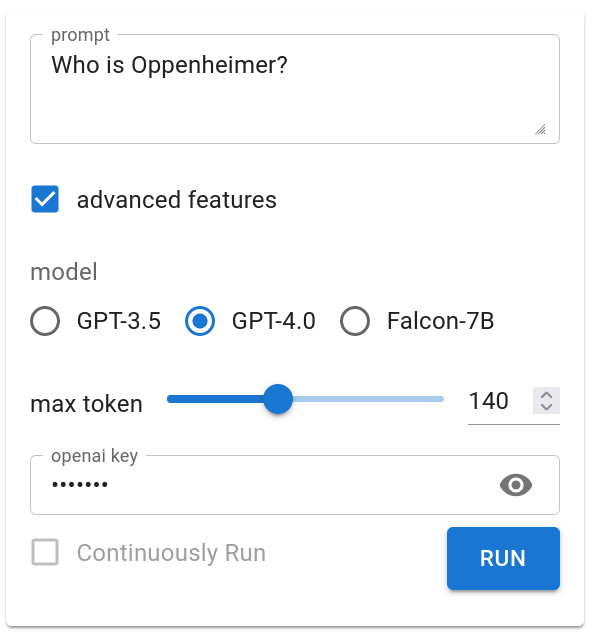
下方的示例展示了如何从四种 Python 原生类型生成普通的 UI 组件:str, bool, Literal 和 range,以及流行软件包中的类型,如 ipywidgets.Password。下面的示例还进一步将默认值映射到用户界面部件中的占位符。从此中,我们可以看到开发人员无需学习任何有关 Funix 的知识,也无需对现有代码做任何修改就可获取一个应用程序。
import typing # Python native
import ipywidgets # popular UI library
def input_widgets_basic(
prompt: str = "Who is Oppenheimer?",
advanced_features: bool = True,
model: typing.Literal['GPT-3.5', 'GPT-4.0', 'Falcon-7B'] = 'GPT-4.0',
max_token: range(100, 200, 20) = 140,
openai_key: ipywidgets.Password = "1234556",
) -> str:
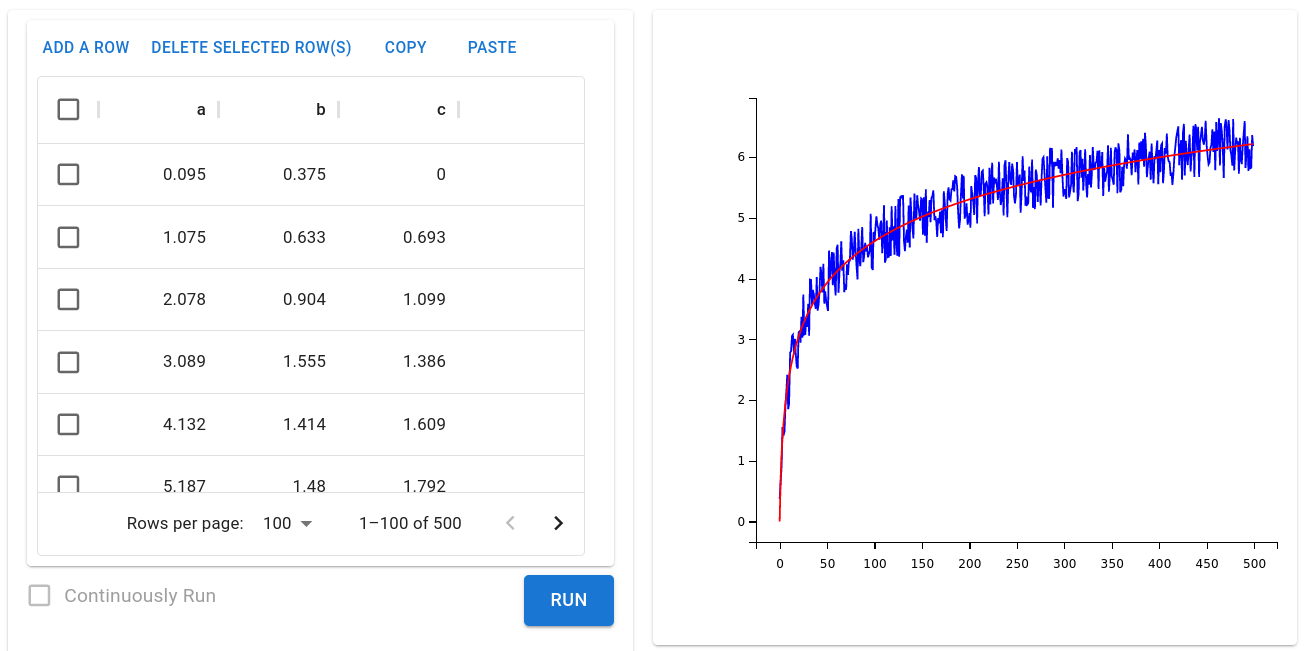
pass下方的示例展示了人工智能/数据开发人员再熟悉不过的 pandas.DataFrame 和 matplotlib.figure.Figure 是如何映射到应用程序中的表格和图表的。
import pandas, matplotlib.pyplot
from numpy import arange, log
from numpy.random import random
def table_and_plot(
df: pandas.DataFrame = pandas.DataFrame({
"a": arange(500) + random(500)/5,
"b": random(500)-0.5 + log(arange(500)+1),
"c": log(arange(500)+1) })
) -> matplotlib.figure.Figure:
fig = matplotlib.pyplot.figure()
matplotlib.pyplot.plot(df["a"], df["b"], 'b')
matplotlib.pyplot.plot(df["a"], df["c"], 'r')
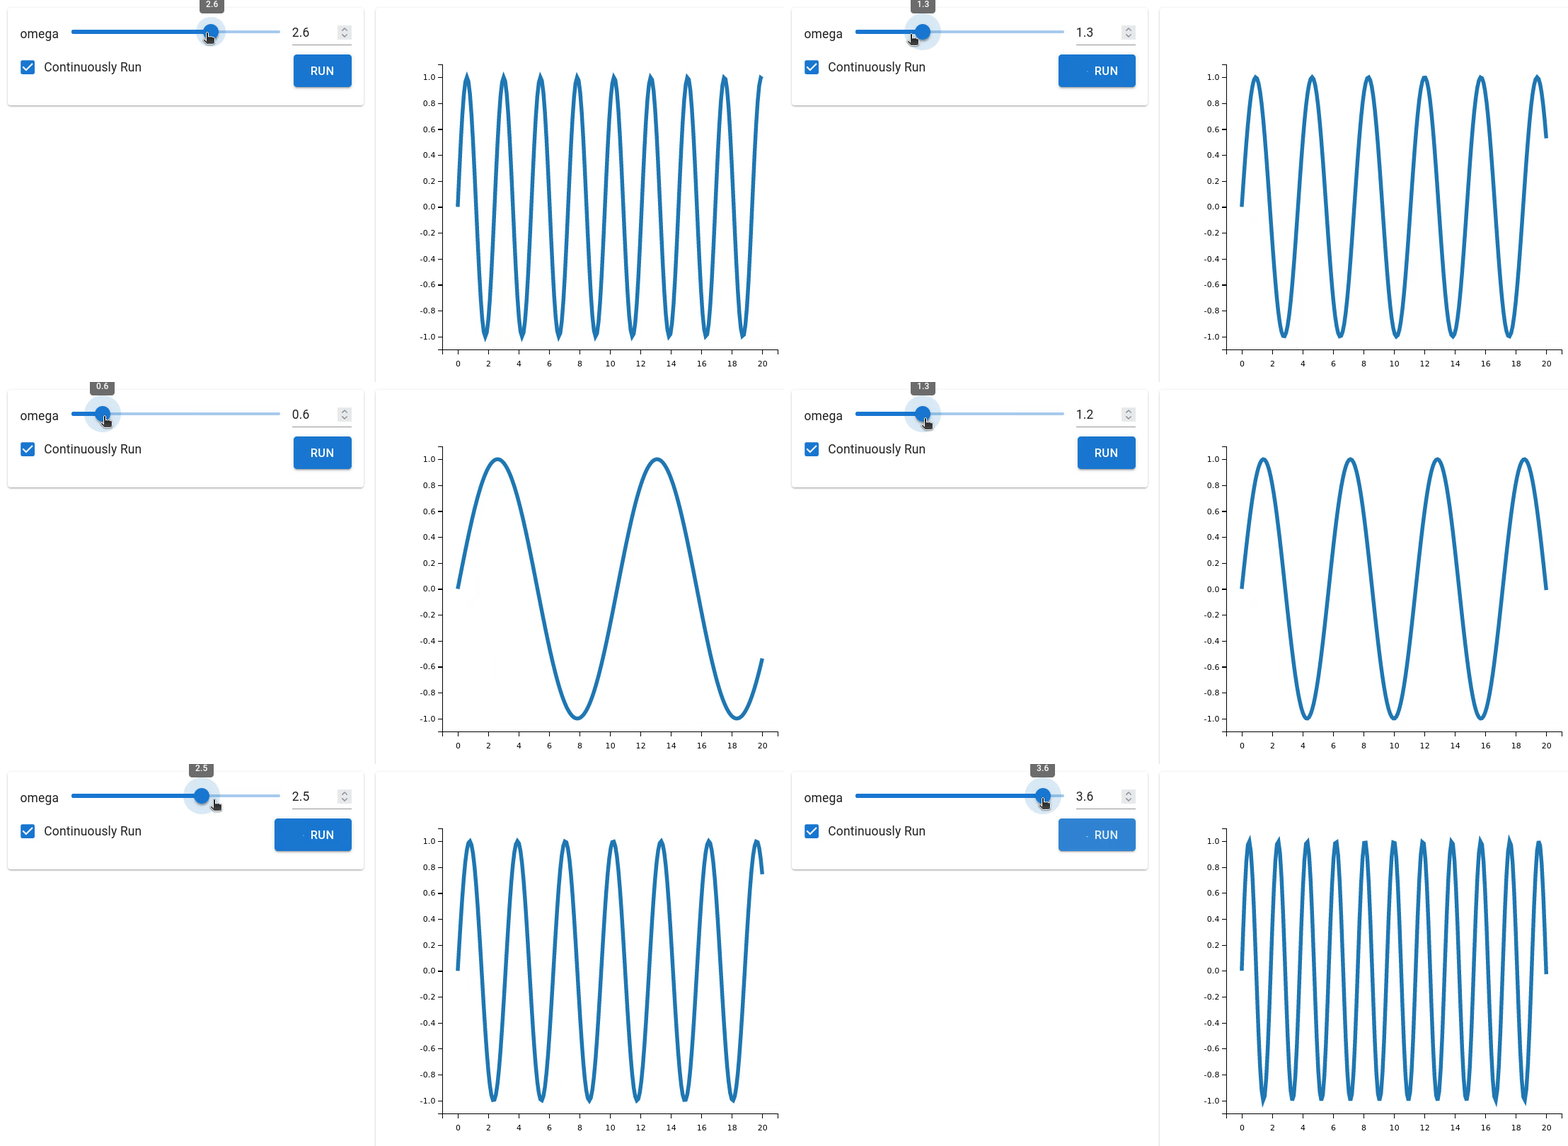
return fig你甚至可以根据用户随时的输入不断更新图像:
import funix
import matplotlib.pyplot, matplotlib.figure
import numpy
@funix.funix(
autorun=True,
)
def sine(omega: funix.hint.FloatSlider(0, 4, 0.1)) -> matplotlib.figure.Figure:
fig = matplotlib.pyplot.figure()
x = numpy.linspace(0, 20, 200)
y = numpy.sin(x*omega)
matplotlib.pyplot.plot(x, y, linewidth=5)
return figFunix 可将类中的每一个方法变成应用程序中的一个页面。
只需两行代码,下方的示例就能将类定义转化为多页面应用程序,其中类对象的实例化在与类的构造函数相对应的页面中完成,对象的成员值可在其他页面中查看和更新。无需手动公开类的成员方法。
from funix import funix_class
@funix_class()
class A:
def __init__(self, a: int):
self.a = a
return f"`self.a` has been initialized to {self.a}"
def set(self, b: int) -> str:
self.a = b
return f"`self.a` has been updated to {self.a}"
def get(self) -> str:
return f"The value of `self.a` is {self.a}"Wordle 游戏就是一个更高级的例子,你可以从这里获取它的源代码:examples/wordle.py。不到百行就可实现 Wordle,来看截图:
在 Funix 中,你可将任何 Python 函数都变为 Web 应用。例如,您可以从 OpenAI 的 API 参考资料中获取 ChatGPT 演示代码,并将其封装为 str-to-str 函数:
from openai import OpenAI
def ChatGPT(prompt: str) -> str:
client = OpenAI()
completion = client.chat.completions.create(
model="gpt-3.5-turbo",
messages=[
{"role": "user", "content": prompt}
]
)
return completion.choices[0].message.content这样,大功告成,如下所示:
Funix 之于 Python,就如 CSS 之于 HTML,宏之于 LaTeX 主题分隔了主要的逻辑和 UI 内容。 所有 UI 内容都集中在一个 JSON 格式的主题中被定义,以避免重复单独配置部件,并在不同应用程序中保持一致的外观。因此,数据科学家或机器学习工程师无需考虑任何用户界面问题,只需将其交给 UI 团队和 Funix 即可。
下方是一个主题文件的示例。它根据变量类型定义部件如何选择,并调整用户界面的组件(目前仅支持 MUI)。Funix 向开发人员公开了前端组件及其属性(props),无需他们了解有关前端的知识。如果想知道如何定义和应用一个主题,请移步至开发手册中的主题章节。
{
"name": "test_theme",
"widgets": { // dict, map types to widgets
"str": "inputbox", // using Funix' widget shorthand
"int": "slider[0,100,2]", // using Funix' widget shorthand
"float": {
"widget": "@mui/material/Slider", // using MUI's widget
// https://mui.com/material-ui/api/slider
"props": {
"min": 0,
"max": 100,
"step": 0.1
}
},
"Literal": "radio"
},
}要想引入新数据类型并在 Funix 中使用,您只需要声明一个新的 Python 类,并使用装饰器让 Funix 知道。你可以通过在代码中随时插入的定义(如下)或主题文件将该类型与 widget 关联:
from funix import funix, new_funix_type
@new_funix_type(
widget = {
"widget": "@mui/material/TextField",
"props": {
"type": "password",
"placeholder": "Enter a secret here."
}
}
)
class blackout(str):
def print(self):
return self + " is the message."
@funix()
def hoho(x: blackout = "Funix Rocks!") -> str:
return x.print()
if __name__ == "__main__":
print (hoho(blackout('Fun'))) Funix 可将一些 Python 原生功能转译为 Web 功能。
首先,Funix 并不会将您的 docstring 或 print() 函数调用白白浪费。它们会出现在 Web 应用程序的输入、输出面板上。
from funix import funix
@funix(
print_to_web=True
)
def foo() -> None:
"""
## What a great app in Funix!
Funix won't let your docstring go to waste.
"""
print("It supports **Markdown**.")
print ("And <b>HTML</b>.")
return None将文本流式传输到网页上,只需要简单地使用 yield:
import time
def stream() -> str:
"""
This function is used to test the stream feature of Funix.
"""
message = "We the People of the United States, in Order to form a more perfect Union, establish Justice, insure domestic Tranquility, provide for the common defence, promote the general Welfare, and secure the Blessings of Liberty to ourselves and our Posterity, do ordain and establish this Constitution for the United States of America."
for i in range(len(message)):
time.sleep(0.01)
yield message[0:i]点击展开/收起
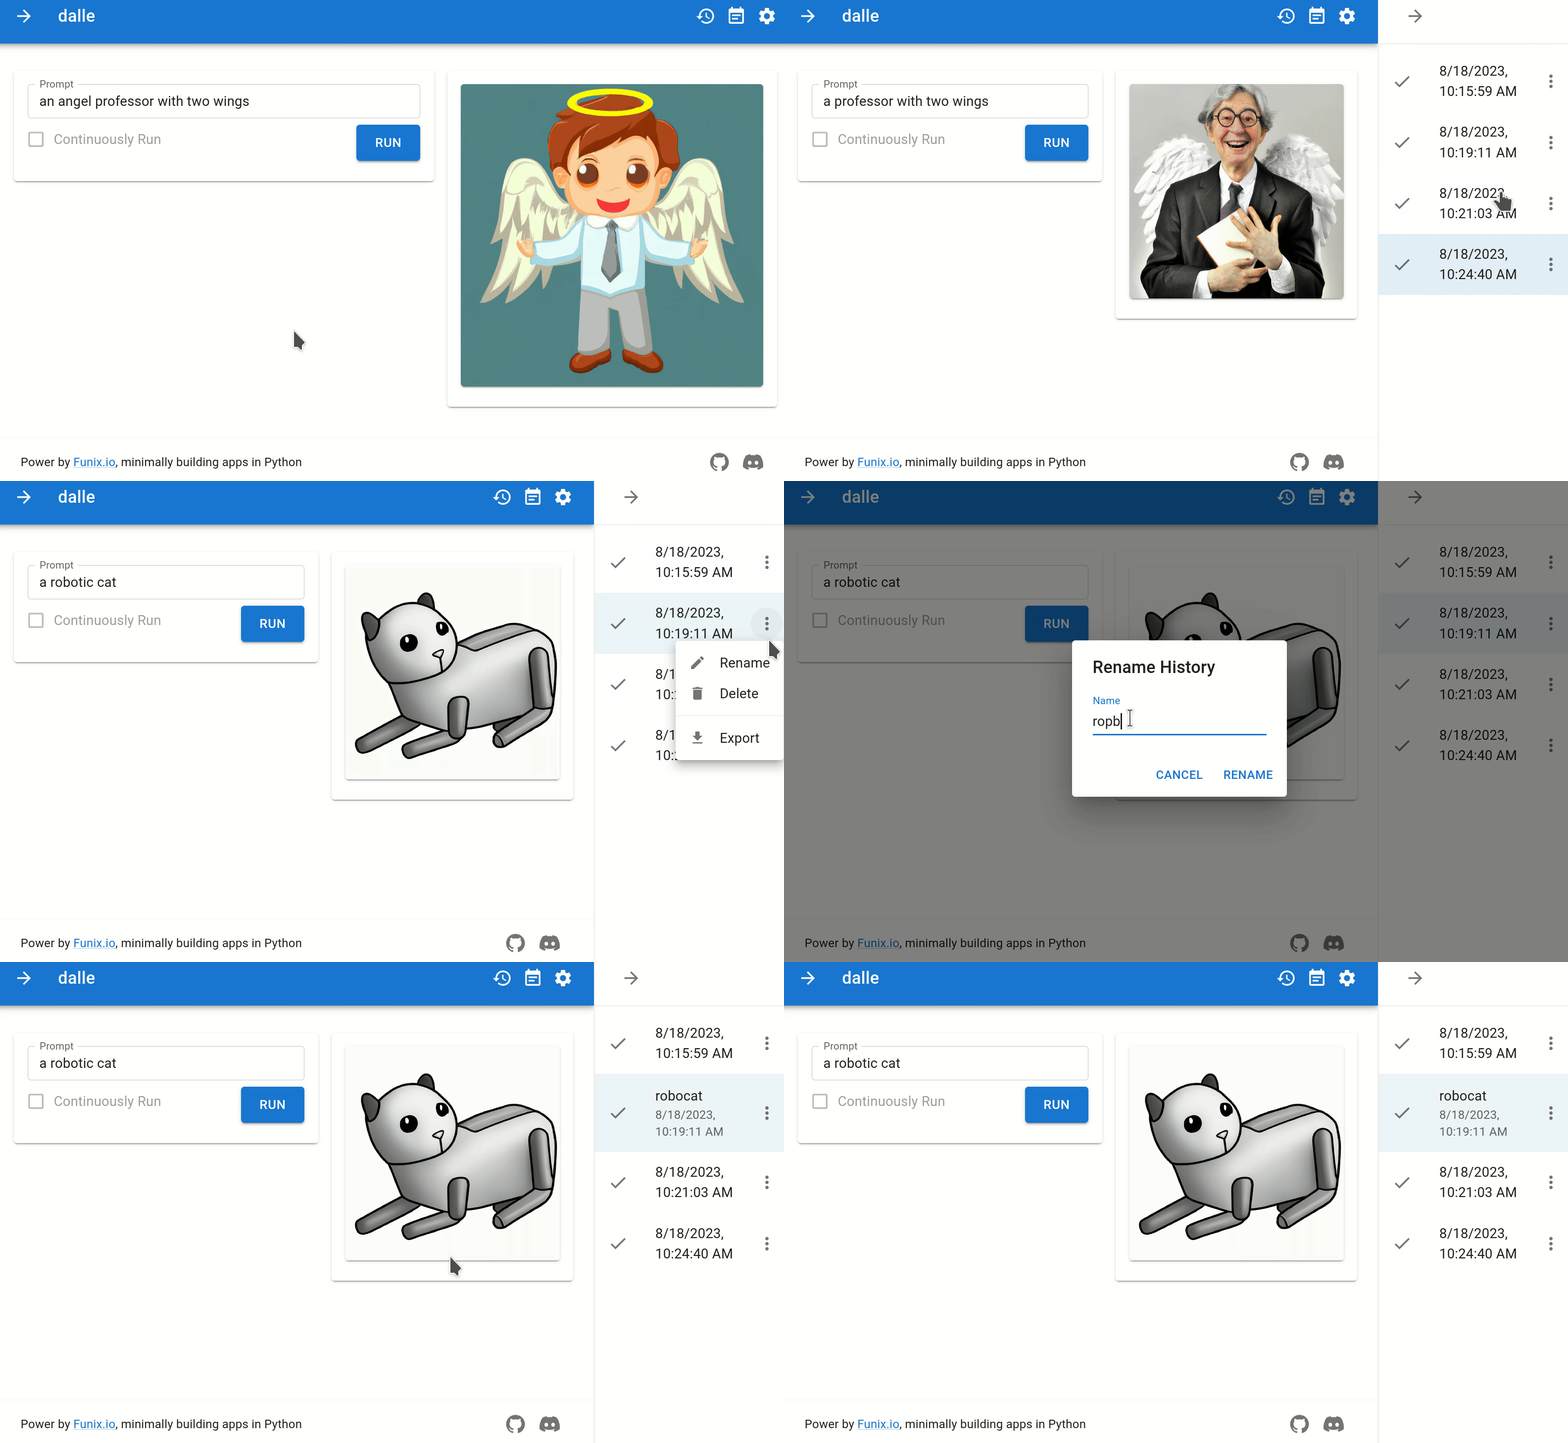
我们从许多用户那里听到的一个功能要求是,他们不会把 Funix 转换的 App 作为仅使用几次的 Demo 程序来使用,而是将其作为一个真正的应用程序来反复使用。在这种情况下,他们希望保留应用程序的调用记录。Funix 默认支持此功能。您可以点击应用程序右上角的历史记录按钮访问应用程序的历史记录。
点击展开/收起
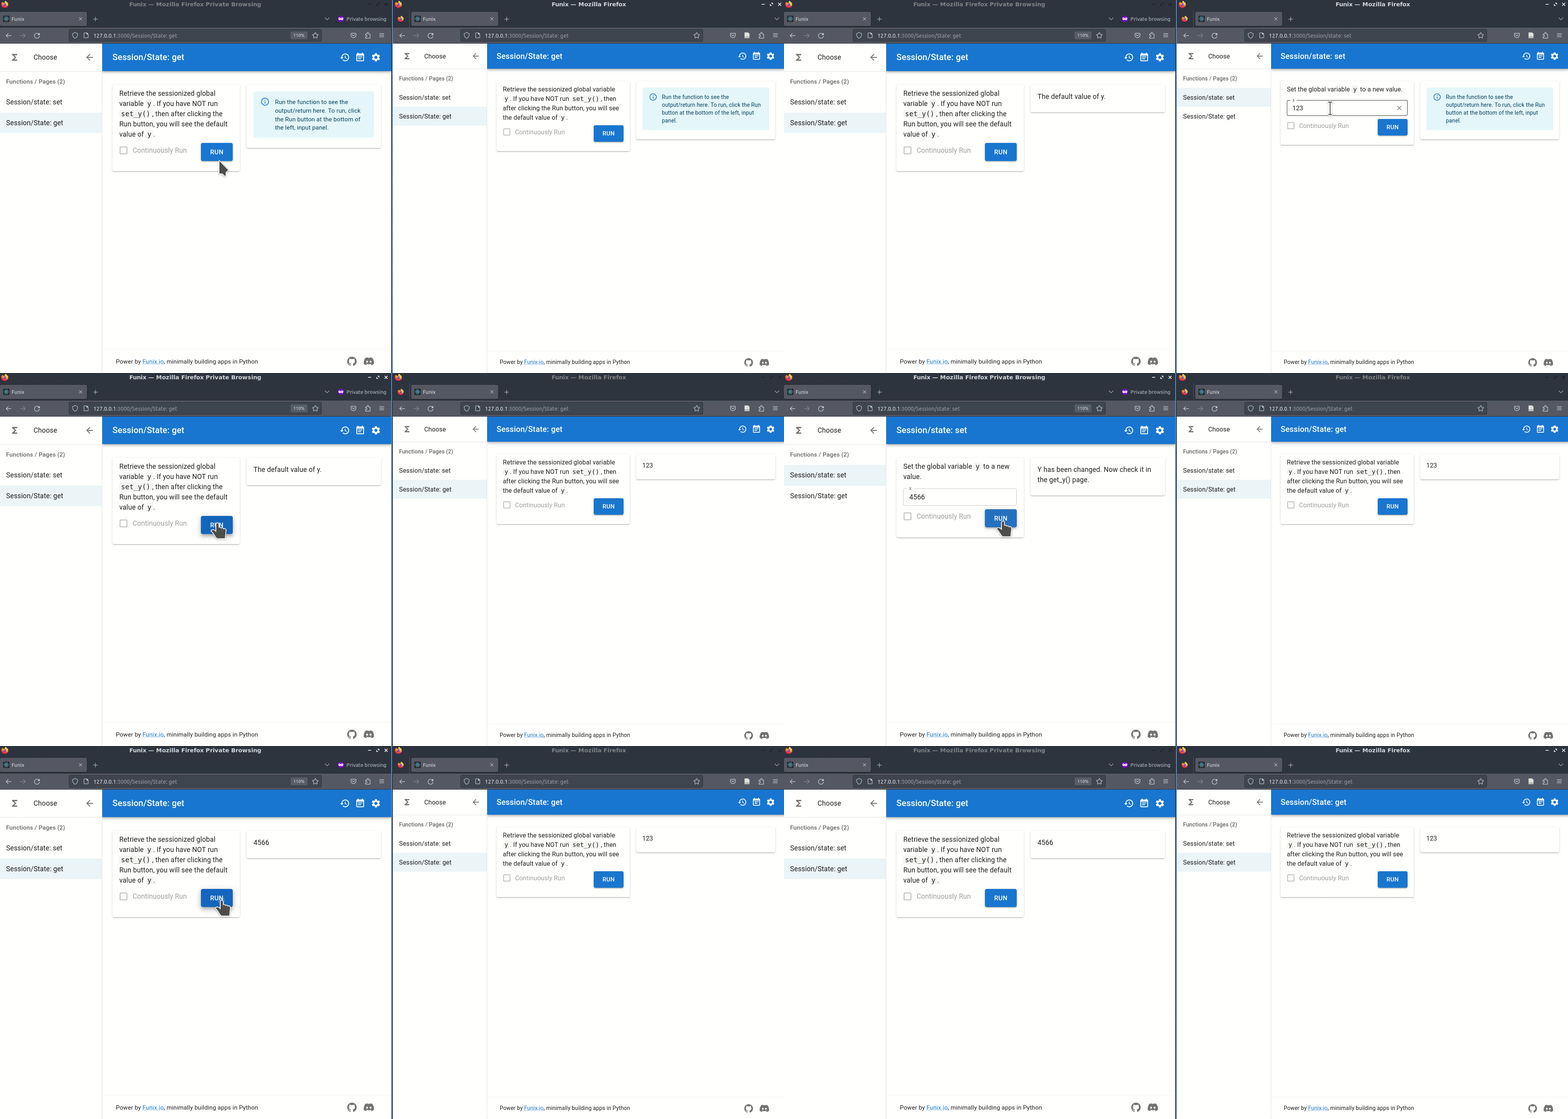
一个真正的应用程序通常有多个页面,例如,在一个页面设置 OpenAI 的令牌密钥,然后在其他 GenAI 页面使用该令牌。同一个 .py 脚本中的函数将成为一个 App 的不同页面。任何全局变量都可用于在函数间传递数据。在使用 -t 标志启动 Funix 时,他会进一步将全局变量会话化,这样不同的用户就可以拥有自己的会话。下面是一个简单的例子和相应的 GIF 动画。在 GIF 动画中,您可以看到两个浏览器会话中的 y 变量有所不同。
import funix
y = "The default value of y."
@funix.funix()
def set_y(x: str="123") -> str:
global y
y = x
return "Y has been changed. Now check it in the get_y() page."
@funix.funix()
def get_y() -> str:
return y点击展开/收起
函数间传递数据的一种特殊情况便是,使用一个函数的返回值作为另一个函数参数的初始值。这种情况称之为预填充。Funix 通过装饰器属性 pre_fill 来支持预填充。下方是一个示例:
import funix
@funix.funix()
def first_action(x: int) -> int:
return x - 1
@funix.funix()
def second_action(message: str) -> list[str]:
return message.split(" ")
@funix.funix()
def third_action(x: int, y: int) -> dict:
return {"x": x, "y": y}
@funix.funix(
pre_fill={
"a": first_action,
"b": (second_action, -1),
"c": (third_action, "x")
}
)
def final_action(a: int, b: str, c: int) -> str:
return f"{a} {b} {c}"点击展开/收起
[!NOTE] 这不是保护您应用程序的最佳实践。
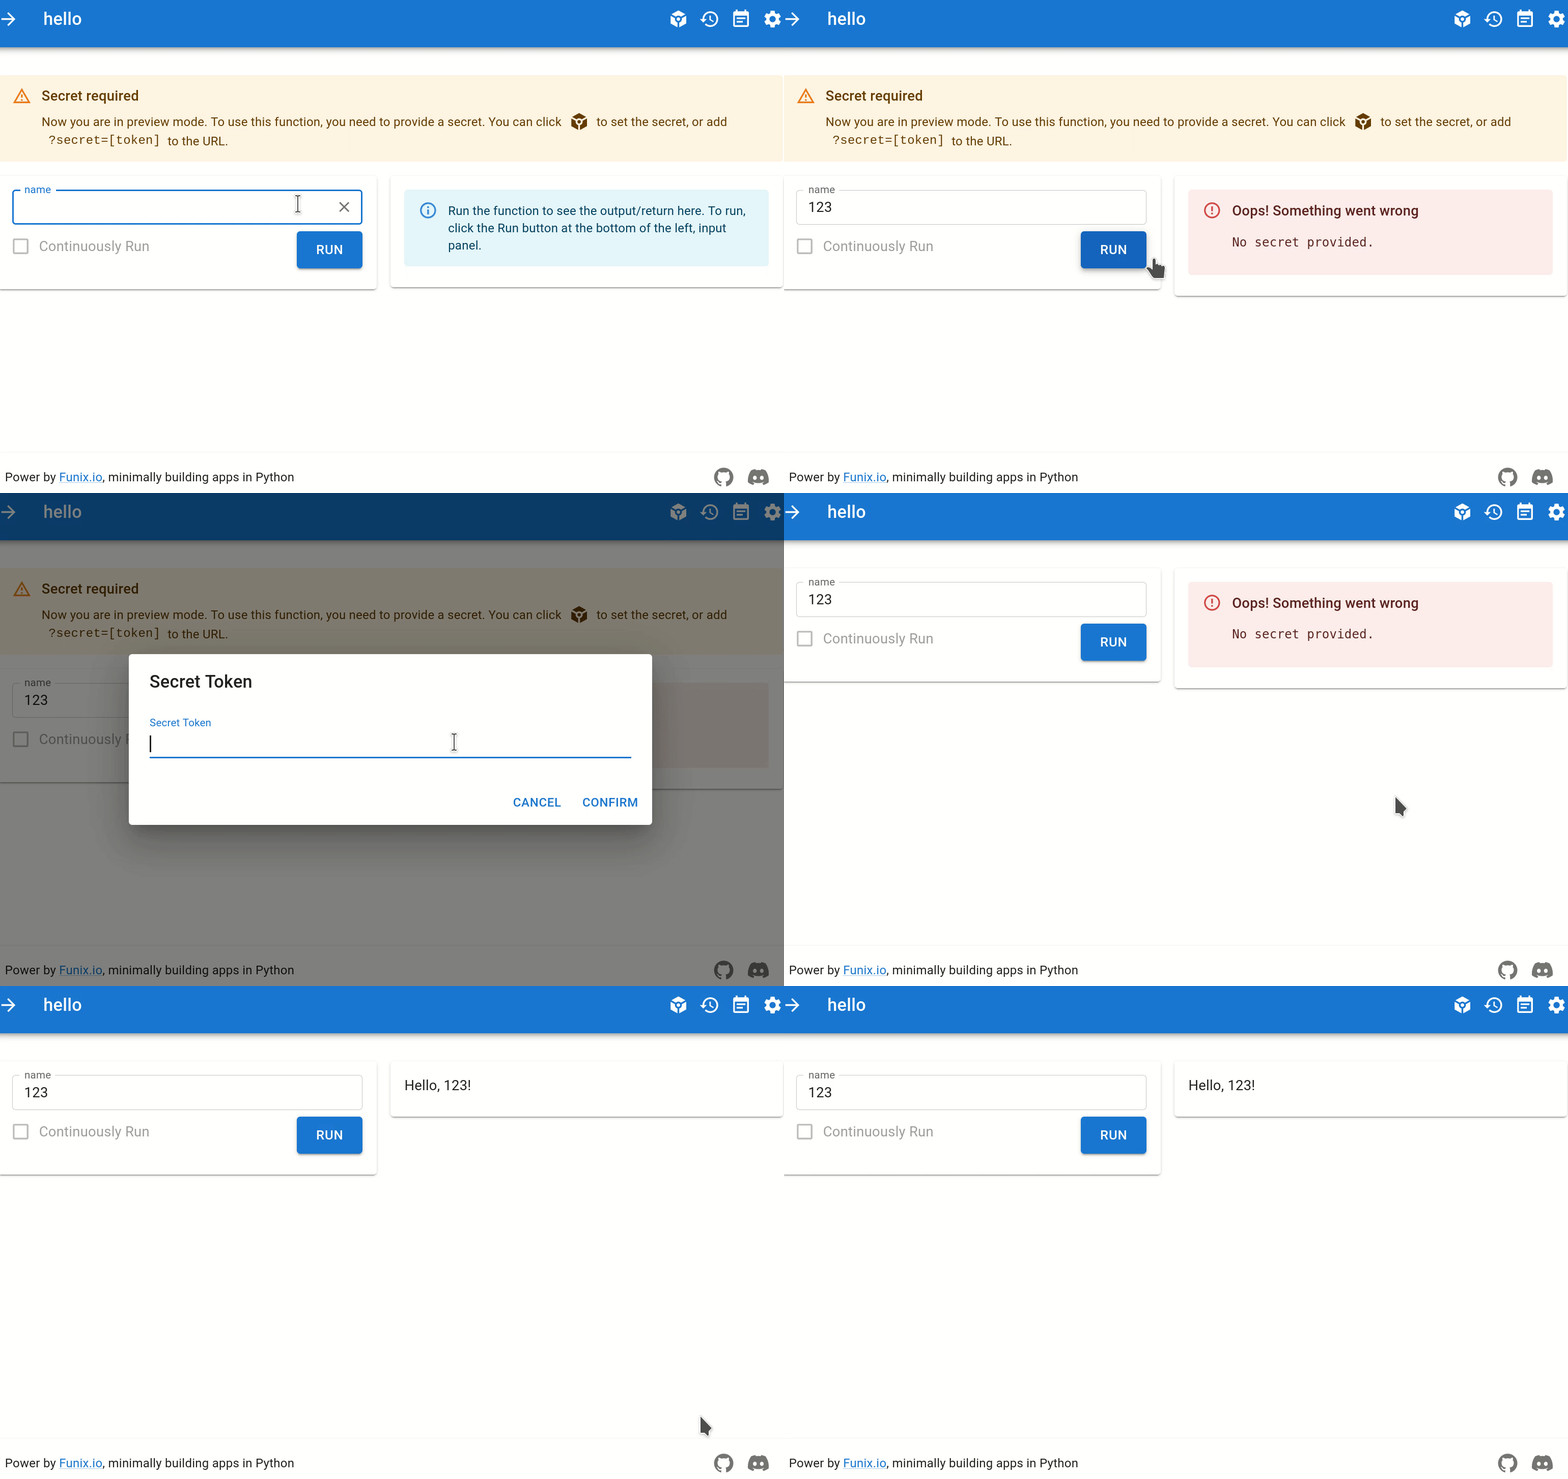
为了保护您的代码(例如,与 OpenAI 相关的函数,可能会导致一些经济损失),您可以使用 secret 选项:
funix my_app.py --secret my_secret_token # 您自己提供 Token
# or
funix my_app.py --secret True # 随机生成 Token令牌将展示在终端上,示例如下:
$ funix hello.py --secret True
Secrets:
---------------
Name: hello
Secret: 8c9f55d0eb74adbb3c87a445ea0ae92f
Link: http://127.0.0.1:3000/hello?secret=8c9f55d0eb74adbb3c87a445ea0ae92f需要在 URL 中包含令牌或手动输入令牌才能执行应用程序。
更多例子可在开发手册或在 ./examples 文件夹中可见。
examples/AI/chatGPT_multi_turn.py 👈 点我查看/收起源码
import os
import IPython
from openai import OpenAI
import funix
client = OpenAI(api_key=os.environ.get("OPENAI_KEY"))
messages = [] # list of dicts, dict keys: role, content, system
@funix.funix(
disable=True,
)
def print_messages_html(messages):
printout = ""
for message in messages:
if message["role"] == "user":
align, name = "left", "You"
elif message["role"] == "assistant":
align, name = "right", "ChatGPT"
printout += f'<div style="width: 100%; text-align: {align}"><b>{name}</b>: {message["content"]}</div>'
return printout
@funix.funix(
direction="column-reverse",
)
def ChatGPT_multi_turn(current_message: str) -> IPython.display.HTML:
current_message = current_message.strip()
messages.append({"role": "user", "content": current_message})
completion = client.chat.completions.create(messages=messages,
model='gpt-3.5-turbo',
max_tokens=100)
chatgpt_response = completion.choices[0].message.content
messages.append({"role": "assistant", "content": chatgpt_response})
# return print_messages_markdown(messages)
return print_messages_html(messages)from funix import funix # add line one
from IPython.display import Image
from openai import OpenAI # pip install openai
import os
client = OpenAI(api_key=os.environ.get("OPENAI_KEY"))
@funix() # add line three
def dalle(prompt: str = "a cat") -> Image:
response = client.images.generate(prompt=prompt)
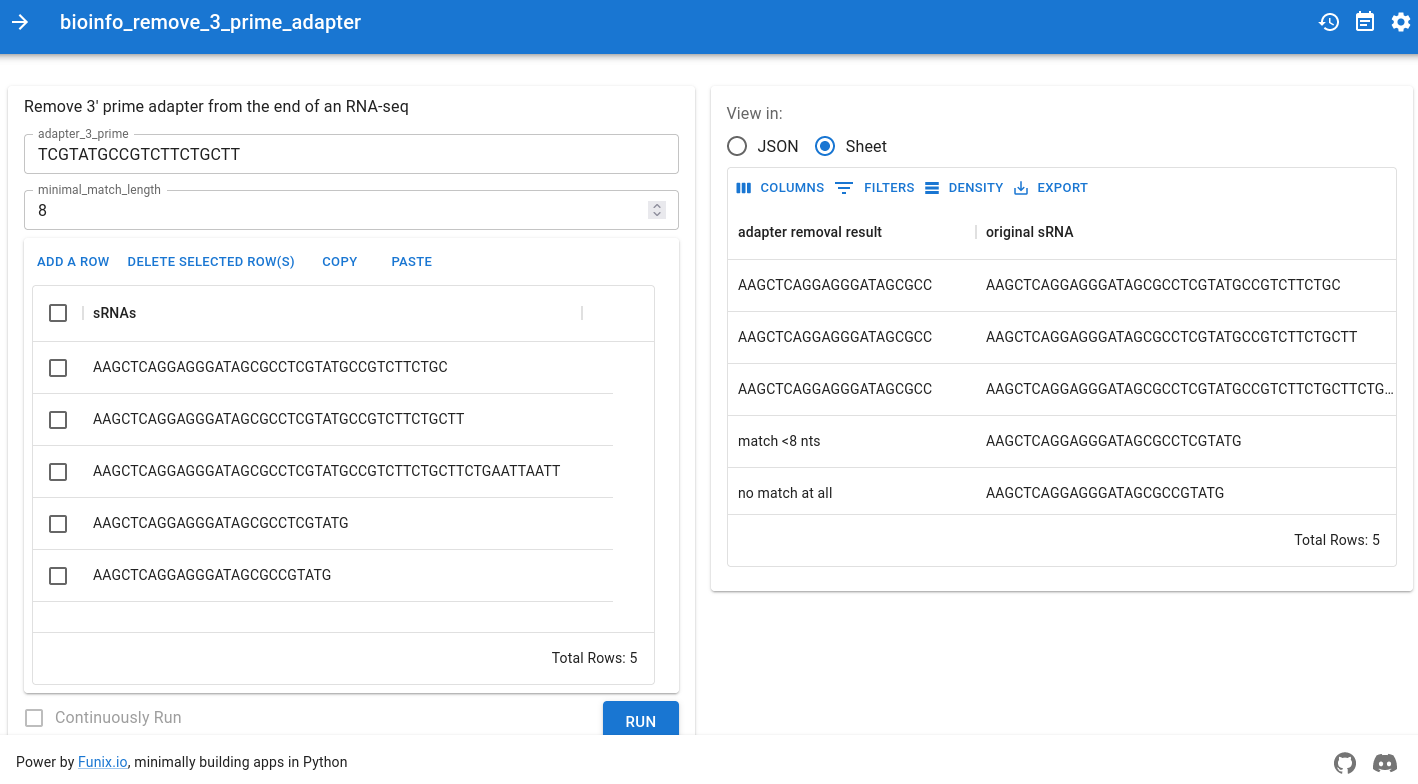
return response.data[0].urlexamples/bioinformatics/vector_strip.py 👈 点击查看源码
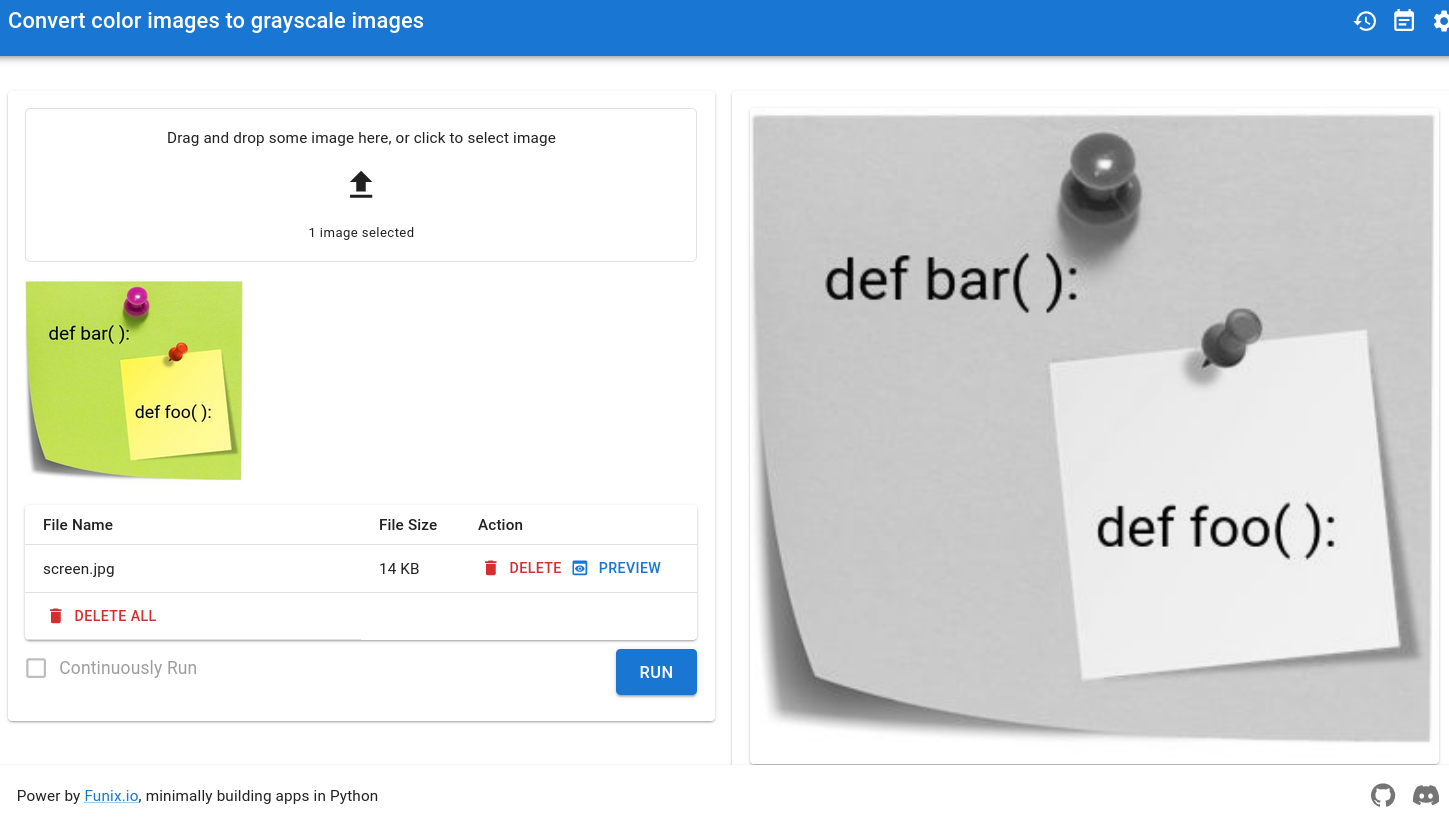
examples/multimedia/rgb2gray.py 👈 点我查看/收起源码
import io # Python's native
import PIL # the Python Image Library
import IPython
import funix
@funix.funix(
title="Convert color images to grayscale images",
)
def gray_it(image: funix.hint.BytesImage) -> IPython.display.Image:
img = PIL.Image.open(io.BytesIO(image))
gray = PIL.ImageOps.grayscale(img)
output = io.BytesIO()
gray.save(output, format="PNG")
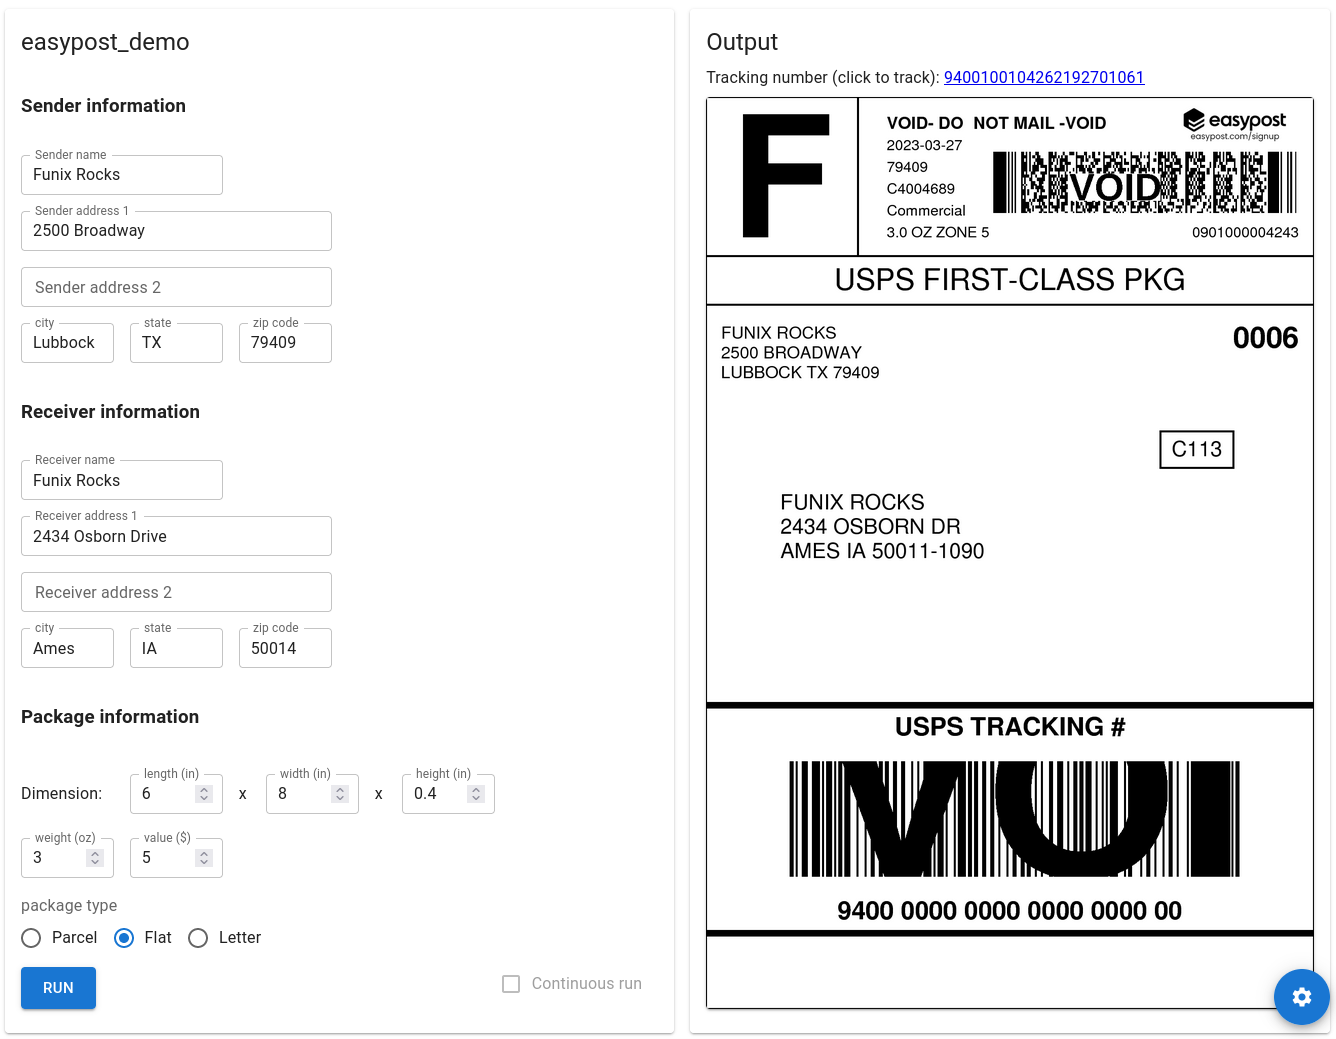
return output.getvalue()examples/layout_easypost_shipping.py 👈 点击查看源码
-
从 PyPI 安装(稳定版本,缺少最新功能)
pip install funix
-
从 GitHub 安装(开发或稳定版本)
pip install "git+https://github.com/TexteaInc/funix.git@develop" # 开发 pip install "git+https://github.com/TexteaInc/funix.git" # 稳定
-
本地开发
git clone -b develop https://github.com/TexteaInc/funix cd funix pip install -e .
-
如果你想使用 Git 相关的功能,比如从 GitHub 拉取项目,请这样安装 Funix:
pip install funix[git]
-
如果你想使用
ipython相关的功能:pip install funix[ipython]
-
或许未来有其他可选的新功能,您可以试着安装完全的 Funix:
pip install funix[all]
如果您需要参与 Funix 的工作,或使用开发版本的 Funix,您需要自己构建前端。假设您已在 funix 文件夹中,请运行以下命令:
cd frontendyarn install(你需要安装 Node.JS 和 Yarn 包管理器)yarn funix:build(构建前端以便于 Funix 使用)
对于需要调试的开发者,以下是简单的指南:
yarn funix:test(进入开发模式)funix xxx -p 8080 -F(使用 8080 端口的无前端模式)
这样,您应该可以调试Funix 的前后端与您的应用程序了。
我们的表格组件可以使用 MUI Pro 中的高级功能。如果你有一个 MUI Pro 的证书许可,你可以使用自己的 MUI Pro 证书并构建前端:
- 确保安装了 Node.js 和 Yarn;
- 运行
export MUI_PRO_LICENSE_KEY=[MUI_KEY]; - 运行
yarn install && yarn funix:build构建前端; - 万事大吉!
运行下面的命令查看命令行选项:
funix -h 除了从命令行启动 Funix 外,您还可在 .py 脚本中使用 Funix:
import funix
@funix.funix()
def hello(your_name: str) -> str:
    return f"Hello, {your_name}."
if __name__ == "__main__":
funix.run(__file__)funix [module] --host [your_server_ip]Funix 采用 MIT 许可开源。我们不仅欢迎社区贡献,而且希望来自社区的贡献。如果您准备好了,请随时 Fork 并提出拉取请求。您还可以通过 Issue 追踪器或我们的 Discord 服务器报告错误,建议新功能等。
Funix 从 FastAPI 和 Google Fire 中汲取灵感:透过推断包含类型提示的函数签名来构建软件界面。我们从这一想法从后端(FastAPI)或终端(Python-Fire)移植到前端。我们还要感谢 Streamlit、Gradio、PyWebIO 和 Pynecone/Reflex。它们启发了我们。我们只是太懒了,懒得手动定义部件。Funix 的后端由 Flask 实现,前端由 MUI 实现。
Forrest dot Bao @ Gmail


