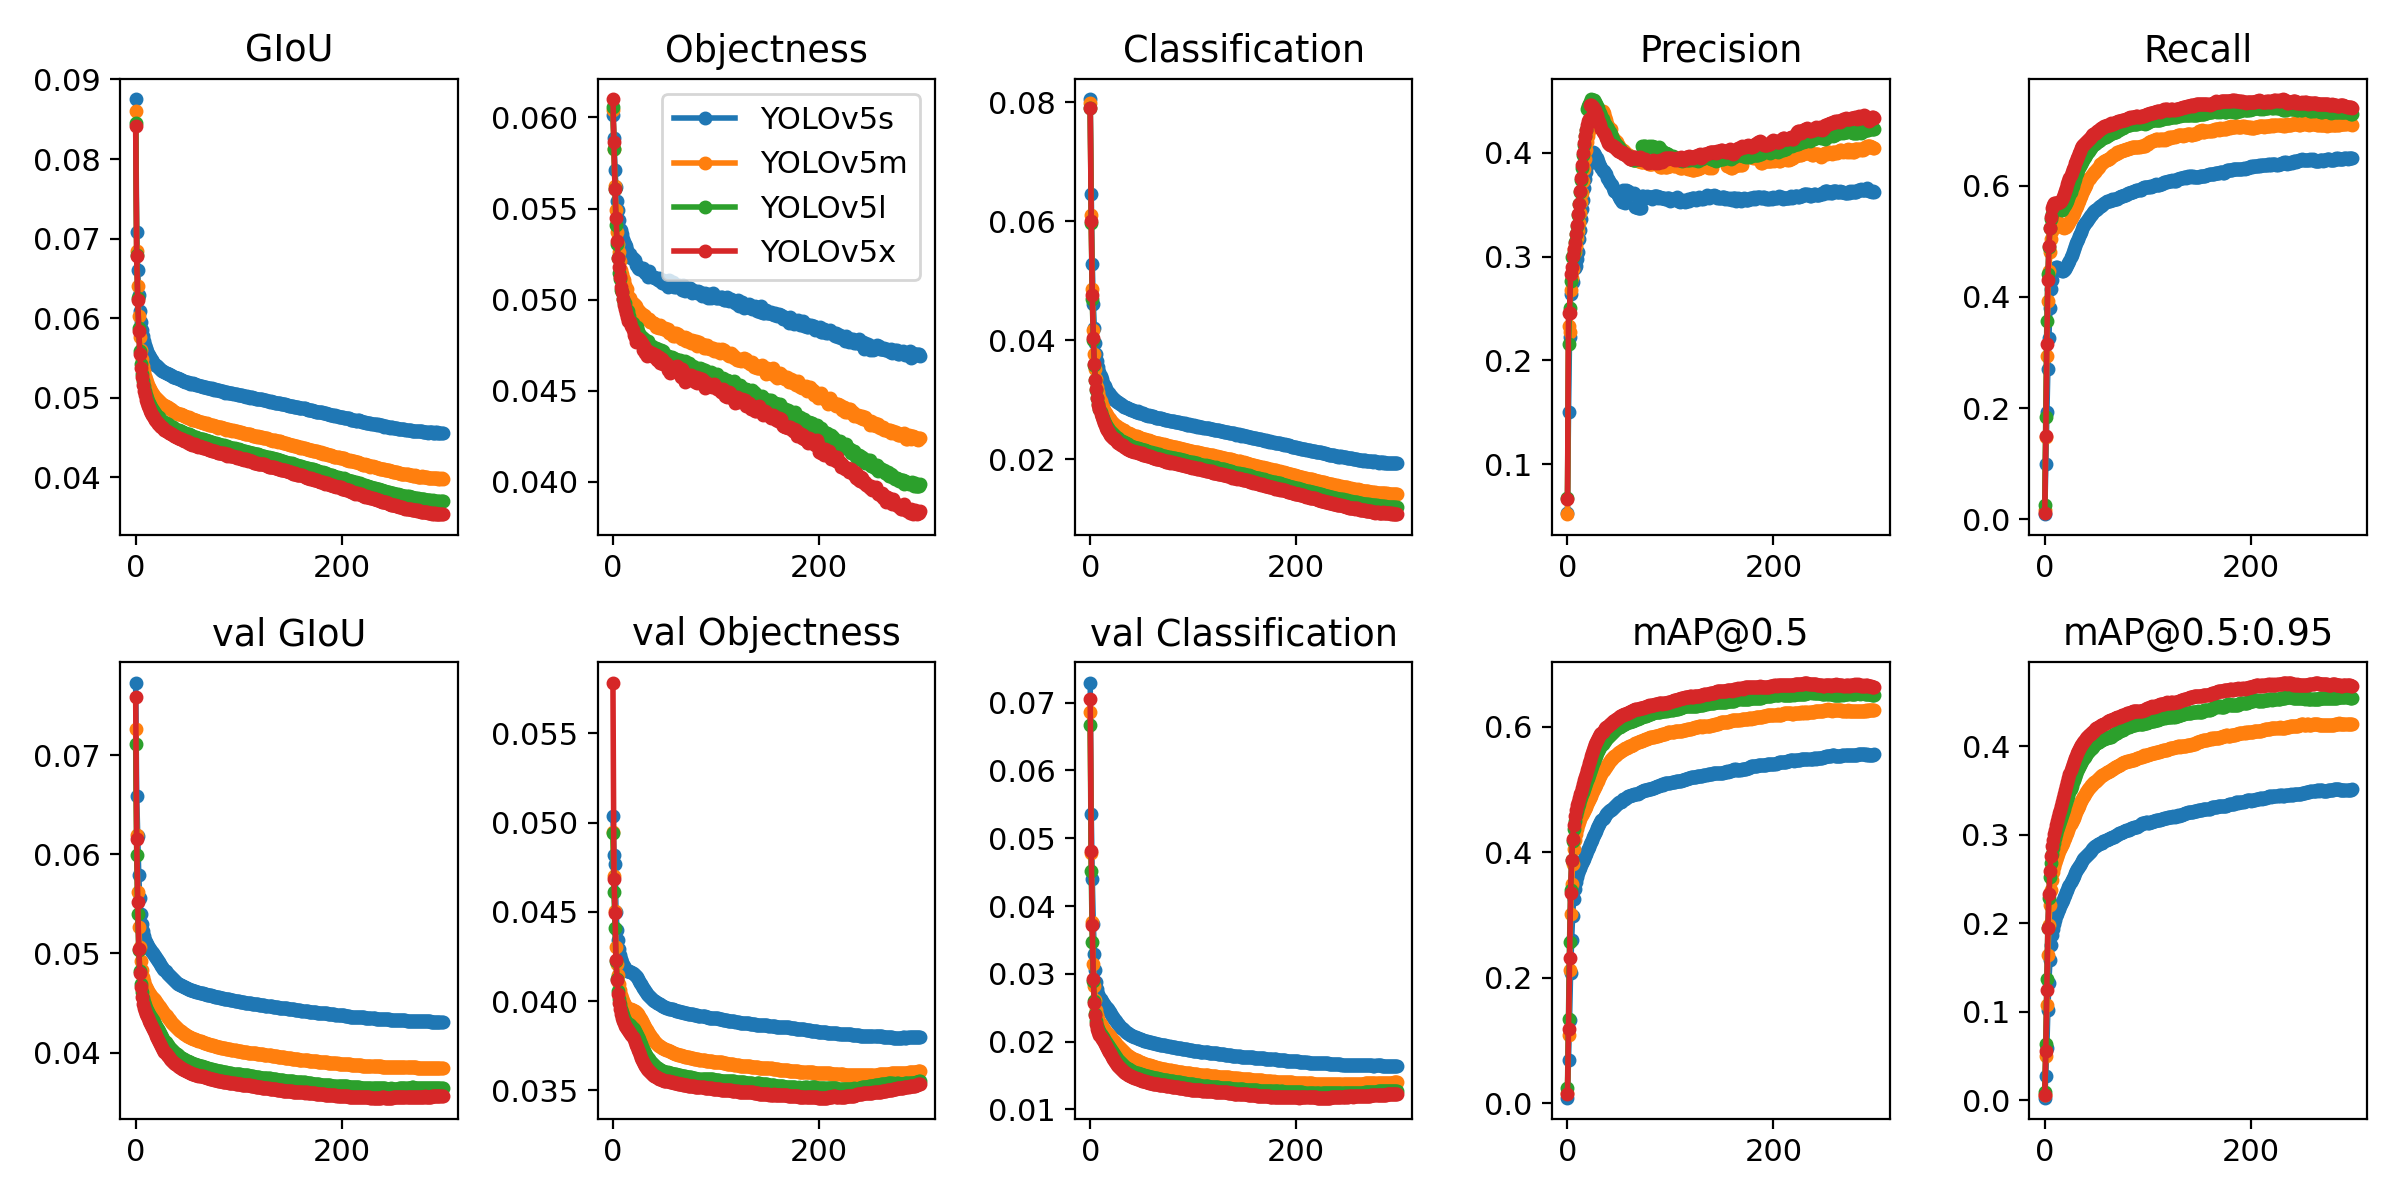
众所周知,YOLOv5不仅效果好,而且快的起飞。YOLOv5s,640*384的输入分辨率在Jetson Xavier AGX上配合NVIDIA亲儿子TensorRT,可以跑出150fps+的速度,不可不谓NB。然而,如果没有GPU的加持,仅使用CPU运行网络,YOLOv5s则只有不到10fps,离实时性还有一定的距离。
所以我们准备采用模型剪枝的技术,尝试使得它在CPU上同样能够满足实时性。
在CNN中,如果想要降低计算量,我们通常会从两个方便入手:
- 降低模型深度,即减少网络层数
- 降低模型宽度,即减少特征图通道数
其中降低模型深度的方法会导致网络的结构发生变换,这会使得剪枝的代码实现难度极大上升,所以我们采用降低模型宽度的方法对模型进行加速。
剪枝的基本理念是尽量少的影响到网络的效果,如果剪枝结束后,模型性能极大下降,甚至完全失效,那么这样一个剪枝是毫无意义的。
如果想要在移除部分特征图通道的同时,不影响到网络的性能,最直观的方式就是去寻找那些对网络输出结果没什么影响的特征图通道,然而如果不加处理,直接找,会十分困难,甚至根本找不到这样的通道。
为了使得我们可以轻松的找到这样的通道,可以在特定的特征图上对每个通道乘上一个系数,并增加一个正则化项,使得网络在训练的过程中,让这些系数的绝对值尽量小。如果某个通道上的系数非常小,那么这个通道乘上这个系数后,结果也会趋近于零,而零特征图在给下一次进行计算的结果也会是零,也就是说这一层是“不重要的”,可以被剪枝移除掉。
有的代码实现中,使用BatchNorm层的weight作为这个系数,但在我个人看来,这样不是很好。因为BatchNorm层还有bias,即使weight很小,加上bias后,最终的特征图也不一定为零;其次,BatchNorm层通常会被放在激活层的前面,但并不是所有的激活函数,输入为0时输出也为0。
在这份代码实现中,直接在需要剪枝的位置处,在激活层后添加一层,这一层对每个特征图通道乘上一个系数,这样可以保证系数很小的特征图通道一定区域0。
由于YOLOv5的网络结构并不是简单的层与层的串联,也存在很多并联层。如果盲目的使用上述剪枝方法处理每个特征图,很可能导致剪枝后的网络无法正常计算。举个简单的例子,shortcut连接会将某层的卷积输入输出相加作为结果,即y=f(x)+x。如果剪枝后f(x)的特征图通道和x的特征图通道数量不相等,将导致加法无法正常计算。类似的情况还有不少,具体的处理办法见pruning.py源码。
如果同时对所有系数进行正则化处理,系数之间可能拉不开差距,同样不利于剪枝。所以对于每个特征图后的系数,对其进行绝对值排序,仅对最小的一半的系数进行正则化处理。
每次训练结束可以剪枝掉一部分的通道,剪枝结束后可以接着训练。即,训练——剪枝——训练——剪枝……这个过程可以反复迭代进行,以达到一个较好的剪枝结果。过程中需要注意网络的性能指标的变化,过度剪枝可能出现过拟合等现象。
上述迭代训练过程结束后,取消掉对系数的正则化计算,在训练几个epoch,结束整个剪枝的过程。
作者github主页: xinyang-go
以下为原作README

This repository represents Ultralytics open-source research into future object detection methods, and incorporates lessons learned and best practices evolved over thousands of hours of training and evolution on anonymized client datasets. All code and models are under active development, and are subject to modification or deletion without notice. Use at your own risk.
 ** GPU Speed measures end-to-end time per image averaged over 5000 COCO val2017 images using a V100 GPU with batch size 32, and includes image preprocessing, PyTorch FP16 inference, postprocessing and NMS. EfficientDet data from google/automl at batch size 8.
- January 5, 2021: v4.0 release: nn.SiLU() activations, Weights & Biases logging, PyTorch Hub integration.
- August 13, 2020: v3.0 release: nn.Hardswish() activations, data autodownload, native AMP.
- July 23, 2020: v2.0 release: improved model definition, training and mAP.
- June 22, 2020: PANet updates: new heads, reduced parameters, improved speed and mAP 364fcfd.
- June 19, 2020: FP16 as new default for smaller checkpoints and faster inference d4c6674.
| Model | size | APval | APtest | AP50 | SpeedV100 | FPSV100 | params | GFLOPS | |
|---|---|---|---|---|---|---|---|---|---|
| YOLOv5s | 640 | 36.8 | 36.8 | 55.6 | 2.2ms | 455 | 7.3M | 17.0 | |
| YOLOv5m | 640 | 44.5 | 44.5 | 63.1 | 2.9ms | 345 | 21.4M | 51.3 | |
| YOLOv5l | 640 | 48.1 | 48.1 | 66.4 | 3.8ms | 264 | 47.0M | 115.4 | |
| YOLOv5x | 640 | 50.1 | 50.1 | 68.7 | 6.0ms | 167 | 87.7M | 218.8 | |
| YOLOv5x + TTA | 832 | 51.9 | 51.9 | 69.6 | 24.9ms | 40 | 87.7M | 1005.3 |
** APtest denotes COCO test-dev2017 server results, all other AP results denote val2017 accuracy.
** All AP numbers are for single-model single-scale without ensemble or TTA. Reproduce mAP by python test.py --data coco.yaml --img 640 --conf 0.001 --iou 0.65
** SpeedGPU averaged over 5000 COCO val2017 images using a GCP n1-standard-16 V100 instance, and includes image preprocessing, FP16 inference, postprocessing and NMS. NMS is 1-2ms/img. Reproduce speed by python test.py --data coco.yaml --img 640 --conf 0.25 --iou 0.45
** All checkpoints are trained to 300 epochs with default settings and hyperparameters (no autoaugmentation).
** Test Time Augmentation (TTA) runs at 3 image sizes. Reproduce TTA by python test.py --data coco.yaml --img 832 --iou 0.65 --augment
Python 3.8 or later with all requirements.txt dependencies installed, including torch>=1.7. To install run:
$ pip install -r requirements.txt- Train Custom Data 🚀 RECOMMENDED
- Weights & Biases Logging 🌟 NEW
- Multi-GPU Training
- PyTorch Hub ⭐ NEW
- ONNX and TorchScript Export
- Test-Time Augmentation (TTA)
- Model Ensembling
- Model Pruning/Sparsity
- Hyperparameter Evolution
- Transfer Learning with Frozen Layers ⭐ NEW
- TensorRT Deployment
YOLOv5 may be run in any of the following up-to-date verified environments (with all dependencies including CUDA/CUDNN, Python and PyTorch preinstalled):
- Google Colab and Kaggle notebooks with free GPU:
- Google Cloud Deep Learning VM. See GCP Quickstart Guide
- Amazon Deep Learning AMI. See AWS Quickstart Guide
- Docker Image. See Docker Quickstart Guide
detect.py runs inference on a variety of sources, downloading models automatically from the latest YOLOv5 release and saving results to runs/detect.
$ python detect.py --source 0  # webcam
                            file.jpg  # image
                            file.mp4  # video
                            path/  # directory
                            path/*.jpg  # glob
                            rtsp://170.93.143.139/rtplive/470011e600ef003a004ee33696235daa  # rtsp stream
                            rtmp://192.168.1.105/live/test  # rtmp stream
                            http://112.50.243.8/PLTV/88888888/224/3221225900/1.m3u8  # http stream
To run inference on example images in data/images:
$ python detect.py --source data/images --weights yolov5s.pt --conf 0.25

Namespace(agnostic_nms=False, augment=False, classes=None, conf_thres=0.25, device='', img_size=640, iou_thres=0.45, save_conf=False, save_dir='runs/detect', save_txt=False, source='data/images/', update=False, view_img=False, weights=['yolov5s.pt'])
Using torch 1.7.0+cu101 CUDA:0 (Tesla V100-SXM2-16GB, 16130MB)

Downloading https://github.com/ultralytics/yolov5/releases/download/v3.1/yolov5s.pt to yolov5s.pt... 100%|██████████████| 14.5M/14.5M [00:00<00:00, 21.3MB/s]

Fusing layers...
Model Summary: 232 layers, 7459581 parameters, 0 gradients
image 1/2 data/images/bus.jpg: 640x480 4 persons, 1 buss, 1 skateboards, Done. (0.012s)
image 2/2 data/images/zidane.jpg: 384x640 2 persons, 2 ties, Done. (0.012s)
Results saved to runs/detect/exp
Done. (0.113s)To run batched inference with YOLOv5 and PyTorch Hub:
import torch
from PIL import Image

# Model
model = torch.hub.load('ultralytics/yolov5', 'yolov5s', pretrained=True)

# Images
img1 = Image.open('zidane.jpg')
img2 = Image.open('bus.jpg')
imgs = [img1, img2]  # batched list of images

# Inference
result = model(imgs)Run commands below to reproduce results on COCO dataset (dataset auto-downloads on first use). Training times for YOLOv5s/m/l/x are 2/4/6/8 days on a single V100 (multi-GPU times faster). Use the largest --batch-size your GPU allows (batch sizes shown for 16 GB devices).
$ python train.py --data coco.yaml --cfg yolov5s.yaml --weights '' --batch-size 64
                                         yolov5m                                40
                                         yolov5l                                24
yolov5x 16Ultralytics is a U.S.-based particle physics and AI startup with over 6 years of expertise supporting government, academic and business clients. We offer a wide range of vision AI services, spanning from simple expert advice up to delivery of fully customized, end-to-end production solutions, including:
- Cloud-based AI systems operating on hundreds of HD video streams in realtime.
- Edge AI integrated into custom iOS and Android apps for realtime 30 FPS video inference.
- Custom data training, hyperparameter evolution, and model exportation to any destination.
For business inquiries and professional support requests please visit us at https://www.ultralytics.com.
Issues should be raised directly in the repository. For business inquiries or professional support requests please visit https://www.ultralytics.com or email Glenn Jocher at [email protected].


