-
Notifications
You must be signed in to change notification settings - Fork 1
Investigate
MoSS is a tool developed by Stanford which takes submissions of coding-style assignments and generates a measure of the similarity of the code produced (within the cohort of assignments submitted to it). MoSS submissions are made to the Stanford servers via command line, with academics using the tool often amassing a collection of bash scripts to aid them in checking their programming assignments for collusion.
Investigate is designed to make this process more user-friendly by providing a web portal for submitting jobs to the Stanford MoSS servers.
Once Investigate has been deployed (as described here), it should be ready to run without significant configuration.
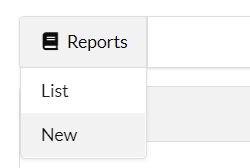
The first step is to create a new MoSS report. This can be done by clicking the Reports button in the top lefthand corner of the screen, and selecting the New option.
The tool takes a .zip file of student submissions to process. This file should contain a folder per student, with the folder name being the student number of that student. Clicking the Upload submissions zip button will cause a file chooser to pop up, allowing the user to select a .zip file matching this format from their hard drive. In the image below, a CSSE1001 gradebook downloaded directly from Blackboard has been used.
Once a file has been chosen, the Upload button can be pressed. This will upload the selected .zip file, with a successful upload being indicated by a green progress bar.
Once the student files have been uploaded, the job parameters can be edited, as outlined in the next section.
The MoSS tool has a number of configurable parameters which are usually set as command line arguments when a job is being submitted. These parameters are also configurable in the tool, and are outlined below:
-
Name: the name of the report being generated (for example,
CSSE1001 A1 Reports) -
Language: the language in which the code being submitted is written (for example,
Python). This can be selected from a dropdown of options pulled from a database containing the languages which MoSS is able to process -
Max matches: this is the maximum number of people with matching code that MoSS will detect before it simply marks this code as being stock/supplied code (as opposed to collusion). By default, this is set to
10. -
Max cases: there are often pieces of code which could be flagged in every single student assignment as matching another student (such as common imports). To avoid an unnecessarily high number of these matches, a maximum cases cap can be set. After this cap is reached, MoSS will stop flagging matches. By default, this is set to
200.
An example job with parameters configured to match those given above is shown below. The max matches and max cases have not explicitly been filled in, as these will default to 10 and 200 respectively within the program (as they ordinarily would when running MoSS from the command line).
Once the student submissions have been uploaded and the job parameters set, the Submit button can be pressed, and the job will be sent off to the MoSS servers for processing.
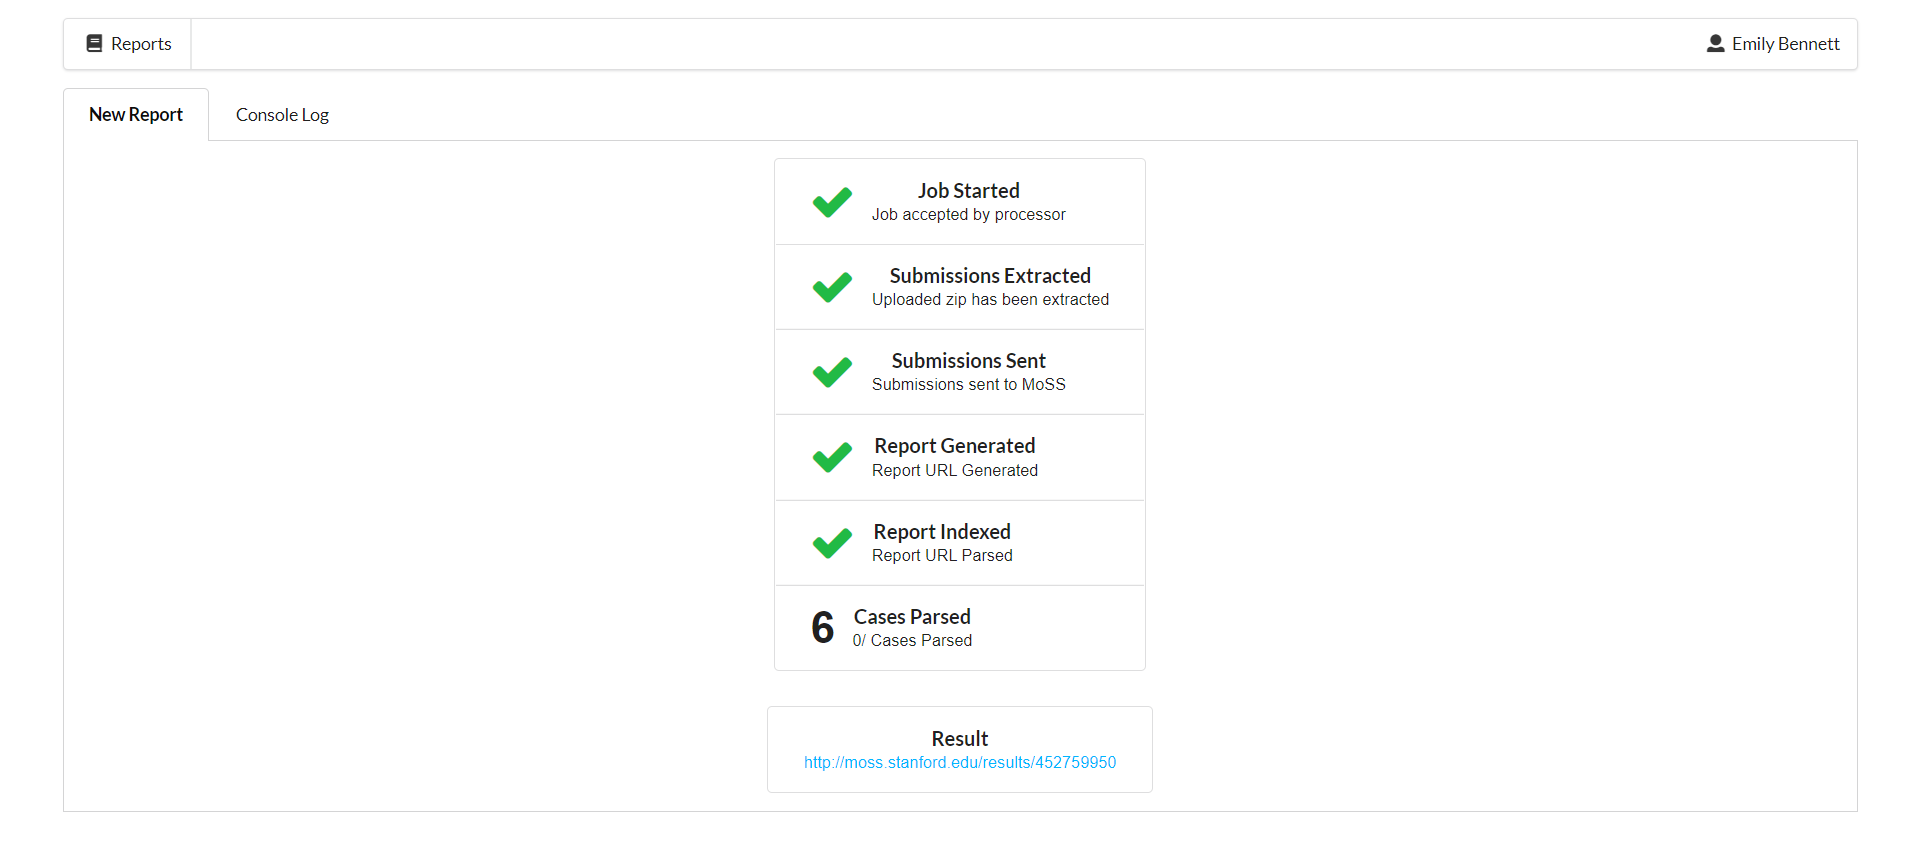
Whilst processing, a checklist of sorts will appear in the main screen to keep the user informed of progress being made. Typically, the XYZ step will take the longest, as this relies on MoSS' processing times.
Once this step has completed, a link to the generated MoSS report will appear on the page. This is just the ordinary MoSS report which would be generated when running the from a command line, prior to any processing on Investigate's end.
Running this job will often take some time, as everything must be sent off to external servers, and then processed there, before being sent back. To keep up to date with the progress of the job, a Console Log tab was added.
This tab is updated with the progress of the job as it is sent to MoSS and processed, and will inform the user of any errors that occur during processing. It will also inform the user when the job is done.
Investigate also generates its own content from the generated MoSS reports. To view this, the user can click the Reports button in the top lefthand corner of the window, and select the List option (similar to the process followed to create a new report).
Following these steps should cause a list of previously run jobs to appear. In this case, we can see that the CSSE1001 A1 job we ran previously is present in our list.
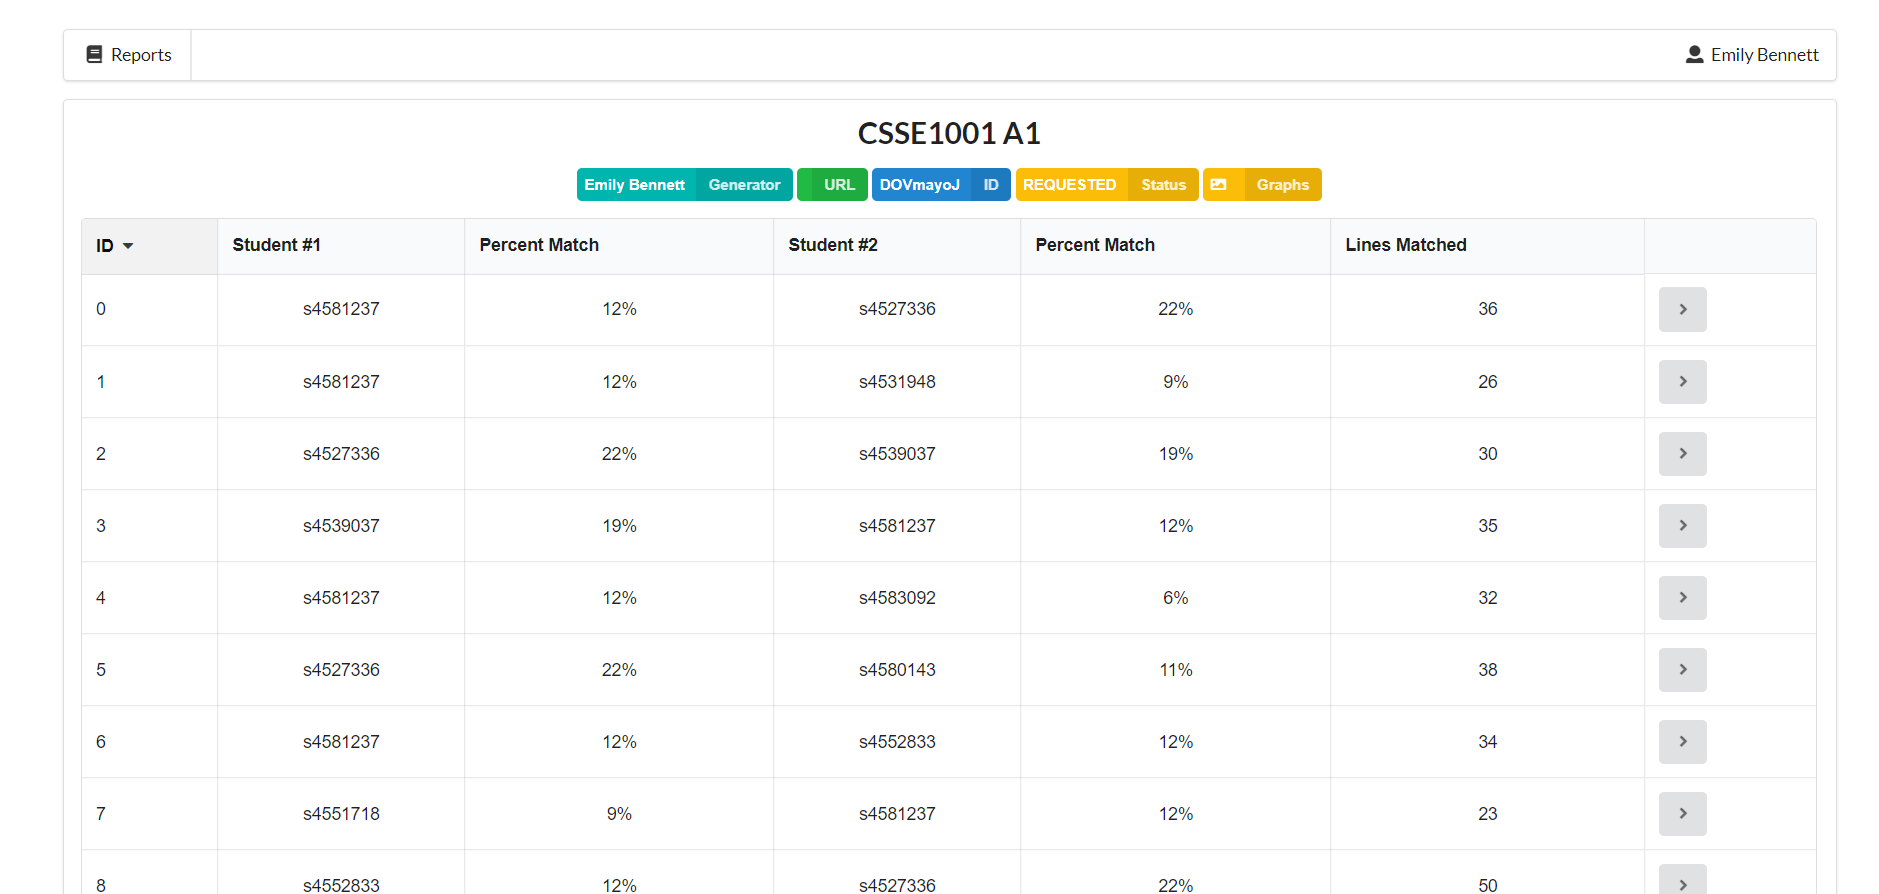
To view the generated content for this report, simply click the small arrow near the righthand side of the relevant entry. Clicking this button should yield a screen laid out similarly to the one below:
Various data about the report is shown along the top of this page (underneath the report name), including the name of the person who generated it. Also in this bar is a Graphs button. This will lead to a separate page where the user can view graphs generated by the Mossum tool. These graphs visualise similarity between different students' code.
Each entry in this page can be clicked on to view the code similarities between two students, in a similar fashion to the traditional MoSS interface. The benefit of Investigate is that these generated results are permanently stored, instead of disappearing after a number of days.


